

Fiber Art DOTW - Week 3
This post was last edited/updated (checked really) in March 2021.
If you’re new to this series, please read this post first.
This week I’d noticed something that I’d neglected before starting the fiber art days-of-the-week thing, and it got to the point where I needed to stop and deal with it before anything else continued. So, a temporary pause to the specific daily thing this week - though I still got plenty of making done, including keeping up with my weekly TAST challenge - all of which I’m going to share with you. First, the studio.
Now, I’ll be the first to admit that I am NOT the tidiest person in the world when I’m working. As much as I enjoy walking into this amazingly clean space that looks like it came fresh out of a magazine, fresh coffee in hand, ready to sit down to work, the reality was starting to look more like Francis Bacon’s studio.
The mess was getting out of hand. Really out of hand. I don’t work in there as much as I’d like to, since my son isn’t allowed in there, and he will sometimes stand at the gate and protest. While there are some things I need to do in there, it’s mostly a storage for my tools/supplies these days, and I work at my desk. I had rearranged it some (you know how rearranging things always make a bit of a mess), and I’d never got around to finishing putting things away. Also, my 6-year old moved in and took over the space, contributing to the mess. It was not totally her fault - she was seriously lacking some personal storage for her stuff.
Sunday I walked in to work on a project idea and I could not get to anything. Insert record scratching stopping sound.
I needed to get a handle on this, STAT.
My studio looks a bit different than it did when I wrote this post. The first time I rearranged it, I moved the piano to the family room after selling the big play kitchen set we had in there. The easel in the original post was also sold (I do have a big easel in the basement if we ever need one). I brought in a little kid-sized table that my grandfather had made for me so my daughter could use the sewing machine and reach the foot pedal. The big cube unit was pushed into the corner where the piano was, and the narrow cube unit got flipped on its side, becoming my new dye station. I also needed to bring my antique trunk in that used to sit in the foyer, which housed all my fabric. Still, we didn’t have enough storage.
This week, I took the drawer unit out that was up against the window before, and brought in some old plastic milk-crate type shelves that I had since college that I was using in the shed. Also, there was a dresser upstairs in the hall which I’d used for keeping some of my craft stuff, so I brought that down.
I didn’t take any photos of the mess. Not that I didn’t think to, but I’m not about to air all my dirty studio publicly like that. I literally spent all week chipping away at this, bit by bit, finally finishing up Friday. This is where it stands now. This isn’t going to look like your average drool-worthy interior decorating post. It’s my space, it’s cozy, and it works for me (well, us, mother and daughter). No pretending here. Also, I’m a thrifty gal, lol - I spent $0 on this rearrangement.
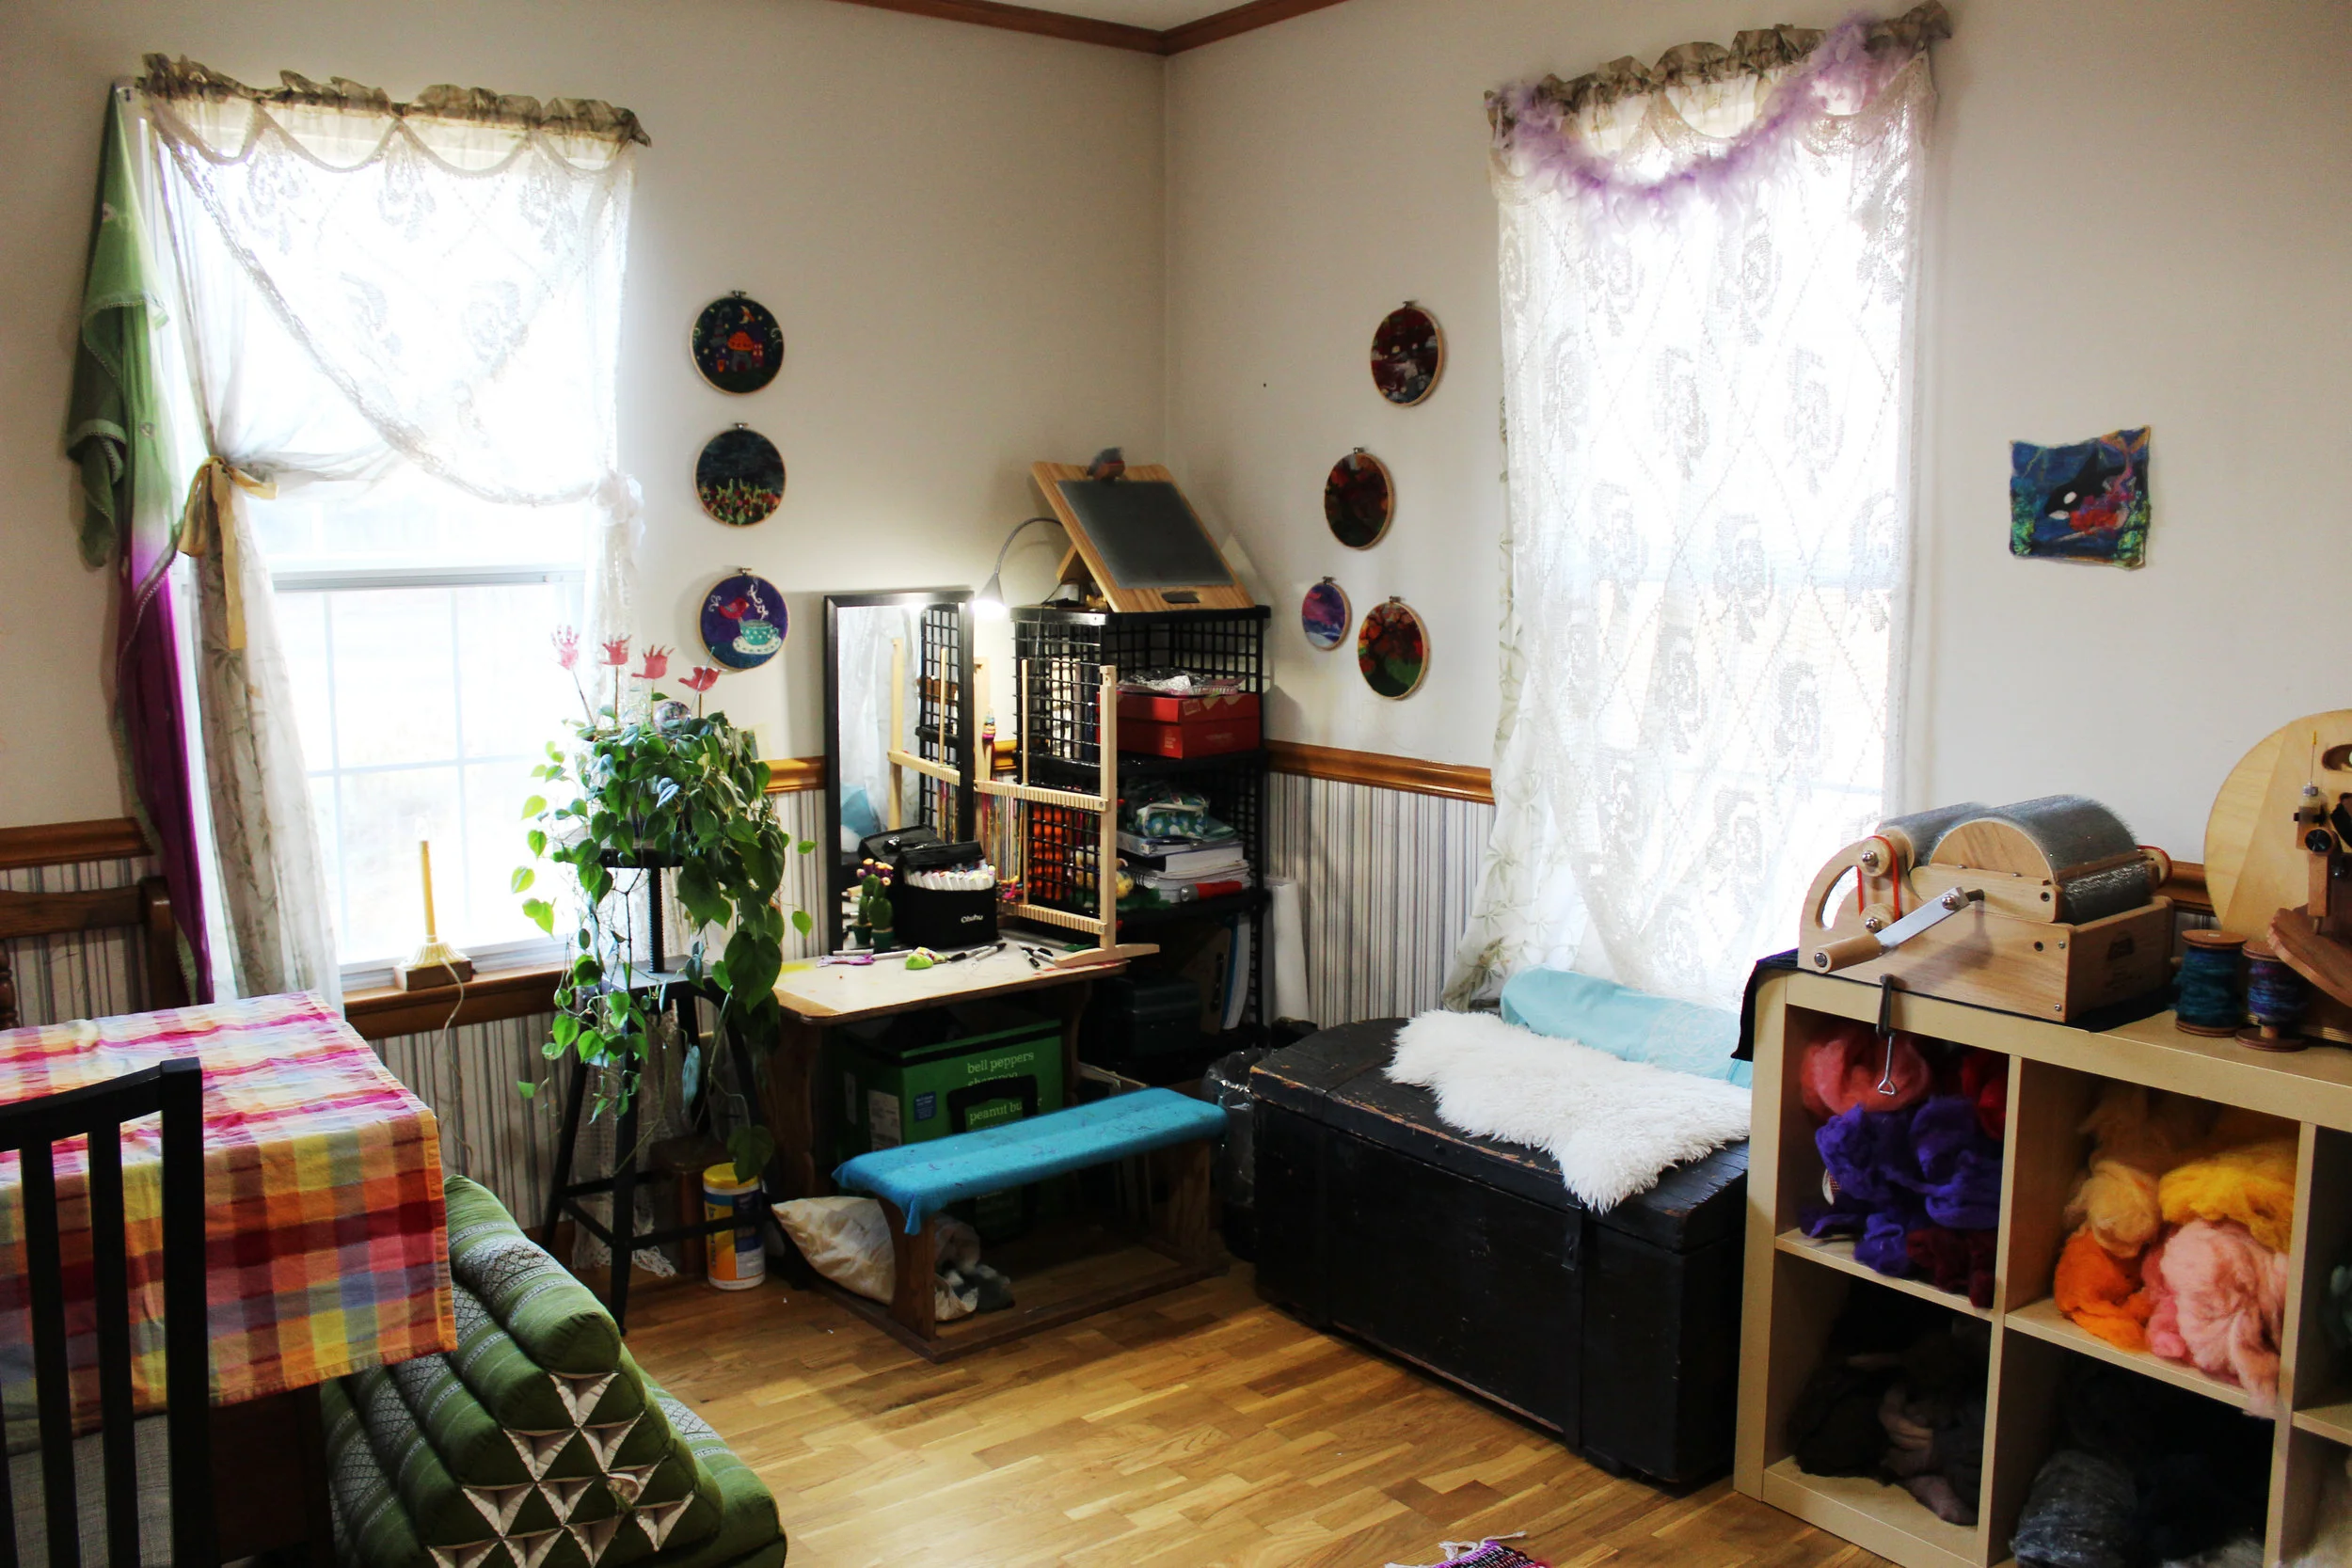
That’s my daughter’s corner. She still gets messy (I tidied up some before taking the photo), but I think it’s much easier to keep it in check now especially for her. Side note: those little discount alcohol markers she got for her birthday are actually pretty decent quality - I think the brand is Ohuhu? The little pink hands in the plant are my daughter’s hand prints and were part of a gift for my 2nd mother’s day. That little table is one my grandfather built for me, and now it’s her workspace. Nothing fancy, and held together with L brackets, but it’s the perfect size for a child.
The old trunk under the window stores bolts of fabric as well as my studio lighting for photos. It has a curved top but still functions as a bench. As massive and heavy as it is, I love it - solid wood throughout, with iron bands and one latch.
I moved the carder off the table and to my shelf thus freeing up more table space. I think it’s better suited there, and is still usable the way it’s set up. There’s also room on top of the shelf to store my spinning wheel and my dye station.

Here’s my little table, which is actually pretty cool because it can also convert into a bench and has storage underneath (where I store most of my embroidery hoops). The bench that matches it perfectly was picked up at a thrift store for $20 (have I mentioned how much I love thrift stores yet?). The basket against the wall holds clothing that I plan to either repair or upcycle on sewing Sundays. The picnic basket by the bench has my felting foams/bases. The kapok-filled triangle fold-out cushion is one of my favorite purchases of that nature, but it’s eventually going to move to the office as a floor seat next to the Lego table. For now, it’s in here for repairs, because my kids really love that cushion and have been quite rough on it, causing a few seams to burst.
I’m not sure if you can see the scribbles on the wall behind the bench, but that’s one of the several reasons my 3 year old isn’t allowed in there currently. I’m not worried about cleaning up the walls, because at some point the plan is to take the old wallpaper and chair rails down and repaint the whole thing. The other reasons include his constantly pulling all the wool off my shelves and all over the floor, and sharp pointy objects. There’s also the issue of my daughter’s obsession with alcohol markers (and keeping them out of his reach), and in general her need for a space to create where she doesn’t need to worry about him getting in her stuff. In a year or two hopefully I’ll be able to open the room up to him too (though I don’t have room for any more tables so they’ll have to learn to share or something).
Isn’t that table cloth adorable?! It’s so cheerful. I picked it up at a thrift store years ago, and it always makes me happy.

And here’s my storage - cluttered but organized. The walls are quite bare and need to be covered with more art. I also want to get some hooks to hang my loom on the wall.
The top of the shelf in the nook has my locks (dyed and undyed) in the two bins, and fancy fibers as I call them (merino and such) in the jars. The rainbow art bin used to be under my desk in the office, but needs to be here for now because my son kept getting into it (again, markers, sharp pointy objects, that sort of thing). That’s kind-of how this room got cluttered in the first place. My son would get into stuff, and I’d need to put it somewhere safe. Eventually it will get rolled back to my other workspace.
Maybe I’ll find/make something pretty to hide the cubes in the wall unit. That stores felt for my wool paintings/kits (you can see the bolts), wet felting supplies, sewing machine, serger, felting machine, silks, WIPs, shipping supplies, beads, tools, more locks…
Dresser is filled with threads, ribbons, yarn, fabric scraps and squares, and has the boot tray I use for wet felting hidden underneath, plus a tabletop drafting board.
On the floor is my meditation cushion, as well as a rag rug I found at 5-below, under which is my giant cutting mat.
So that’s pretty much it. Nothing fancy, maybe a bit cluttered, but tidy.
My ideal fiber studio would include haberdashery cabinets instead of the cube ones, or antique/vintage cabinets with full glass doors, maybe an antique/vintage couch, and room for my antique drafting table (the kind with cast-iron parts) given to me by a friend, which my husband lovingly sanded, stained and refinished for me, but is currently put away upstairs until we have room for that instead of kiddie furniture. Someday, right?
OK, onto what I made this week, not organized in any particular order. (Next week we’ll be back in the swing of things, business as usual.)
needle felting
I wanted to get a jump start on needle felting the outer-space item for this month’s exchange so I can get it in the mail, since this month it needs to make the long trip to the UK. By jump start, I mean I actually got it done start to finish. I filmed it too, so that will go up on my youtube channel once the recipient gets her exchange item. I can’t show you a picture of it, but I am pretty proud of how it turned out - it’s a wool painting this time (normally I do 3D stuff for the exchanges) of the Earth at night, focused on the UK. I really hope she likes it!
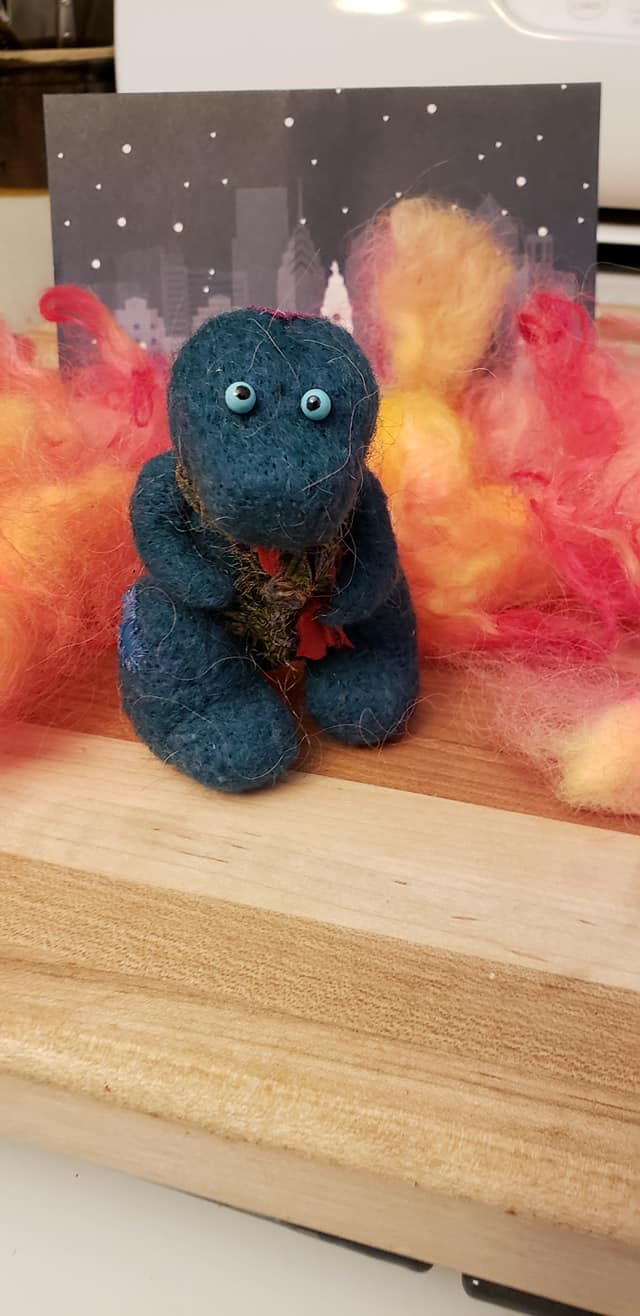
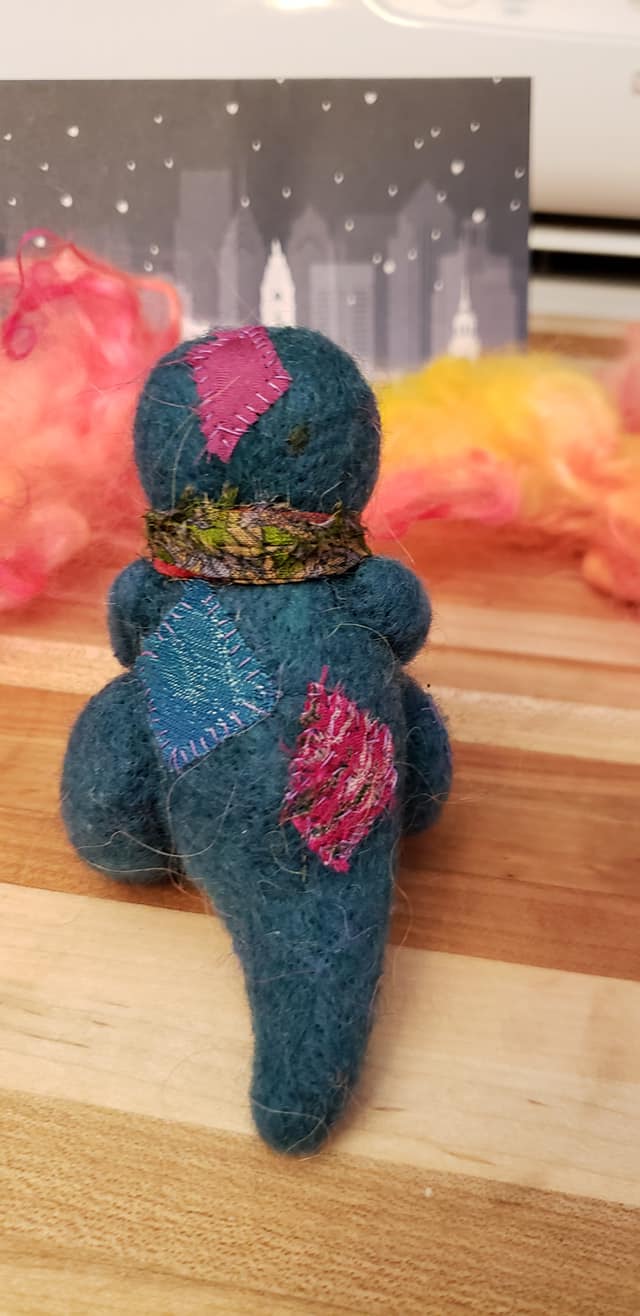
Since I can’t show you a picture of that one yet, I can show you a picture of the feltie I made for the last month’s exchange, which was “prehistoric.” Photos were taken by the recipient since I forgot to take some before sending it out. Meet Patches, the age-worn, awkward dinosaur. I love doing the exchanges because they challenge me to try something different - I feel a bit more free to experiment with different ideas with them, and in this one I wanted to try hand stitching some patches (in this case mostly from silk) on a felt item. Anyway, I sent her some of my fiery locks too as an extra goodie. Nobody’s required to send extra goodies, but if you’ve ever done any sort of craft exchanges, most people send goodies of one kind or another - it’s a bit more fun that way, and I even used some of the fiber I received from one of my previous exchanges in the one that’s going out this month.
shuttle tatting
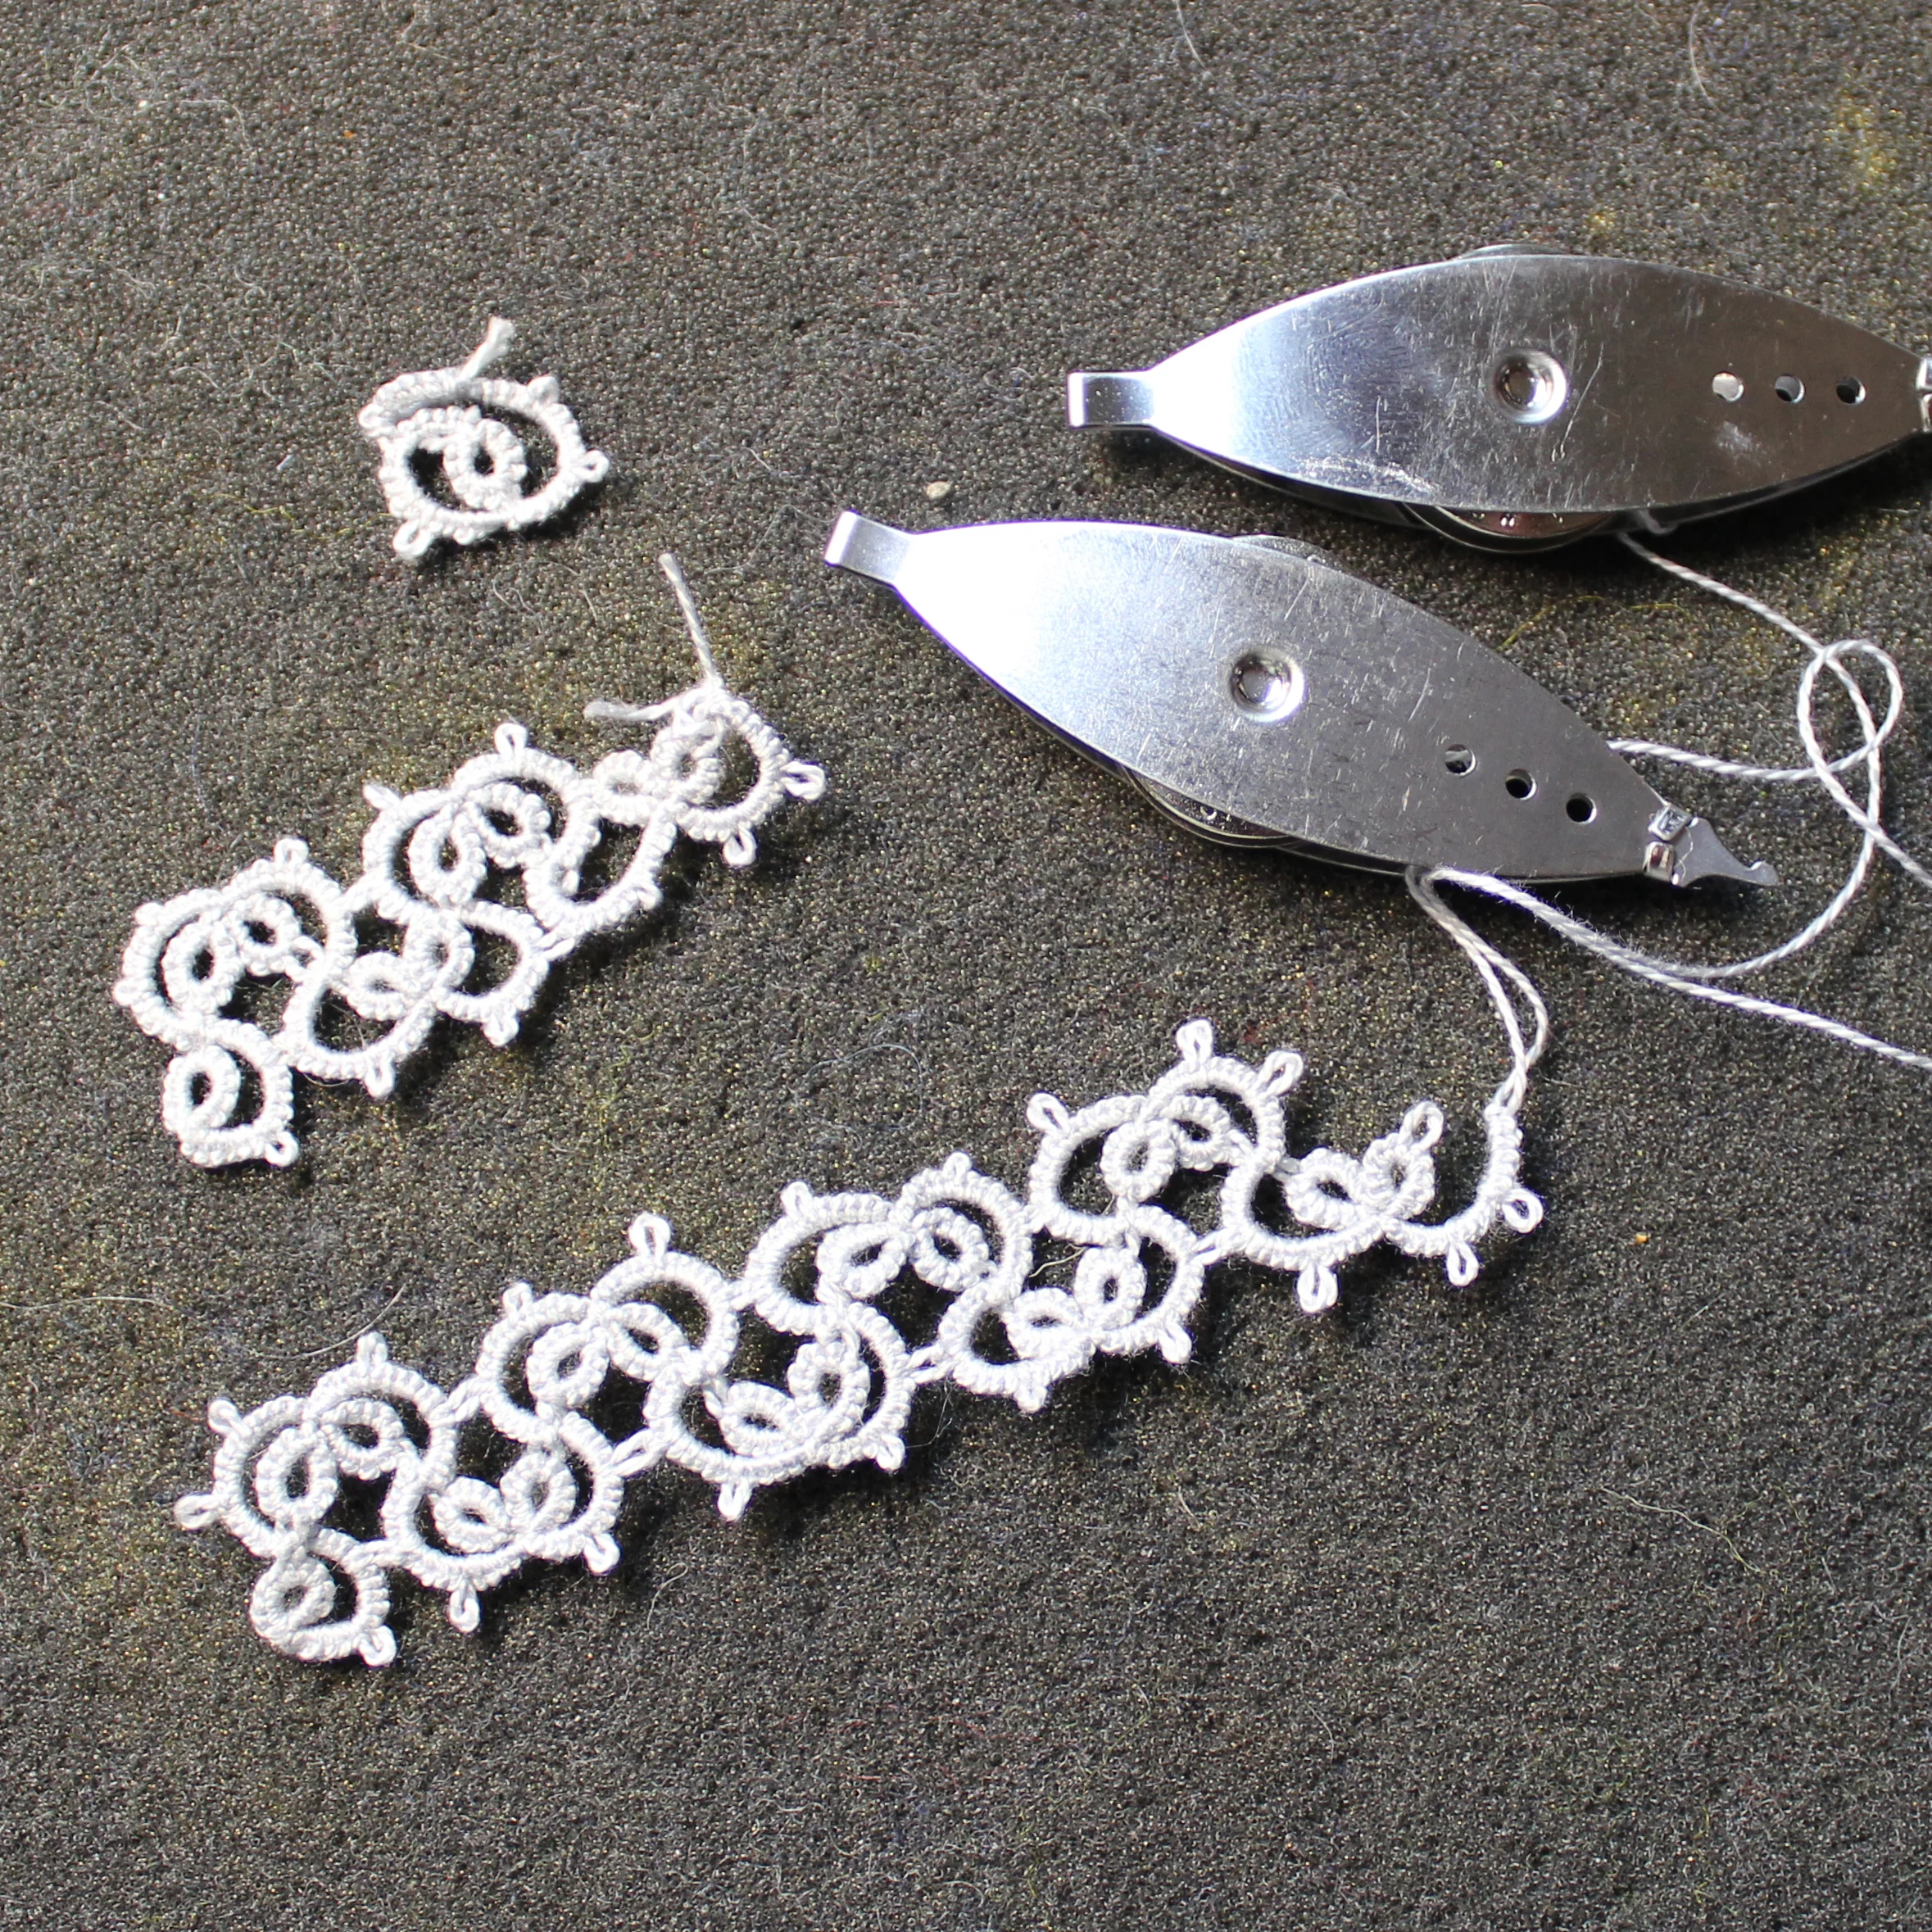
The bracelet me three tries to get it right. First failed nearly immediately. Second was going well until I attached the wring to the wrong picot, and now we’re finally getting somewhere.
This one drove me bonkers.
I did make another shuttle tatted leaf (which I didn’t take a picture of) to attach to a needle felting kit that’s on its way to the UK. Then I decided I wanted to try making a bracelet.
I’m still having difficulty reading patterns and such, but I think I’m doing better at figuring it out visually. This bracelet took me three tries before I finally knew what’s going on. Part of the problem is, I couldn’t understand anything said in the video except “6 double stitch, picot, 6 double stitch, picot.” I somehow figured out how to use two shuttles. I don’t have two different colors in this tiny size, otherwise I would’ve done two, but I wanted to make something smaller. This one is made with No 8 DMC cotton-perle.
embroidery
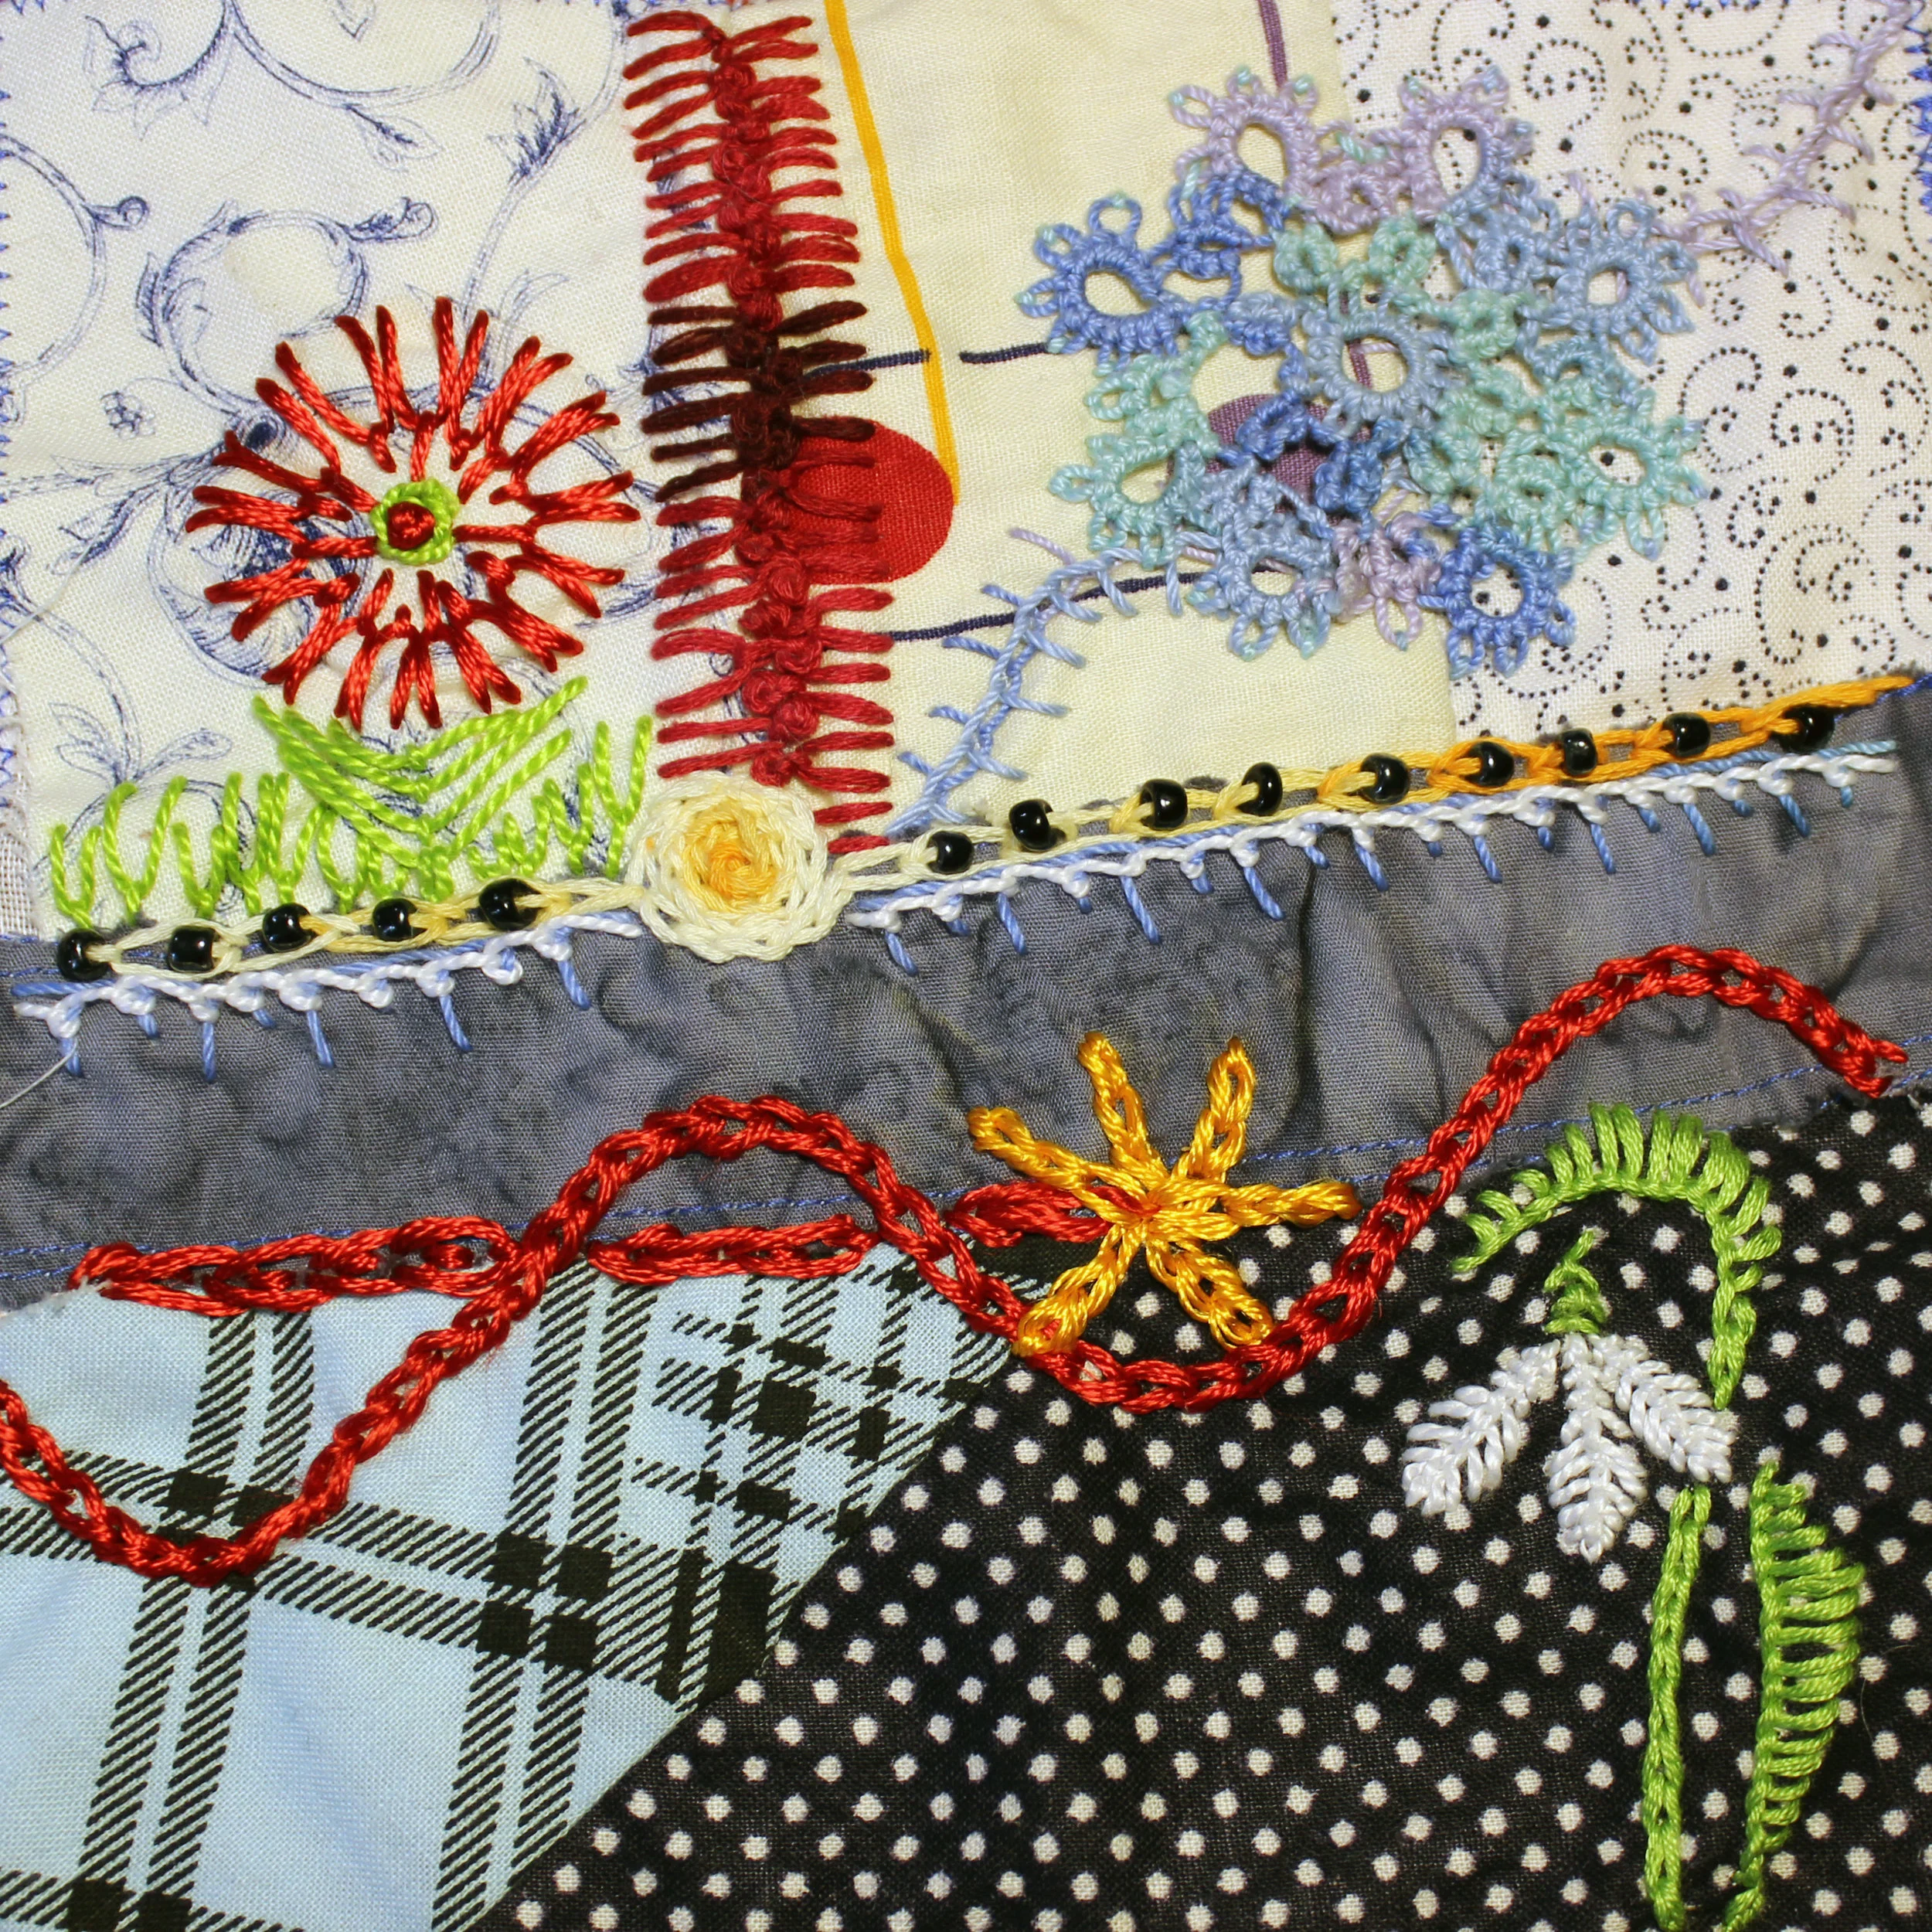
This week’s challenge stitches were the buttonhole stitch (what I think most people know as the blanket stitch) and the reversed buttonhole bar. You can see the buttonhole going in a swirl (back to back) in the top right, under the medallion. Considering the medallion is the first thing I ever made with tatting shuttles (and made this month), I wanted to add it to this block (also first ever crazy quilt I’m in the process of making). I did the reversed buttonhole bar on the blue strip in the middle, under the beaded linked chain stitch. At first I was having difficulty feeling inspired with this stitch, but then I remembered I wanted to add a snowdrop for January (bottom right) which I made using the fly stitch, and then used the buttonhole to make the leaves, and chain stitch for the stem.
It’s starting to get tight on this block, and there are two more week’s worth of challenges to go before I get started on my February square. I’m having a lot of fun with this challenge, and normally I suck at sticking to challenges.
other things I worked on…
… a blog post that will be up in a day or two on vegan needle felting. It’s something I’d been working on for several months, trying to figure out how to best present the information, and I realized that it’s better that I make it into a series of posts rather than one long one. A recent conversation in one of the needle felting groups had pushed this to the forefront, so I feel it’s necessary I get this done. There are many alternatives out there that I need to try, and of course all these things cost money, so as I get my hands on each I’ll be able to test it out and write about it. The first post will be about the materials that are easily accessible by pretty much anyone, which is why it will go out first, and then subsequent posts will be experimenting with other materials that are also available but need to be sourced.

