

The BEST Teabag Tutorial
FTC Disclosure: Please note that some of the links in this post are affiliate or referral links (full disclosure here), and if you make a purchase or sign up for a service within a certain timeframe after clicking on one of those links, I may earn a small commission paid by the retailer at no extra cost to you. I wouldn't recommend anything that I don’t or wouldn't use myself. Thank you for your support!
This post was last edited/updated in March 2021.
I know it’s a bit of a tall order for me to claim this is THE BEST DIY teabag, but hear me out.
First, I’ll explain why I wanted to make this tea bag. I absolutely love tea, but I don’t really need a reusable teabag because I have my Breville tea maker (still going strong 7 years later). It works well for my ADHD brain. You see, before I got this amazing tool that will forever have a place on my kitchen counter, tea making looked a bit like this:
Set water to boil (electric kettle of course) and step away
Forget I boiled water until about 30 minutes later
Set it to boil again.
If I’m lucky I’ll move to the next step, otherwise rinse and repeat
Steep tea bag
Get distracted again
Remove tea bag and end up with very bitter tea
Note: my mom loves to create this extra-strong-super-steeped-tea-bags-still-sitting-in-there-pot of tea which she calls esencja (Polish for the word essence), and it sits in this pot for a few days as she pours it off and dilutes it with hot water. Not my cup of tea (pun intended). I prefer mine to be fresh, and with less tannins.
Now that I have this fancy pot that boils the water to the appropriate temperature, dunks the tea bags for me for the appropriate amount of time, removes them from the water when it is done, and keeps the tea hot and ready for me, the old-fashioned way of attempting to make tea is pretty much a pastime.
So why on earth would I need a teabag?
There is another tea that I drink that does require an extremely long steep time, so long that it goes beyond the capabilities of my tea maker, and we make in huge batches: chaga tea (did you know herbalism is one of my other side passions? I’m full of surprises). For this, we use the slow cooker that stays on low pretty much permanently, gets topped off each night, and the chunks get replaced as needed when the tea starts getting weak. The proper way to make chaga tea is to cook it over a period of at minimum 3-4 hours to release the most beneficial properties (after which, the chunks can be reserved and ground down to sit in a very strong grain alcohol to break down the chitin and create a tincture). As a family of four, we go through about a pound of chaga per “sick” season (so about mid-fall to mid-spring). You don’t need more than that. 5 chunks will make a nice, black tea and easily last a week before needing to be replaced. Although it is a mushroom, it does not taste savory like the mushrooms with which you cook - it’s rather sweet, like molasses. Even my husband, who hates mushrooms, loves this stuff and drinks it daily. If you’re interested in reading about the beneficial properties of chaga, click here to find out more.
A quick side note: please do NOT buy chaga from mass market companies. These beautiful mushrooms take years, even decades to grow, and cannot be mass produced in a lab. I simply cannot trust mass market companies to harvest them responsibly. I personally like to buy mine off of ebay from individual sellers who pick their own while foraging in the woods and do not collect nearly enough to do much damage. Not only that, but the instructions provided by these mass market companies generally do not explain how to properly steep the tea, so you end up going through more. Chaga coffee anyone? No, it simply won’t work. Also, there is absolutely no reason to swallow this in a pill, as it needs heat or a very strong alcohol over a long period of time to extract the components, so you can avoid that as well. There are a few family owned businesses who know how to harvest responsibly - I recommend doing your research first.
Anyway, back to my teabag dilemma. I’m running low on chunks (I’d given quite a few away to family), and it’s only the beginning of February, so we still have a ways to go. I do, however, still have a jar of ground chaga powder that I can use. Unfortunately, the powder needs to be contained somehow, as opposed to the chunks which can happily bob around and easily be omitted when ladling out the tea. Hence the teabag. I can’t use metal tea strainers, because the holes are far too big and would allow the chaga powder to escape.
Not to mention, I enjoy slow stitching. And then there’s the whole sustainability thing - I generally tend to buy loose leaf teas, but I would also occasionally buy tea bags (since some teas I love are not available loose for some reason). Especially pyramid shaped ones, until I learned that many of the pyramid bags are made from nylon (the ones that are silky to the touch) which we know isn’t biodegradable. So I figured I needed this thing, and maybe some of you have been needing this thing too, especially if you’re trying to dip your toes into the slow-and-sustainable lifestyle. So now you too can work up a few of these tea bags, buy loose leaf teas, and then enjoy the beauty of it all. I mean, I may be biased (as self-critical as I may be), but hearing my daughter squeal when I made my first tea using this was quite validating. Who knows, I may even make a few more so we can all enjoy them during our poetry tea times.
Why bother with making a teabag if I could just buy one of the many ready made ones available on the market? Why redesign them? They seem simple enough, right? Here is what I don’t like about those:
Drawstrings. I don’t know about you, but I cannot get them to cinch tight enough. The tea shall escape.
The seams. Most of them have overlocked seams on the inside, so your tea or your chaga gold - which you want to hold onto - will get trapped in them. It would probably make it a bit of a pain to clean.
They’re flat. Any tea aficionado will tell you that flat teabags are a joke, you need maximum space for your tea to expand and allow water to move freely around it for the absolute best cup.
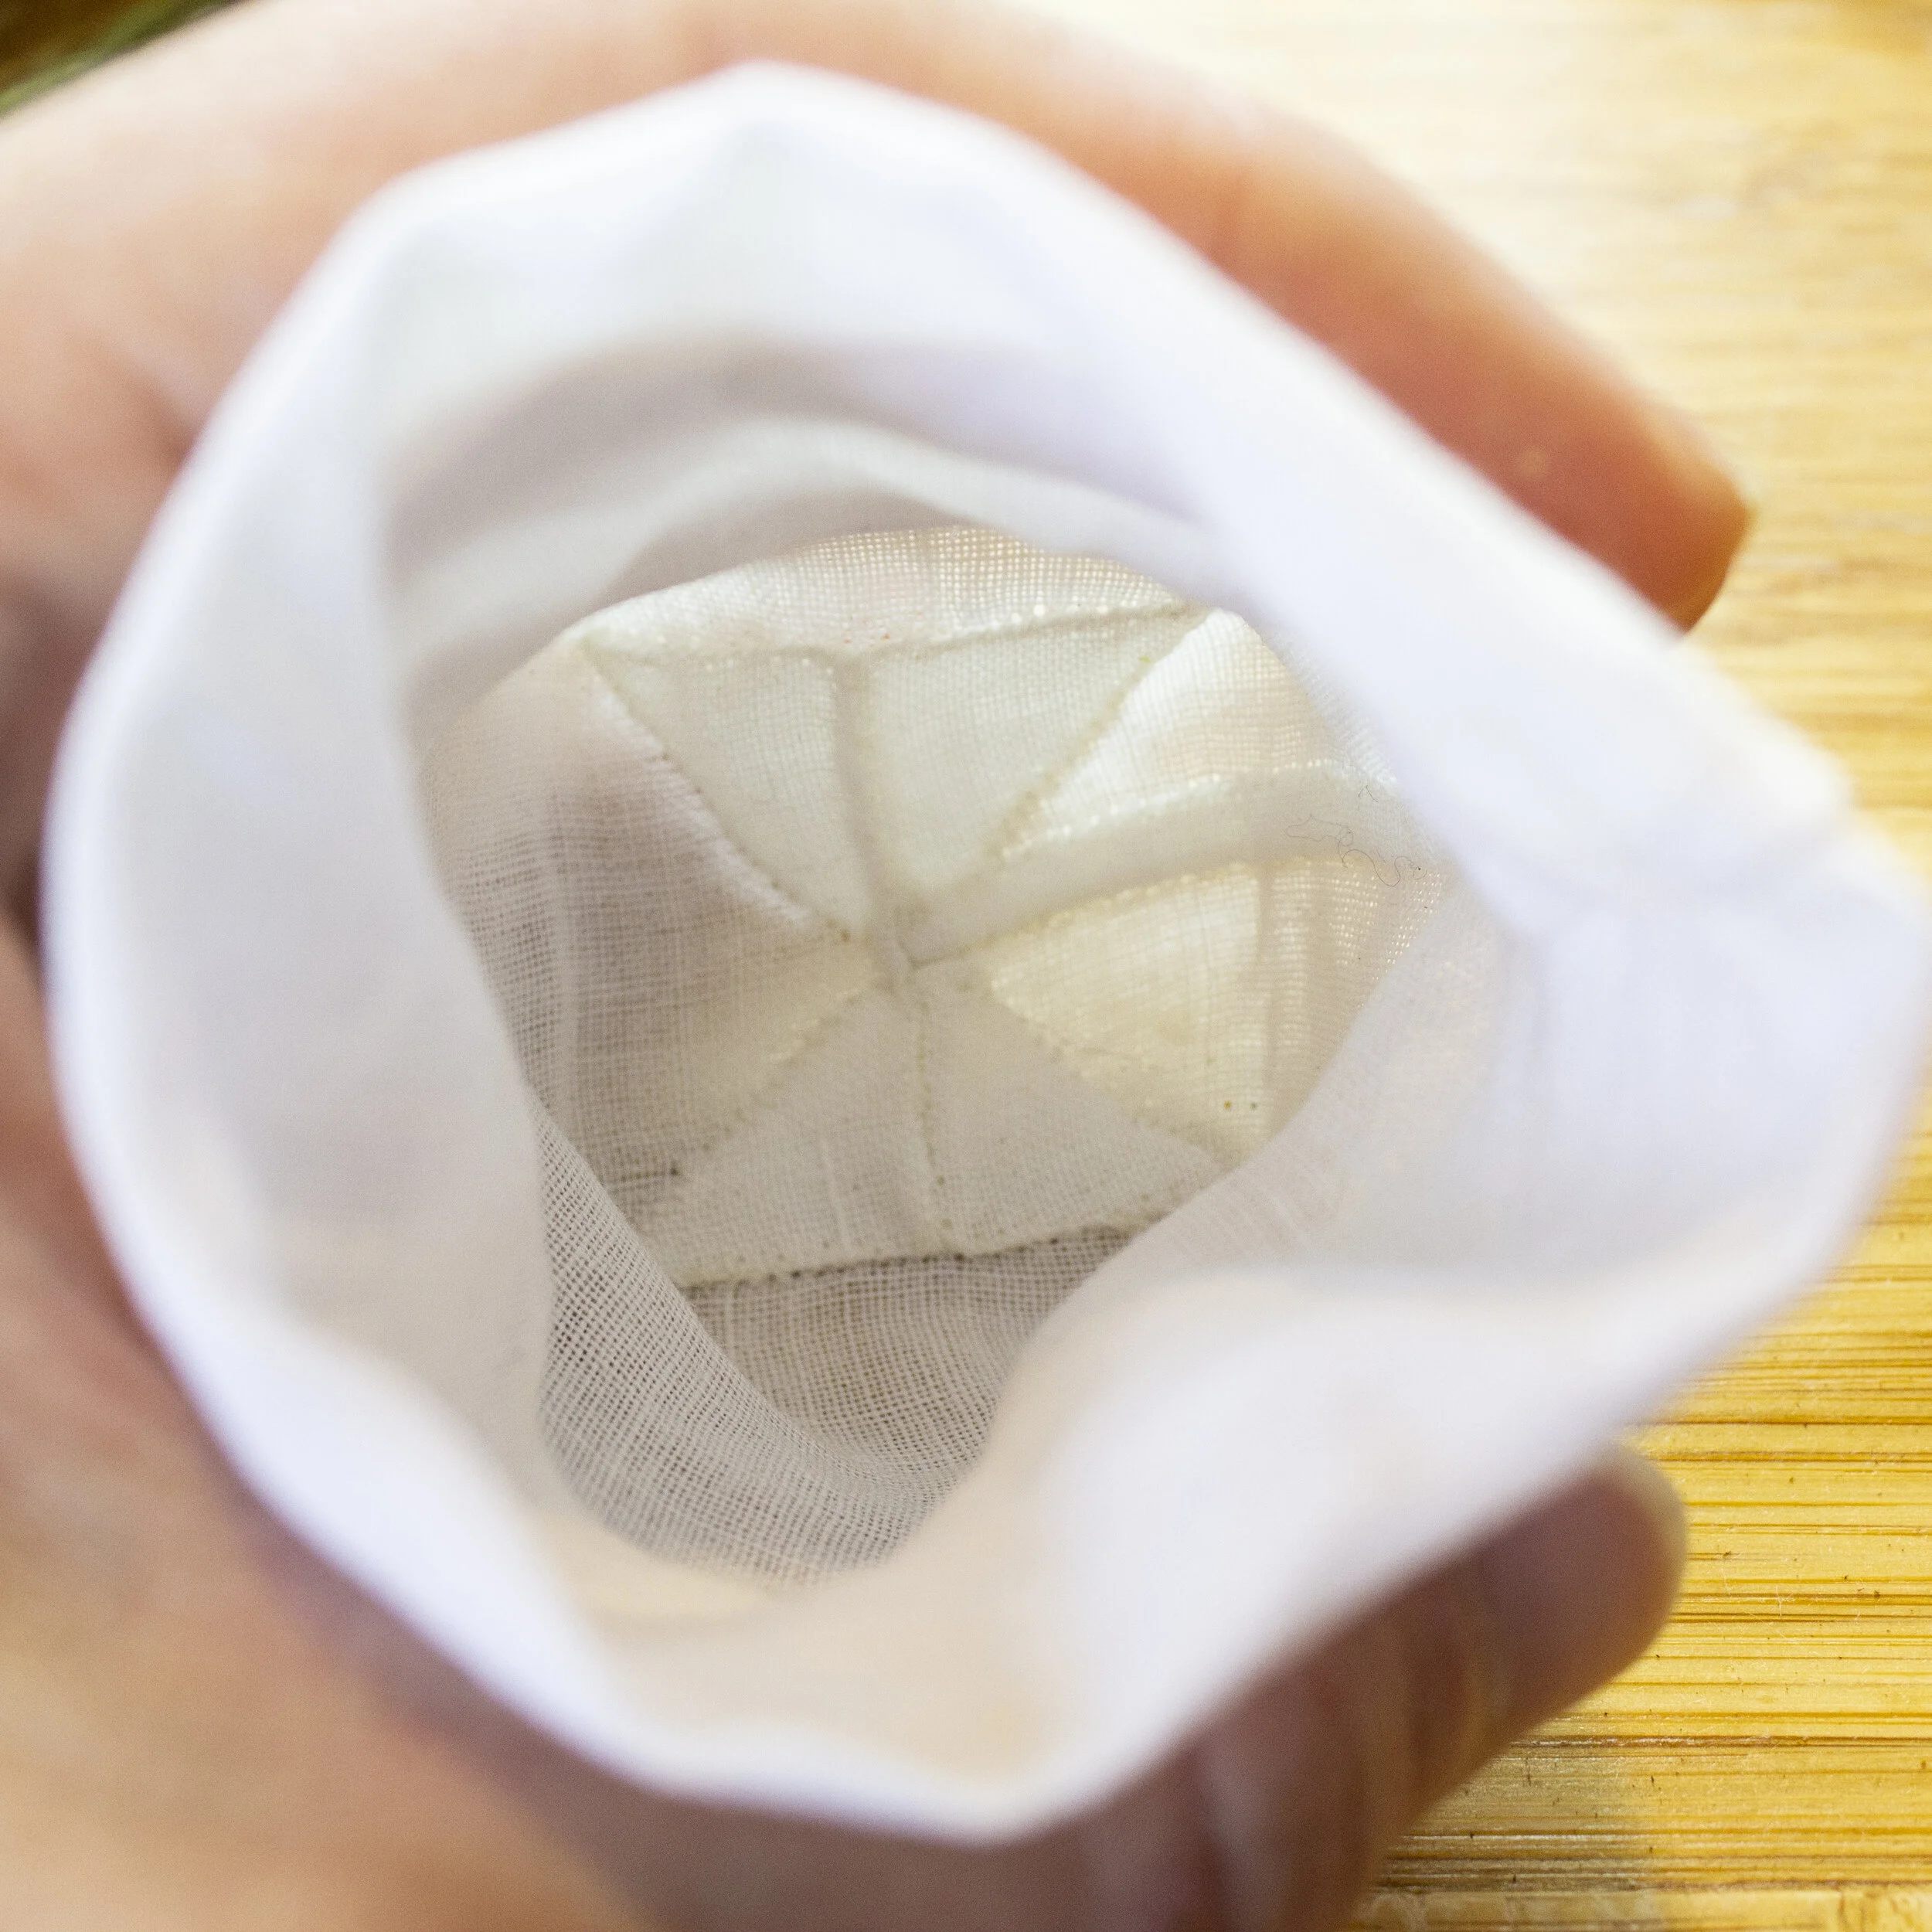
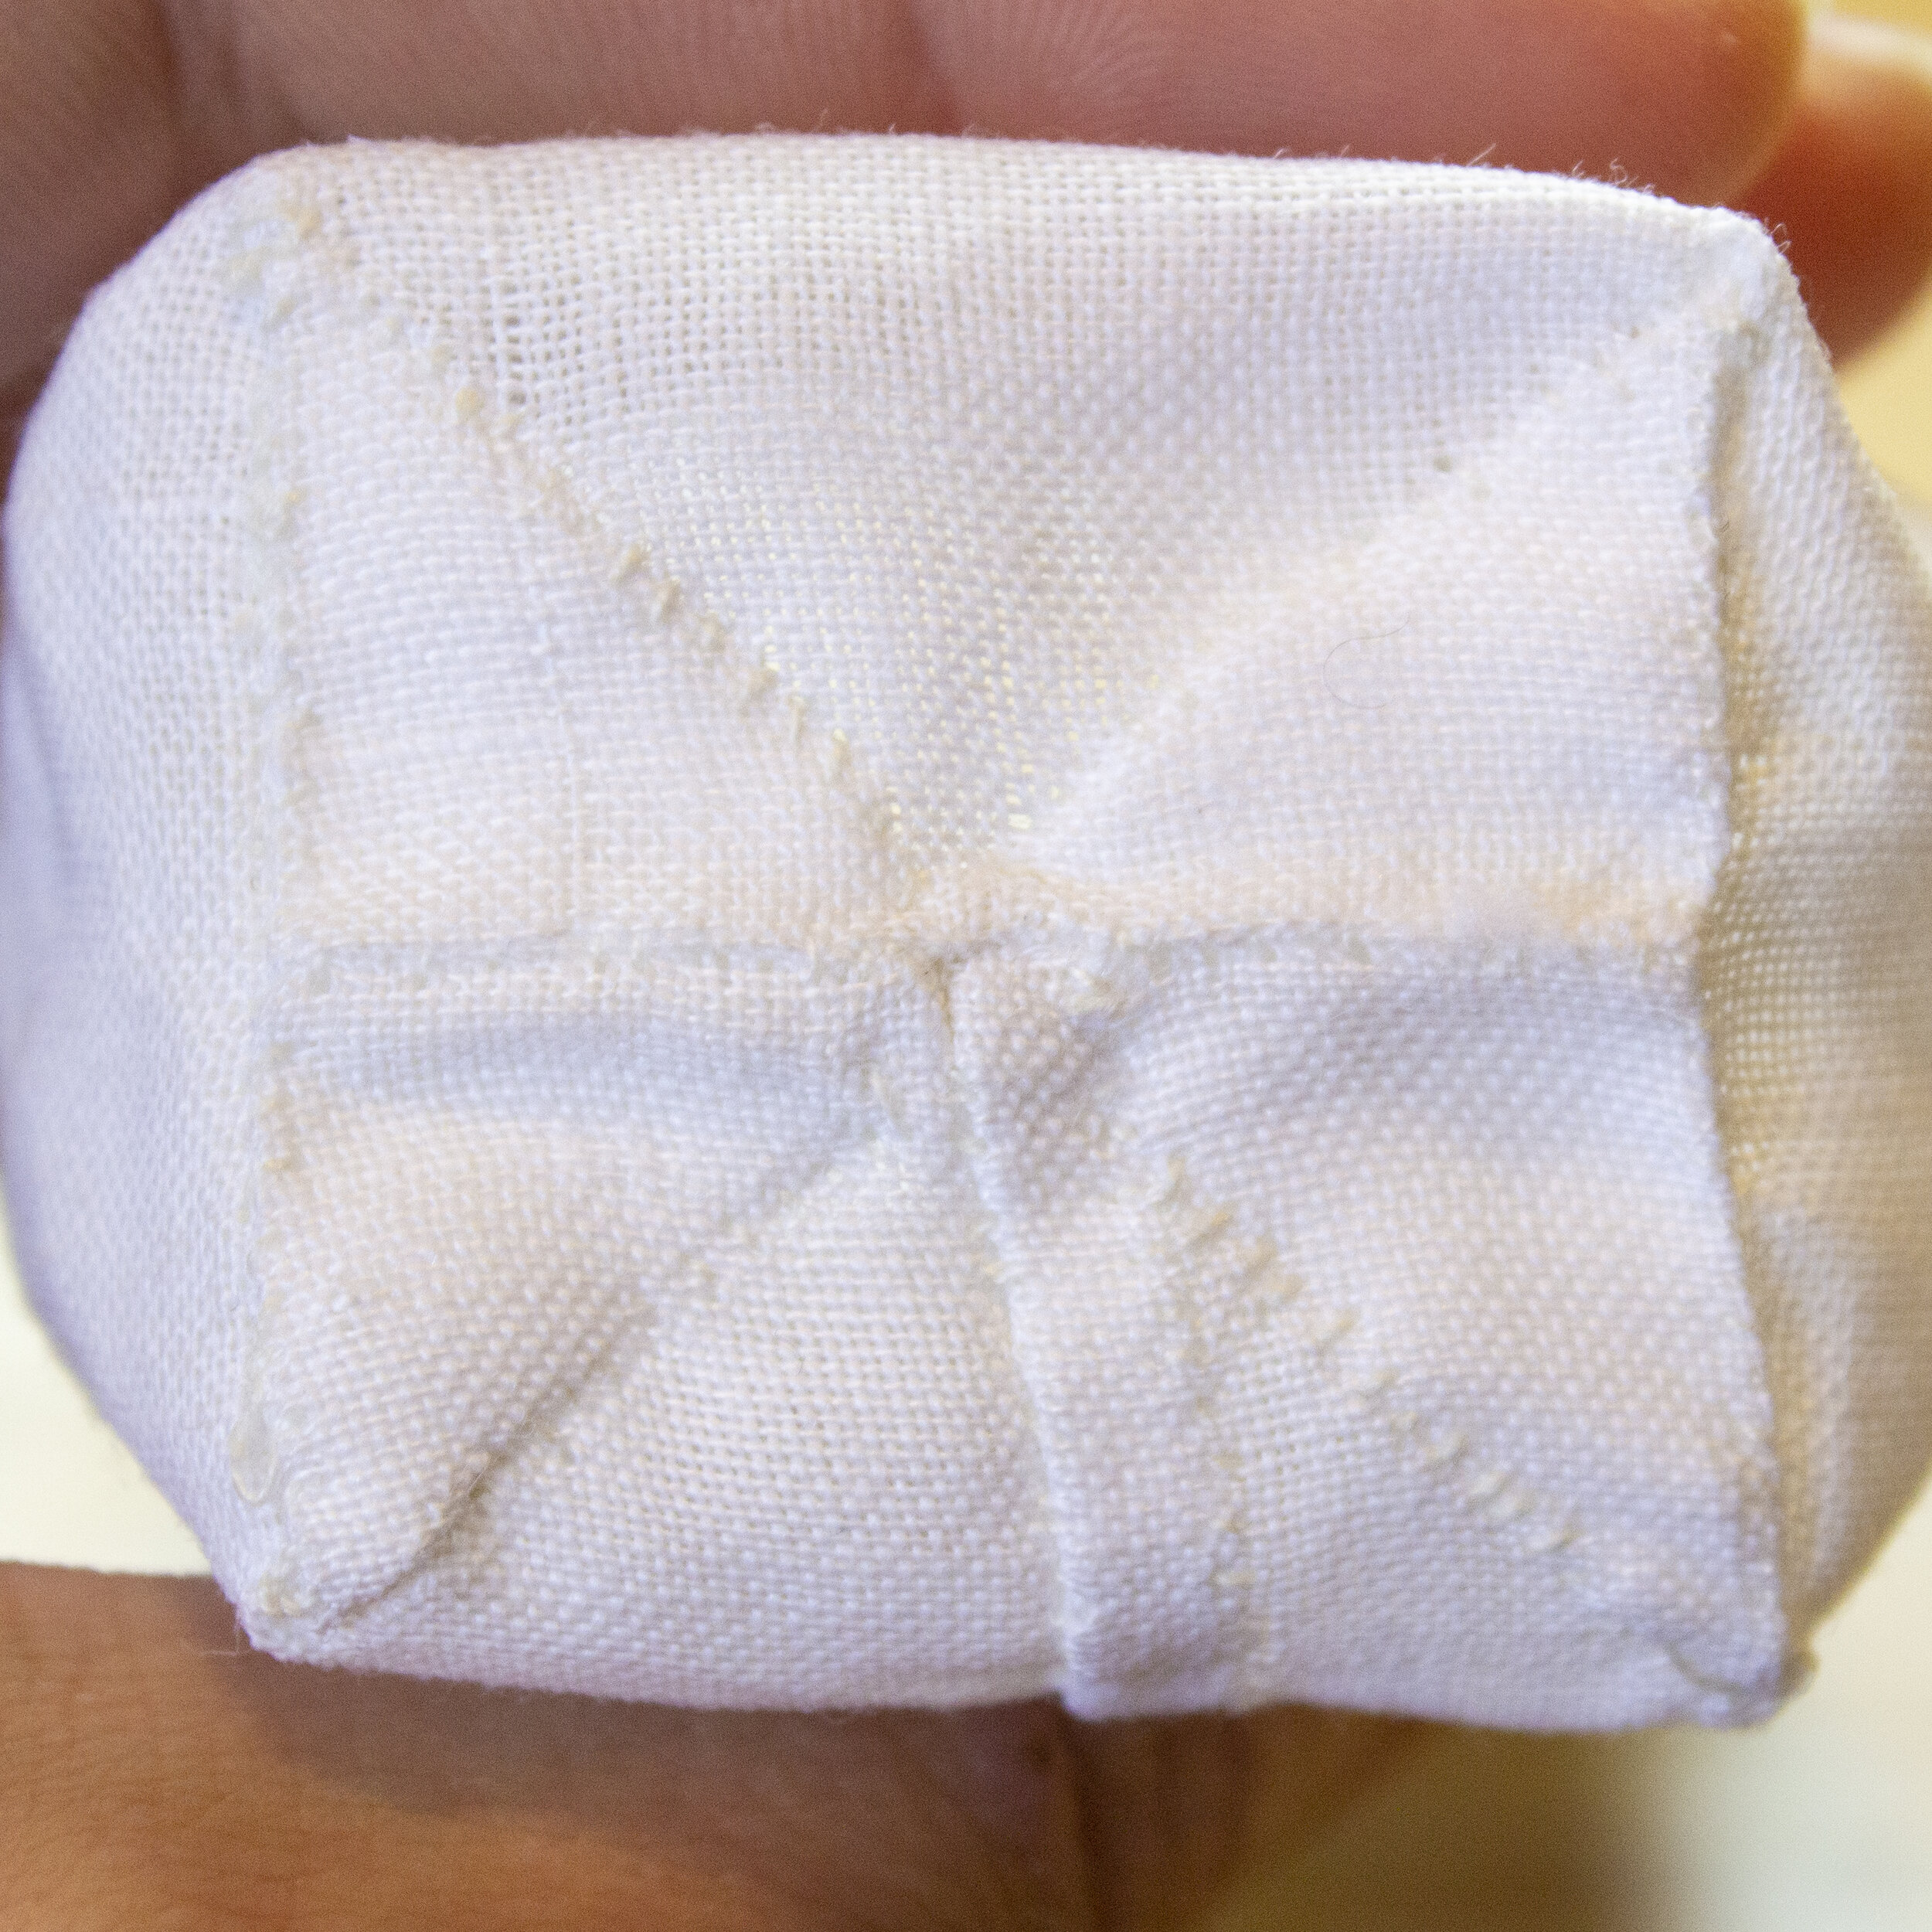
Inside the teabag - the seams are all flat! There is nowhere for tea to get trapped and stuck inside.
This new DIY teabag that I designed, and am about to share with you, has resolved all of those problems. There are no seams sticking out inside the bag (and yet it still looks really neat on the outside). The square bottom guarantees that there is plenty of room for the tea to float and expand without constraints. I also have a number of variations available for you to modify it based on how you want to use yours:
Fold down the top after filling and hand stitch it closed
Add loops to hang off of a skewer, branch, pencil, dowel, whatever you have on hand that can straddle the top of your mug.
Leave it open, without a stick, but attach a string that you can tie to the cup handle so it doesn’t fall into the cup.
Button and string enclosure so you can tie it closed temporarily without needing to have a needle and thread on hand.
The button was a momentary issue. I didn’t want to use any plastic buttons - after all, I’m not a fan of plastic in general, let alone mixing with my foods, especially in a very hot environment which can cause it to melt and leech chemicals. Metal buttons have the same issue - unless you know the metal is food grade, which is highly unlikely since nobody ever uses buttons on anything food related except for weirdos like me. Some metals you really do not want to ingest. I considered looking at glass and initially found two possibilities. First there are crystal glass buttons (which are beautiful), except the ones I found are made with K9 glass, a Chinese borosilicate glass that does contain some lead, and we now know that ingesting lead is a very bad idea. The second were some Czech pressed glass button beads, which are not leaded, but I’m not sure how they get the colors. Are they bonded on the outside? Would that come off and end up in my tea? I considered wood, except boiling wood dries it out very quickly and would make it brittle, especially on something so tiny as a button. It would likely need to be replaced frequently. And then, you’d want to opt for an unfinished natural wood button, because you don’t know what sort of coating or stains they put on the finished ones.
Then, I remembered something. WOOL FELT! How easy is that? It can withstand the temps - if anything it would simply felt down more. The wool you buy for felting is already clean and scoured. If there happens to be minuscule amounts of lanolin left on it, it’s not toxic - after all, that’s why nipple balms for nursing mothers are lanolin. You can rub it on the chapped nips, and babies can nurse safely. (And these days, we even use it overnight on chapped lips and noses.) If babies can suckle on it, a tiny bit in my tea won’t hurt me. If you’re vegan, I’m sorry I don’t have a button solution for you. You could try the wooden button thing and see how that holds up. I was pretty close to using that myself. Otherwise use one of the other variants.
The teabag I designed is quite tall, taller than any tea cups or mugs that I own - the initial purpose was to make one long enough to easily fill with a large amount of tea and still have room to fold the end down and stitch it closed. If you choose to use any of the other methods, you can always make it shorter to fit your needs or fold it over the way I do when I show you how to add the hanging loops so, if need be, I can cut the loops off and still have the length to fill with more tea.
This tea bag is entirely hand stitched, and due to the size, I’m not quite sure how you’d make one on a machine with all enclosed seams. If you absolutely can’t stand hand stitching, you can try using a machine - if you do, please feel free to share how you did it and even post a video or tutorial using a machine (linking back to this post would be much appreciated). If you need some assistance in learning the stitches I used, I recommend watching this video, which will teach you both the back stitch and the felling stitch used to enclose all the seams on my teabag design.
how to make the tea bag
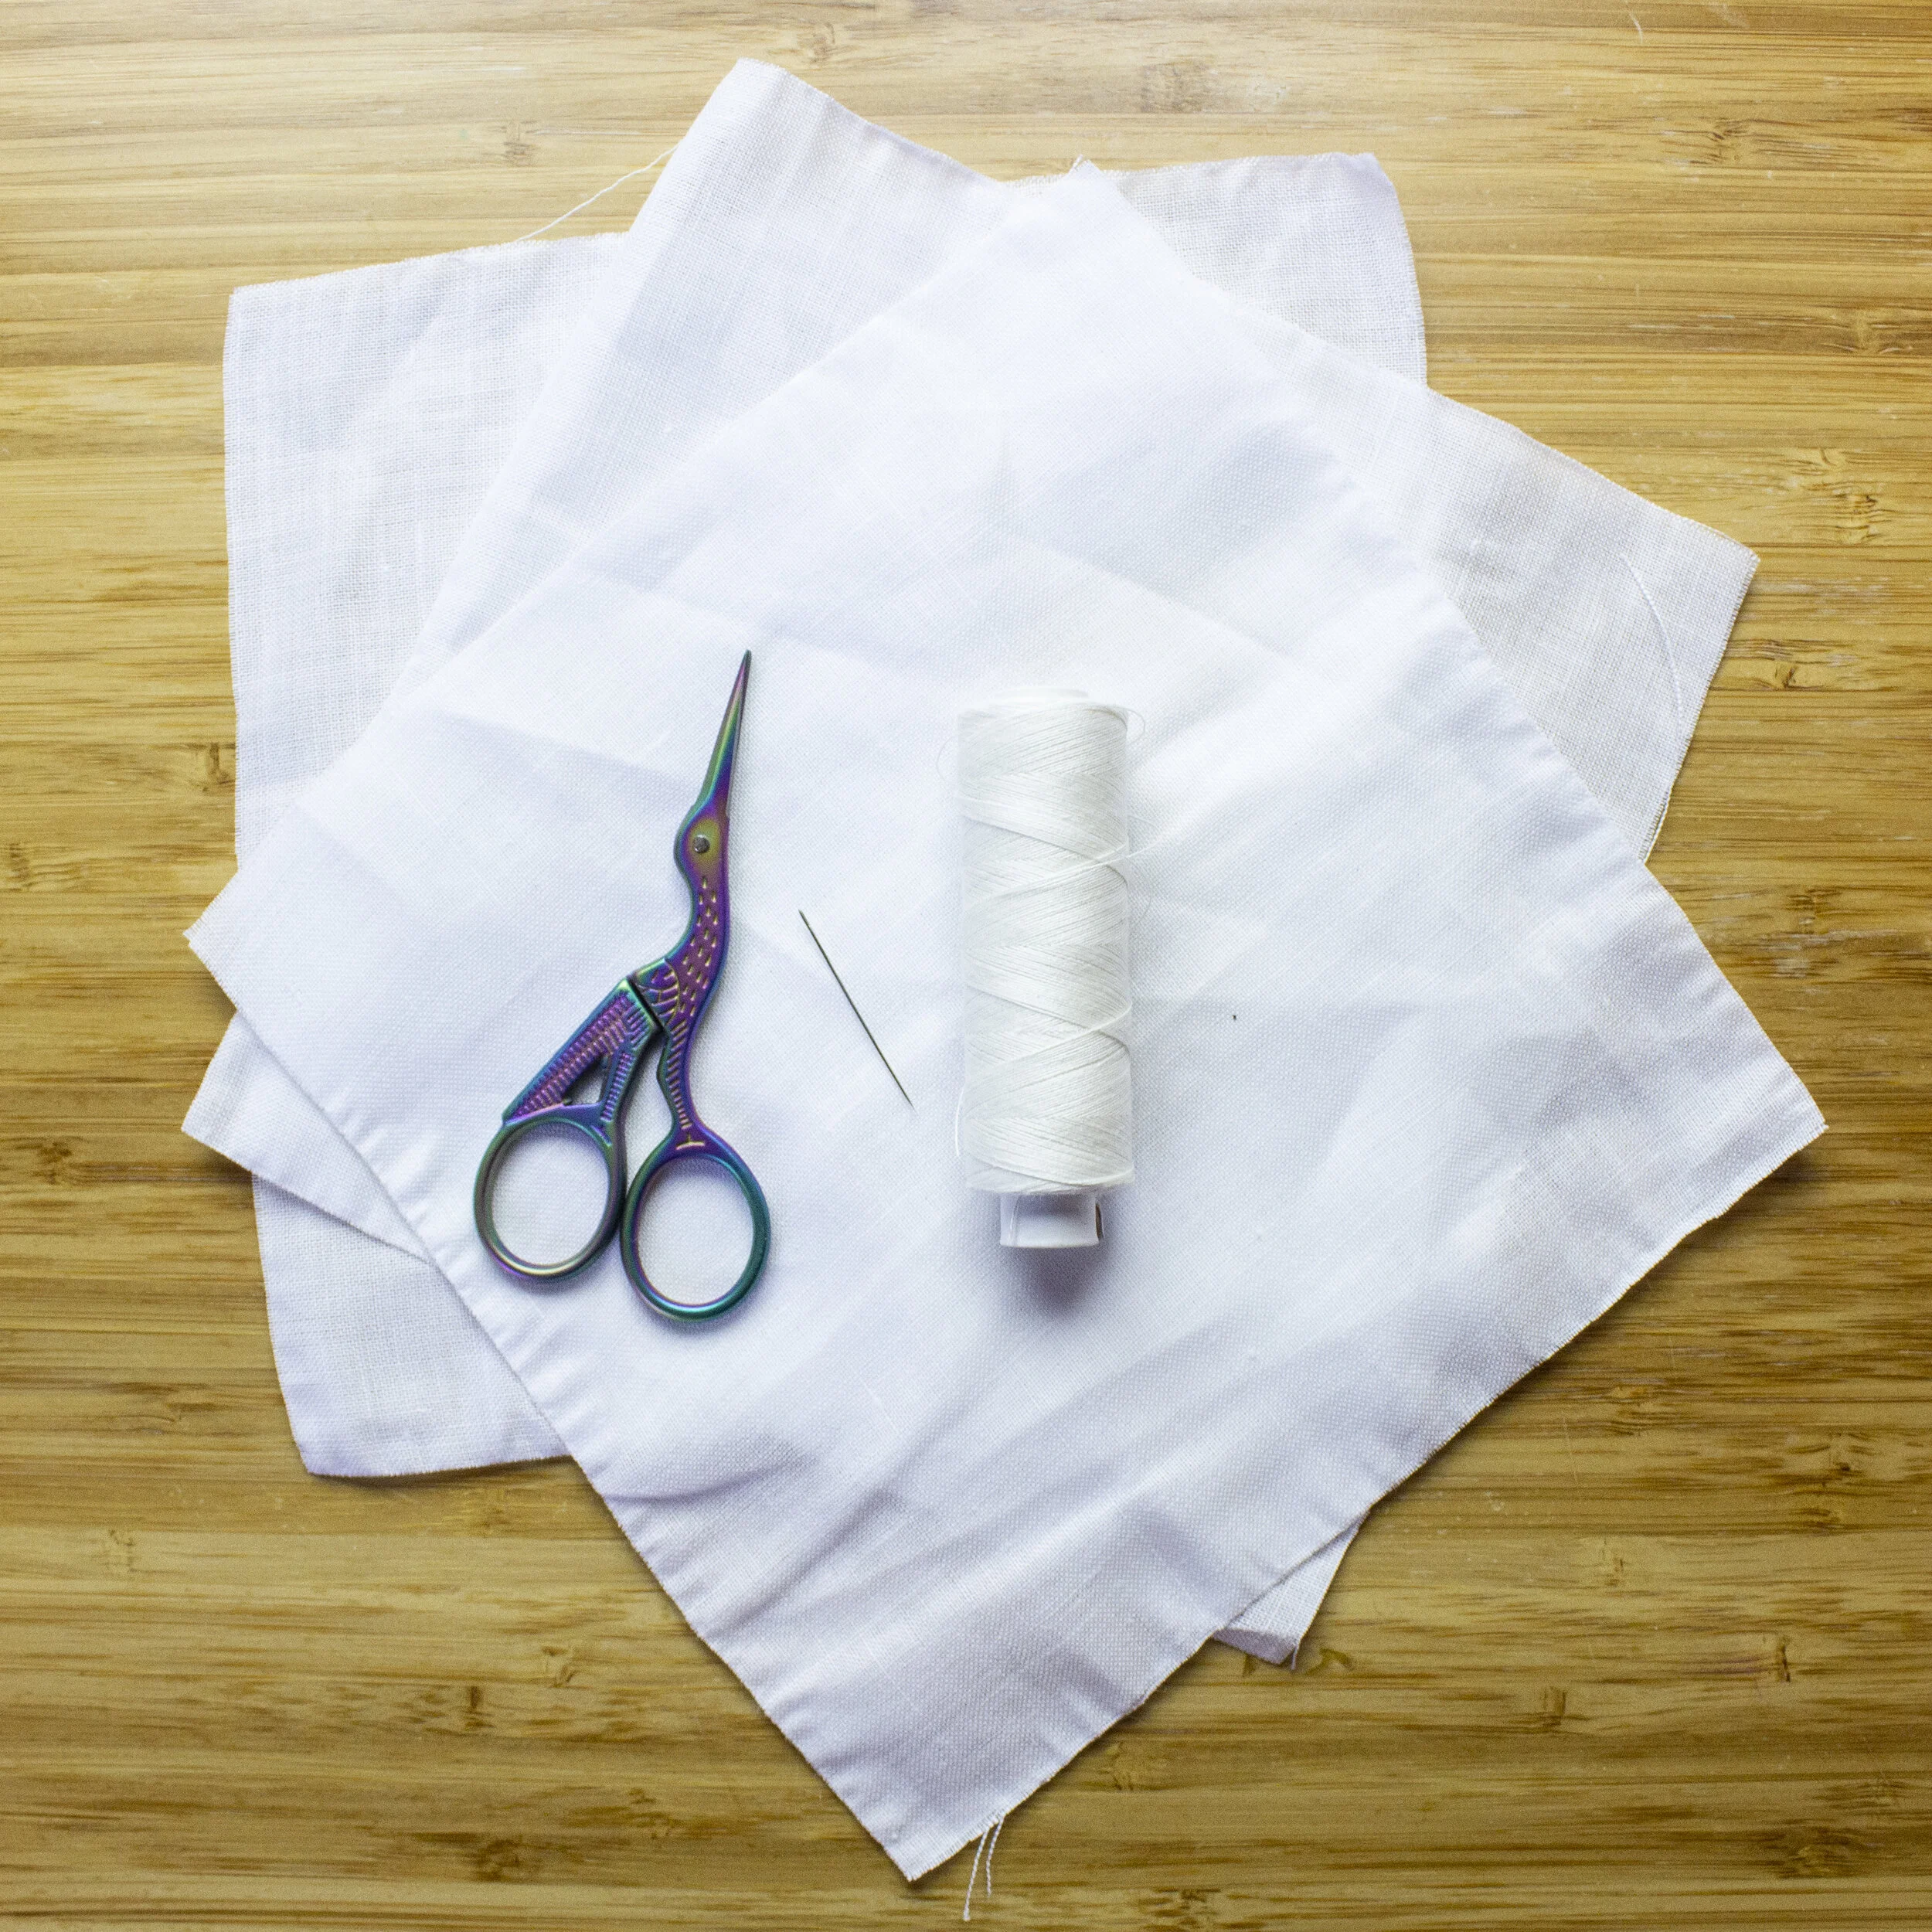
Materials used:
- For the teabag material itself, I used a cambric linen fabric. You can use another linen or cotton woven material if you wish (Update: when I checked back, they no longer carried the cambric, but it’s essentially a handkerchief-weight like this one). If you choose to repurpose an old fabric, I highly recommend scouring your material first to make sure it’s extra clean before using it for your tea. My teabags use 6.75 inch (or 17cm) squares of material. I personally love using linen because I can fold the seams and use just the heat and pressure from my hand to crease it. Also, it’s linen… what’s not to love?
- My choice of thread was this linen thread. This one is also a good option. While you can use beeswax (which is edible) to strengthen the thread, I didn’t find the need to do so. You may also use a cotton thread if you wish. I would absolutely avoid using synthetics, as you are dunking this in hot water.
- Wool for felting if you are going to try the button method - undyed of course.
- Thick cotton thread, like the one used for Sashiko or shuttle tatting or crocheting doilies, or perle cotton cord.
- Needle (I love these Bohin needles) for stitching and an embroidery needle for the cord. You can find them here as well.
- Thread snips (because I know someone will ask me where I got these scissors, they were a gift from my husband, but I’m pretty sure they’re these)
I would avoid using any dyed materials, as hot water may cause dyes to leech and you don’t want to drink that stuff. And, of course, opt for natural woven materials (knit is too stretchy) as opposed to synthetic as well. Besides, why waste the opportunity to dip your toes in some eco-dyeing here, as the color of the tea will stain your material! I’m not an affiliate of Burnley & Trowbridge, just sharing what I love and use myself. They are a wonderful, small business and ship quickly!
The steps:

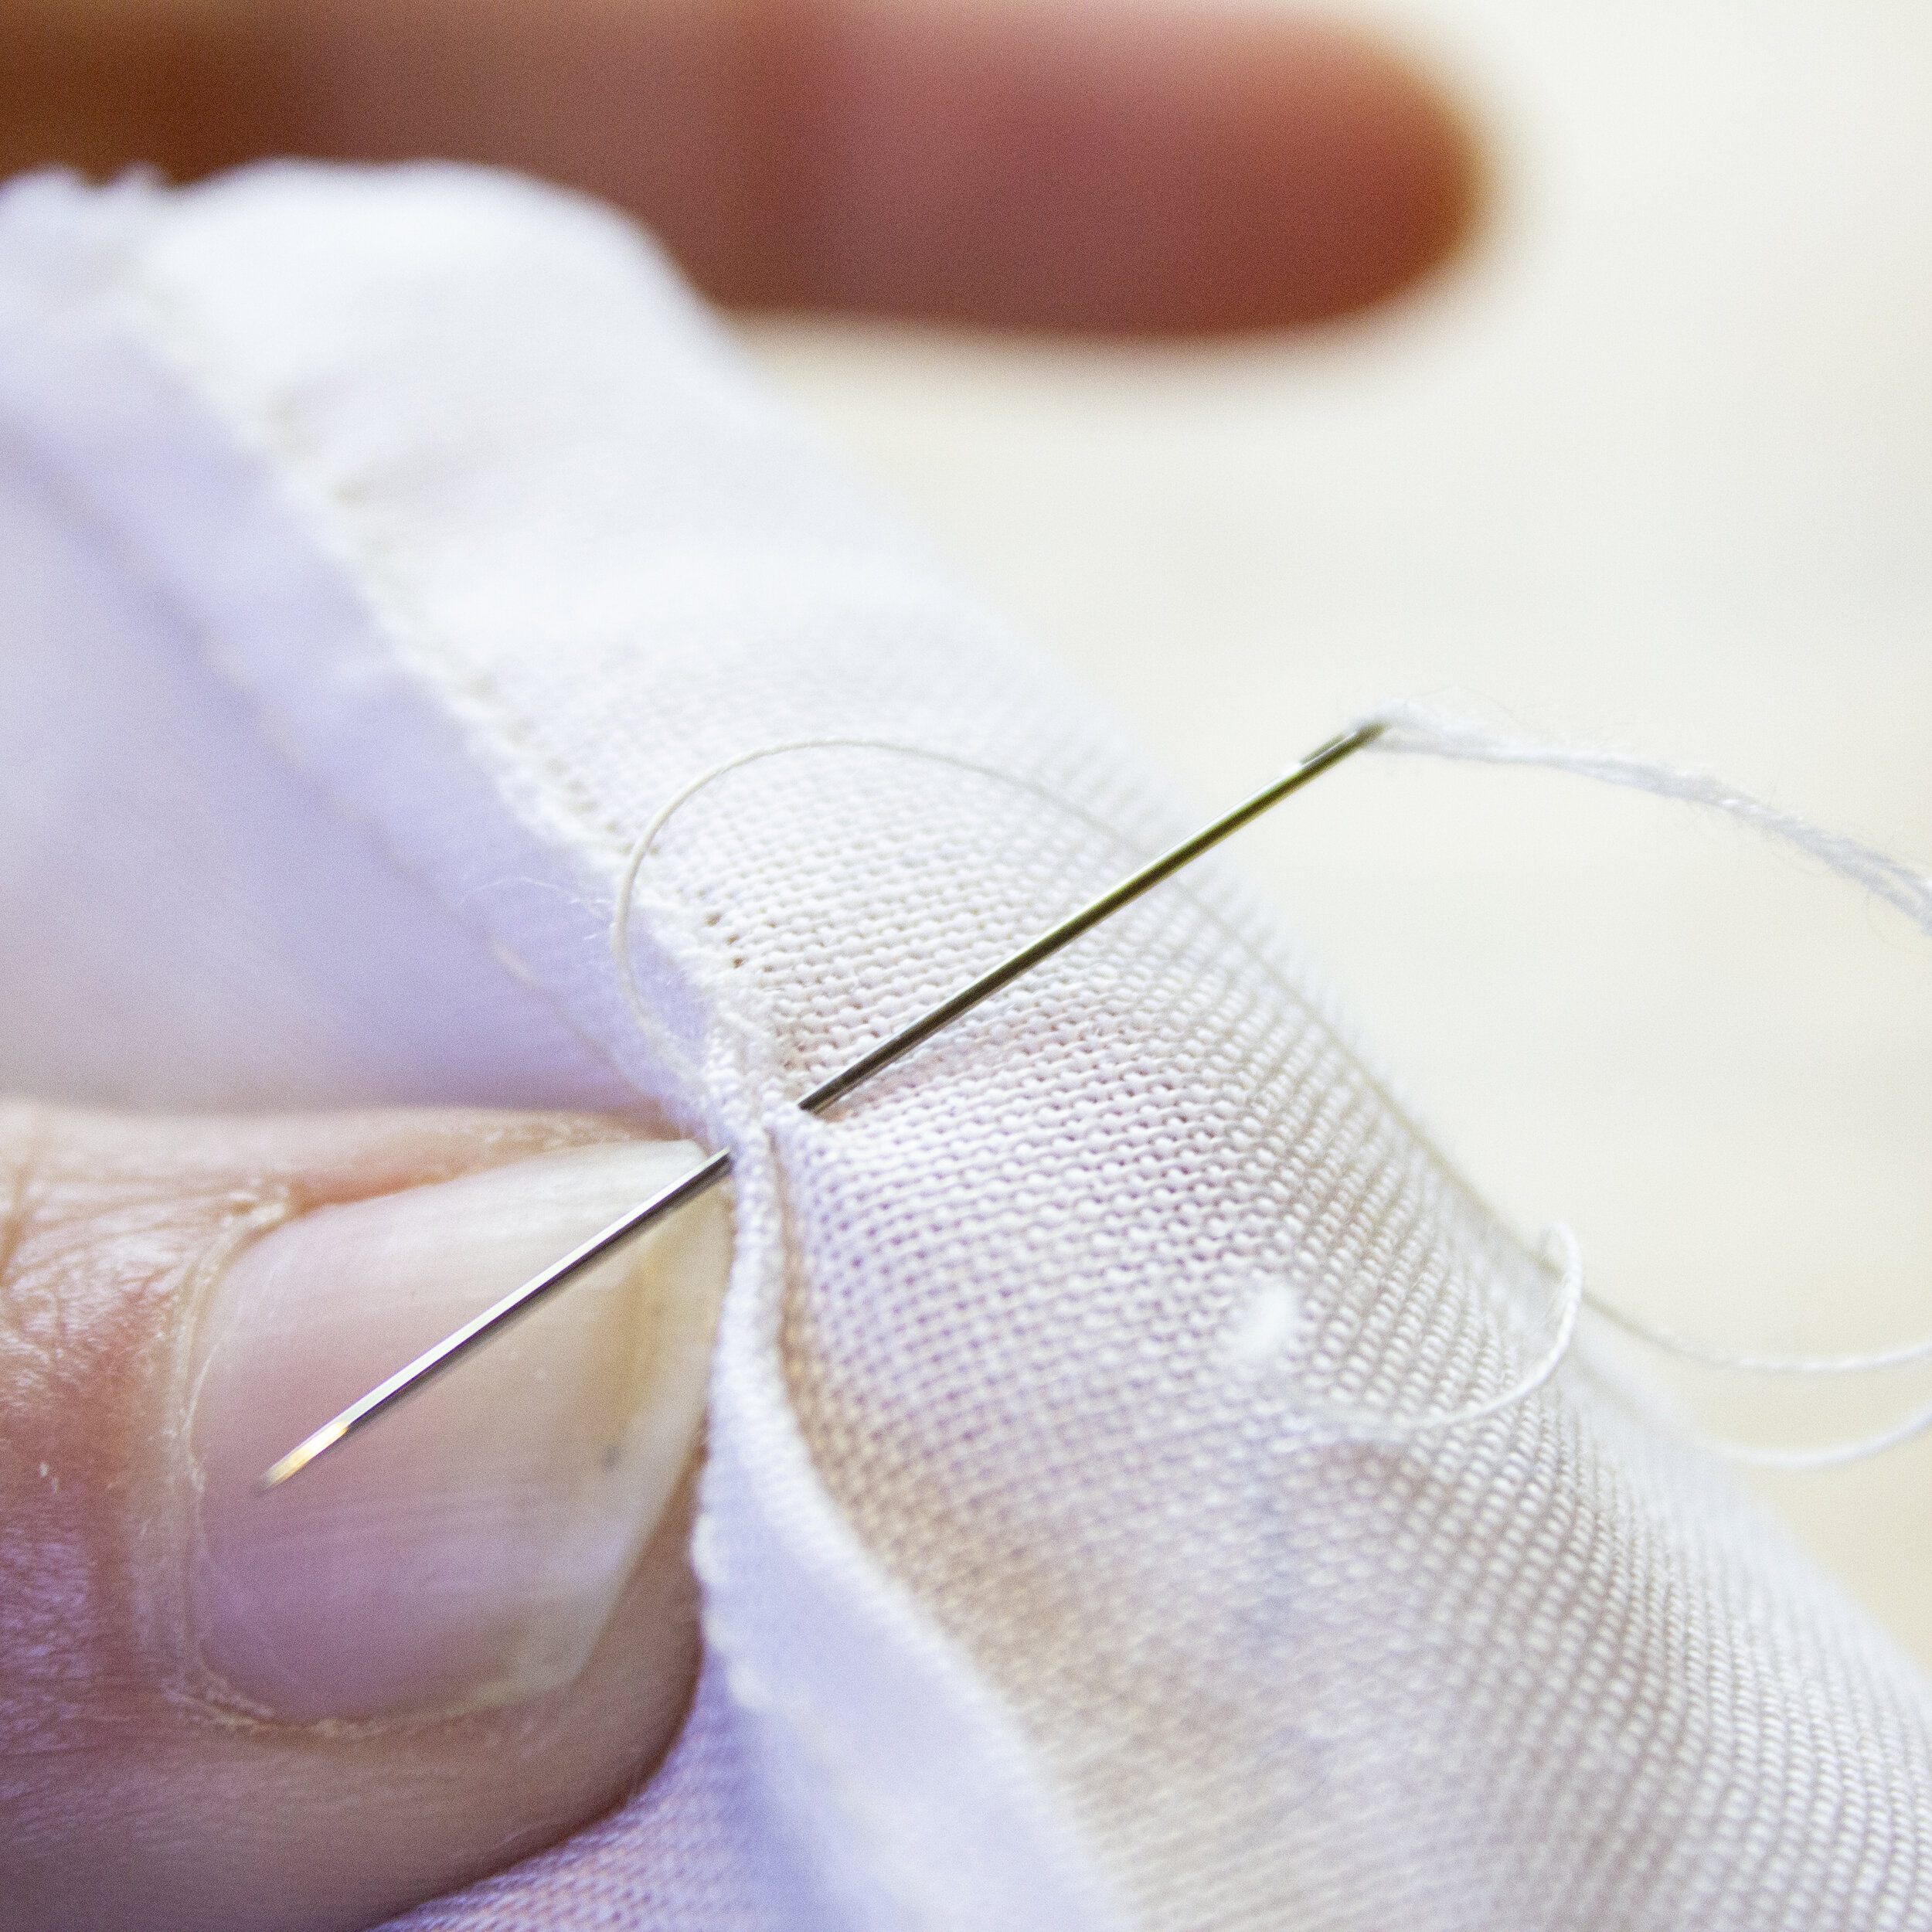
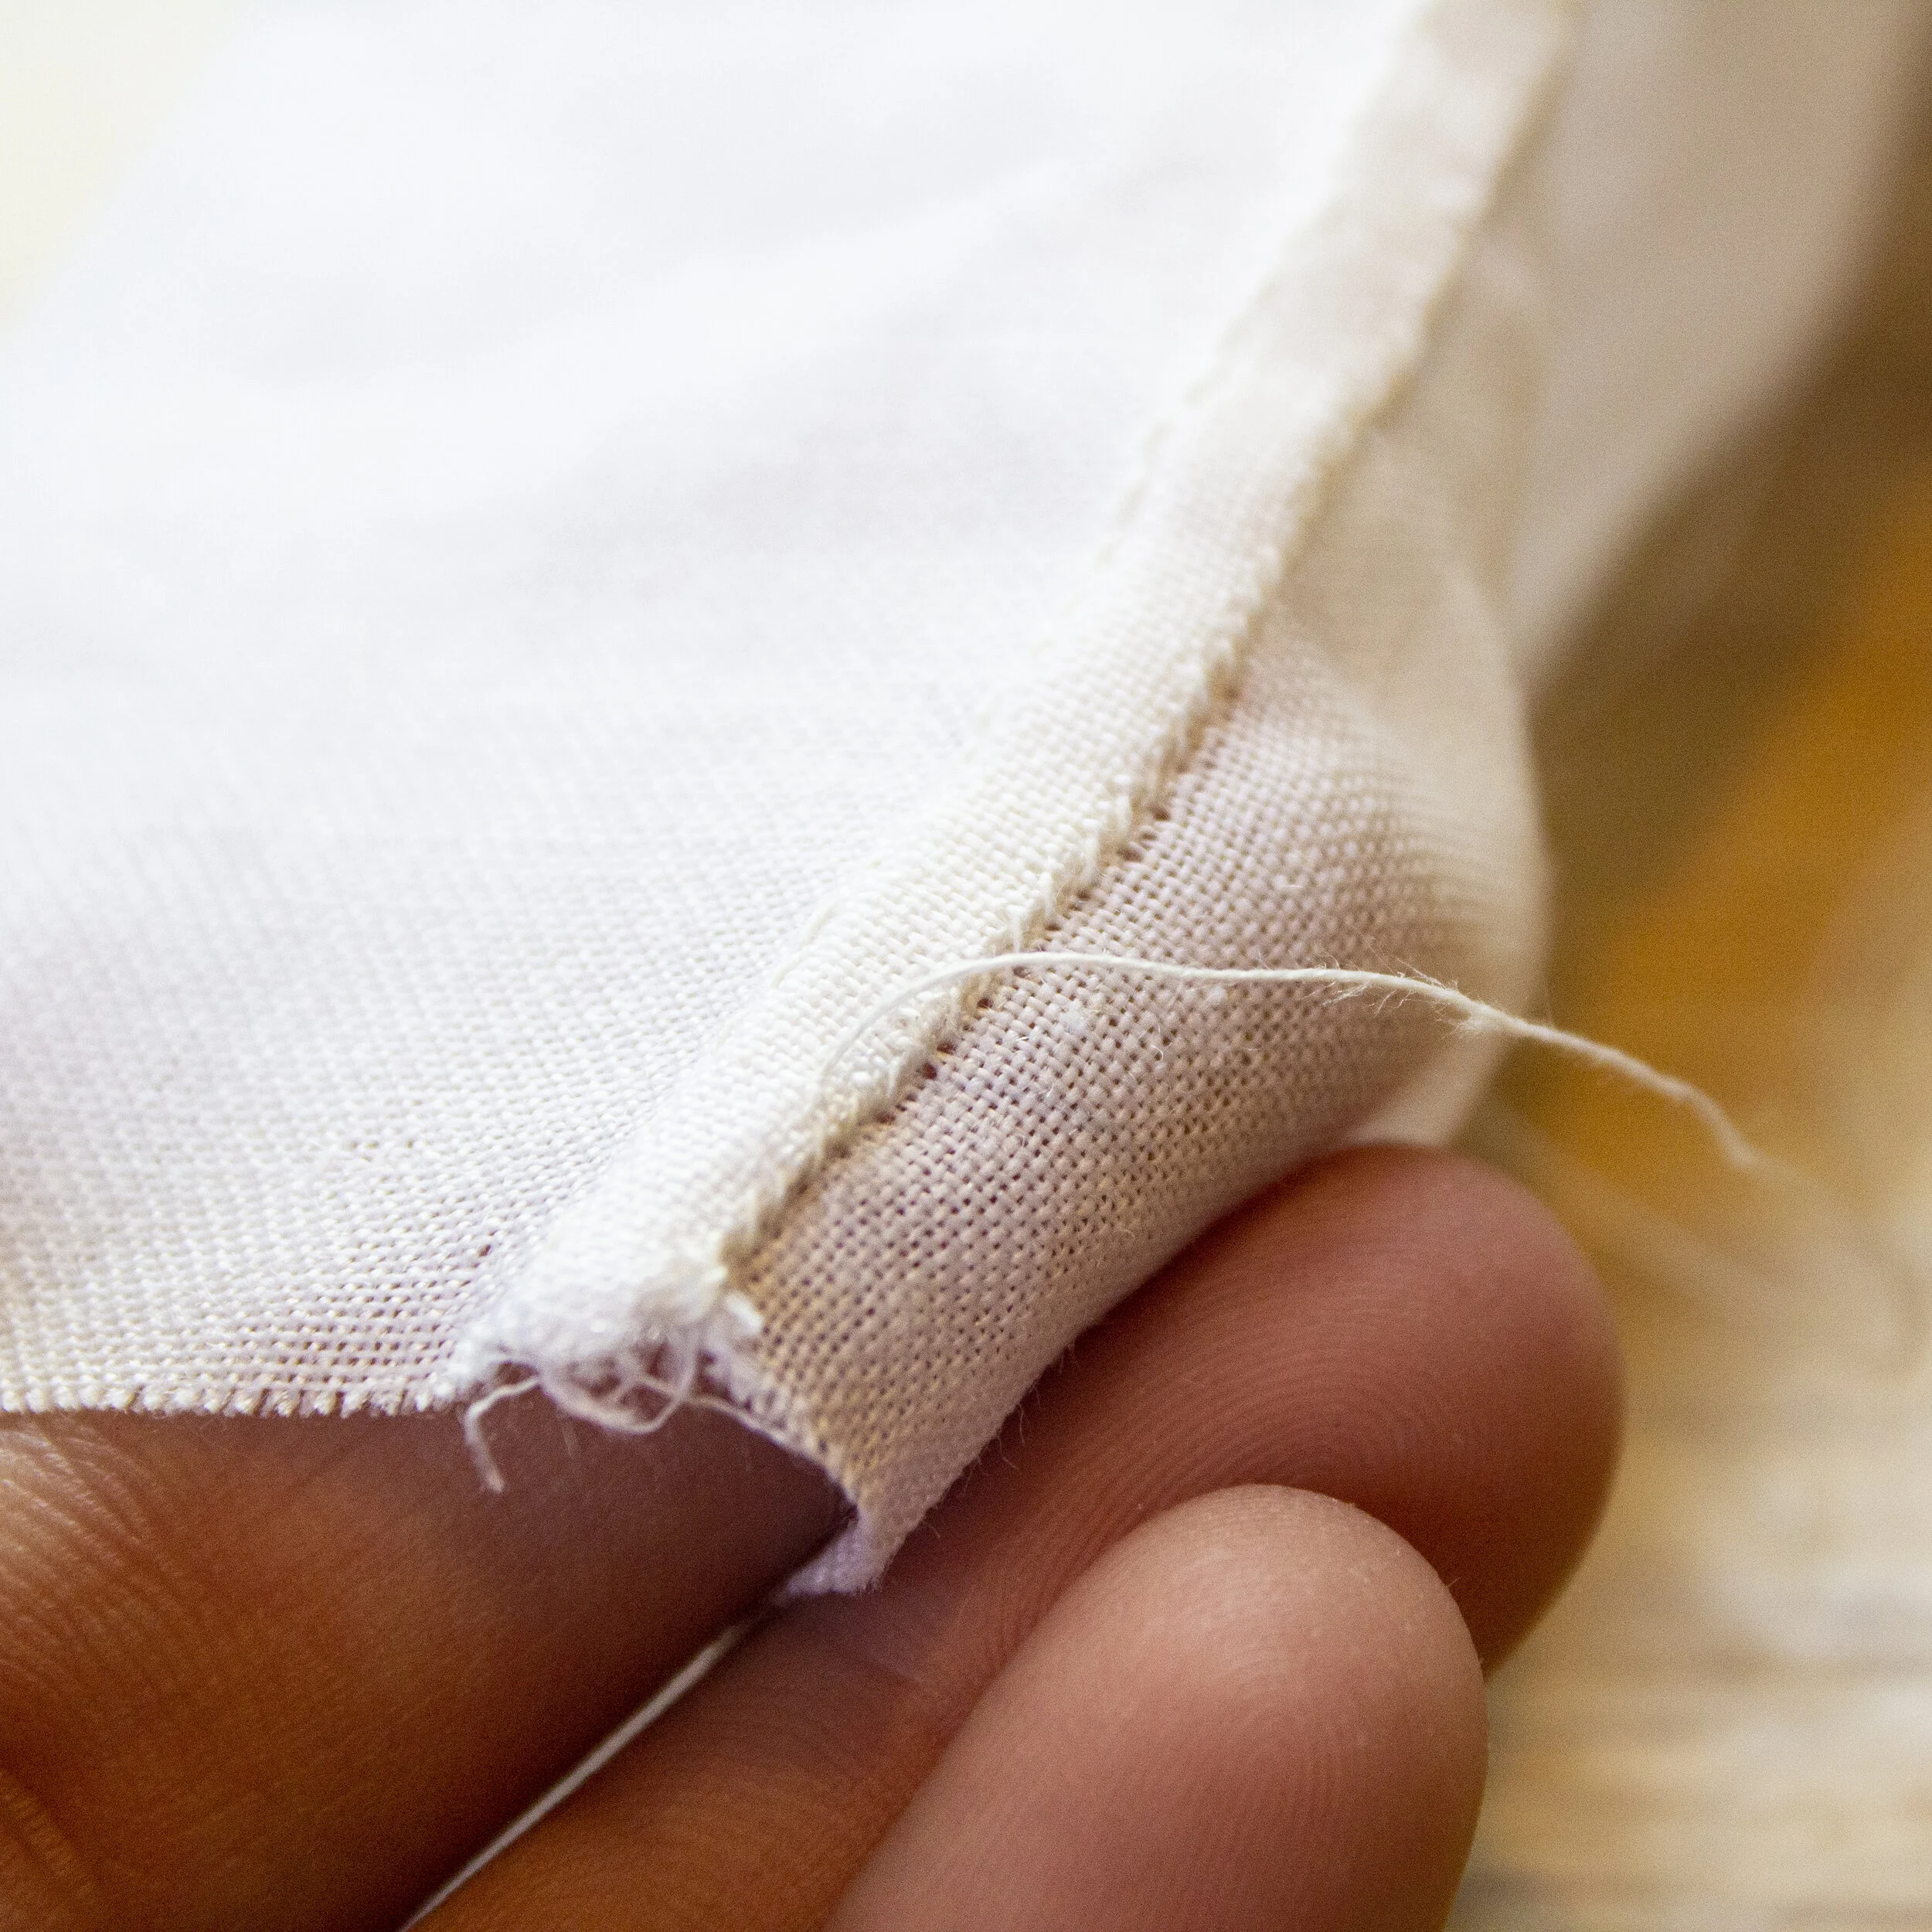
1. Fold the fabric in half, leaving about an 1/8th to 1/4 of an inch overhang on one side - pin if you like (I just eyeballed it myself). Back stitch the entire length with a 1/8th seam allowance on the shorter side.

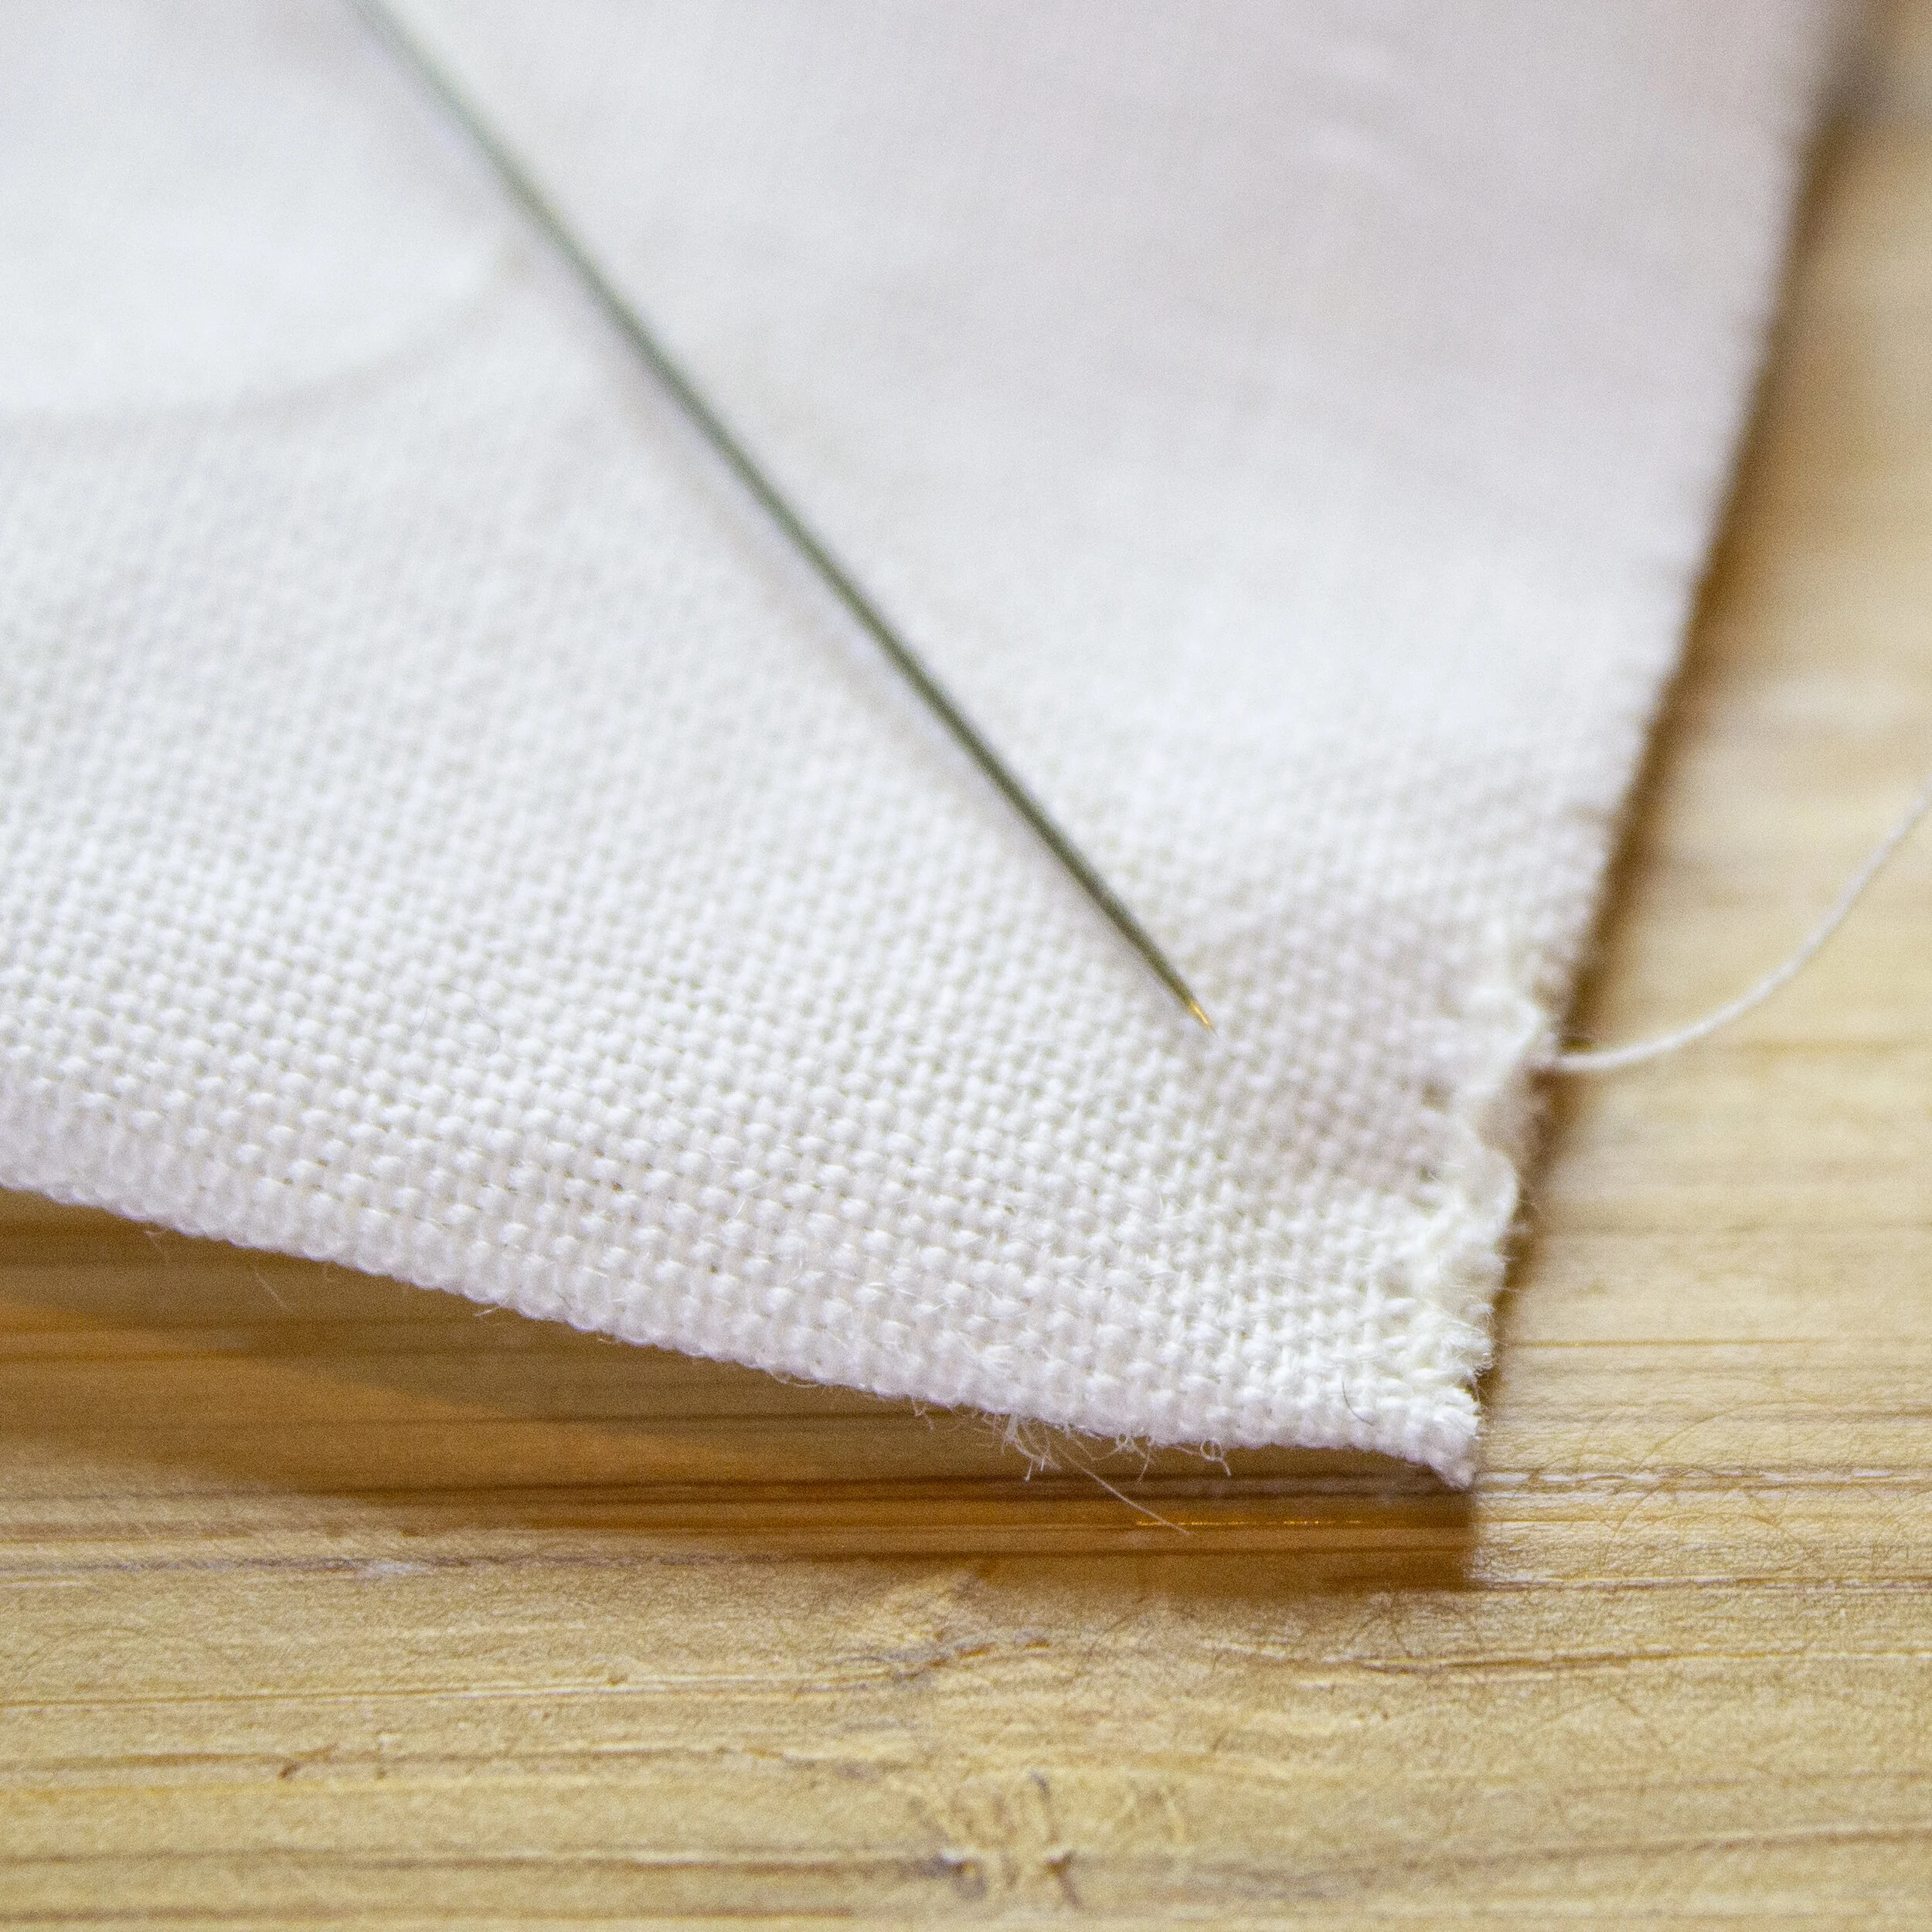
2. Fold the longer seam over the shorter, and then fold both over towards one side of the bag, using a felling stitch to enclose the seam. Be careful not to stitch it to the opposite side of the bag.
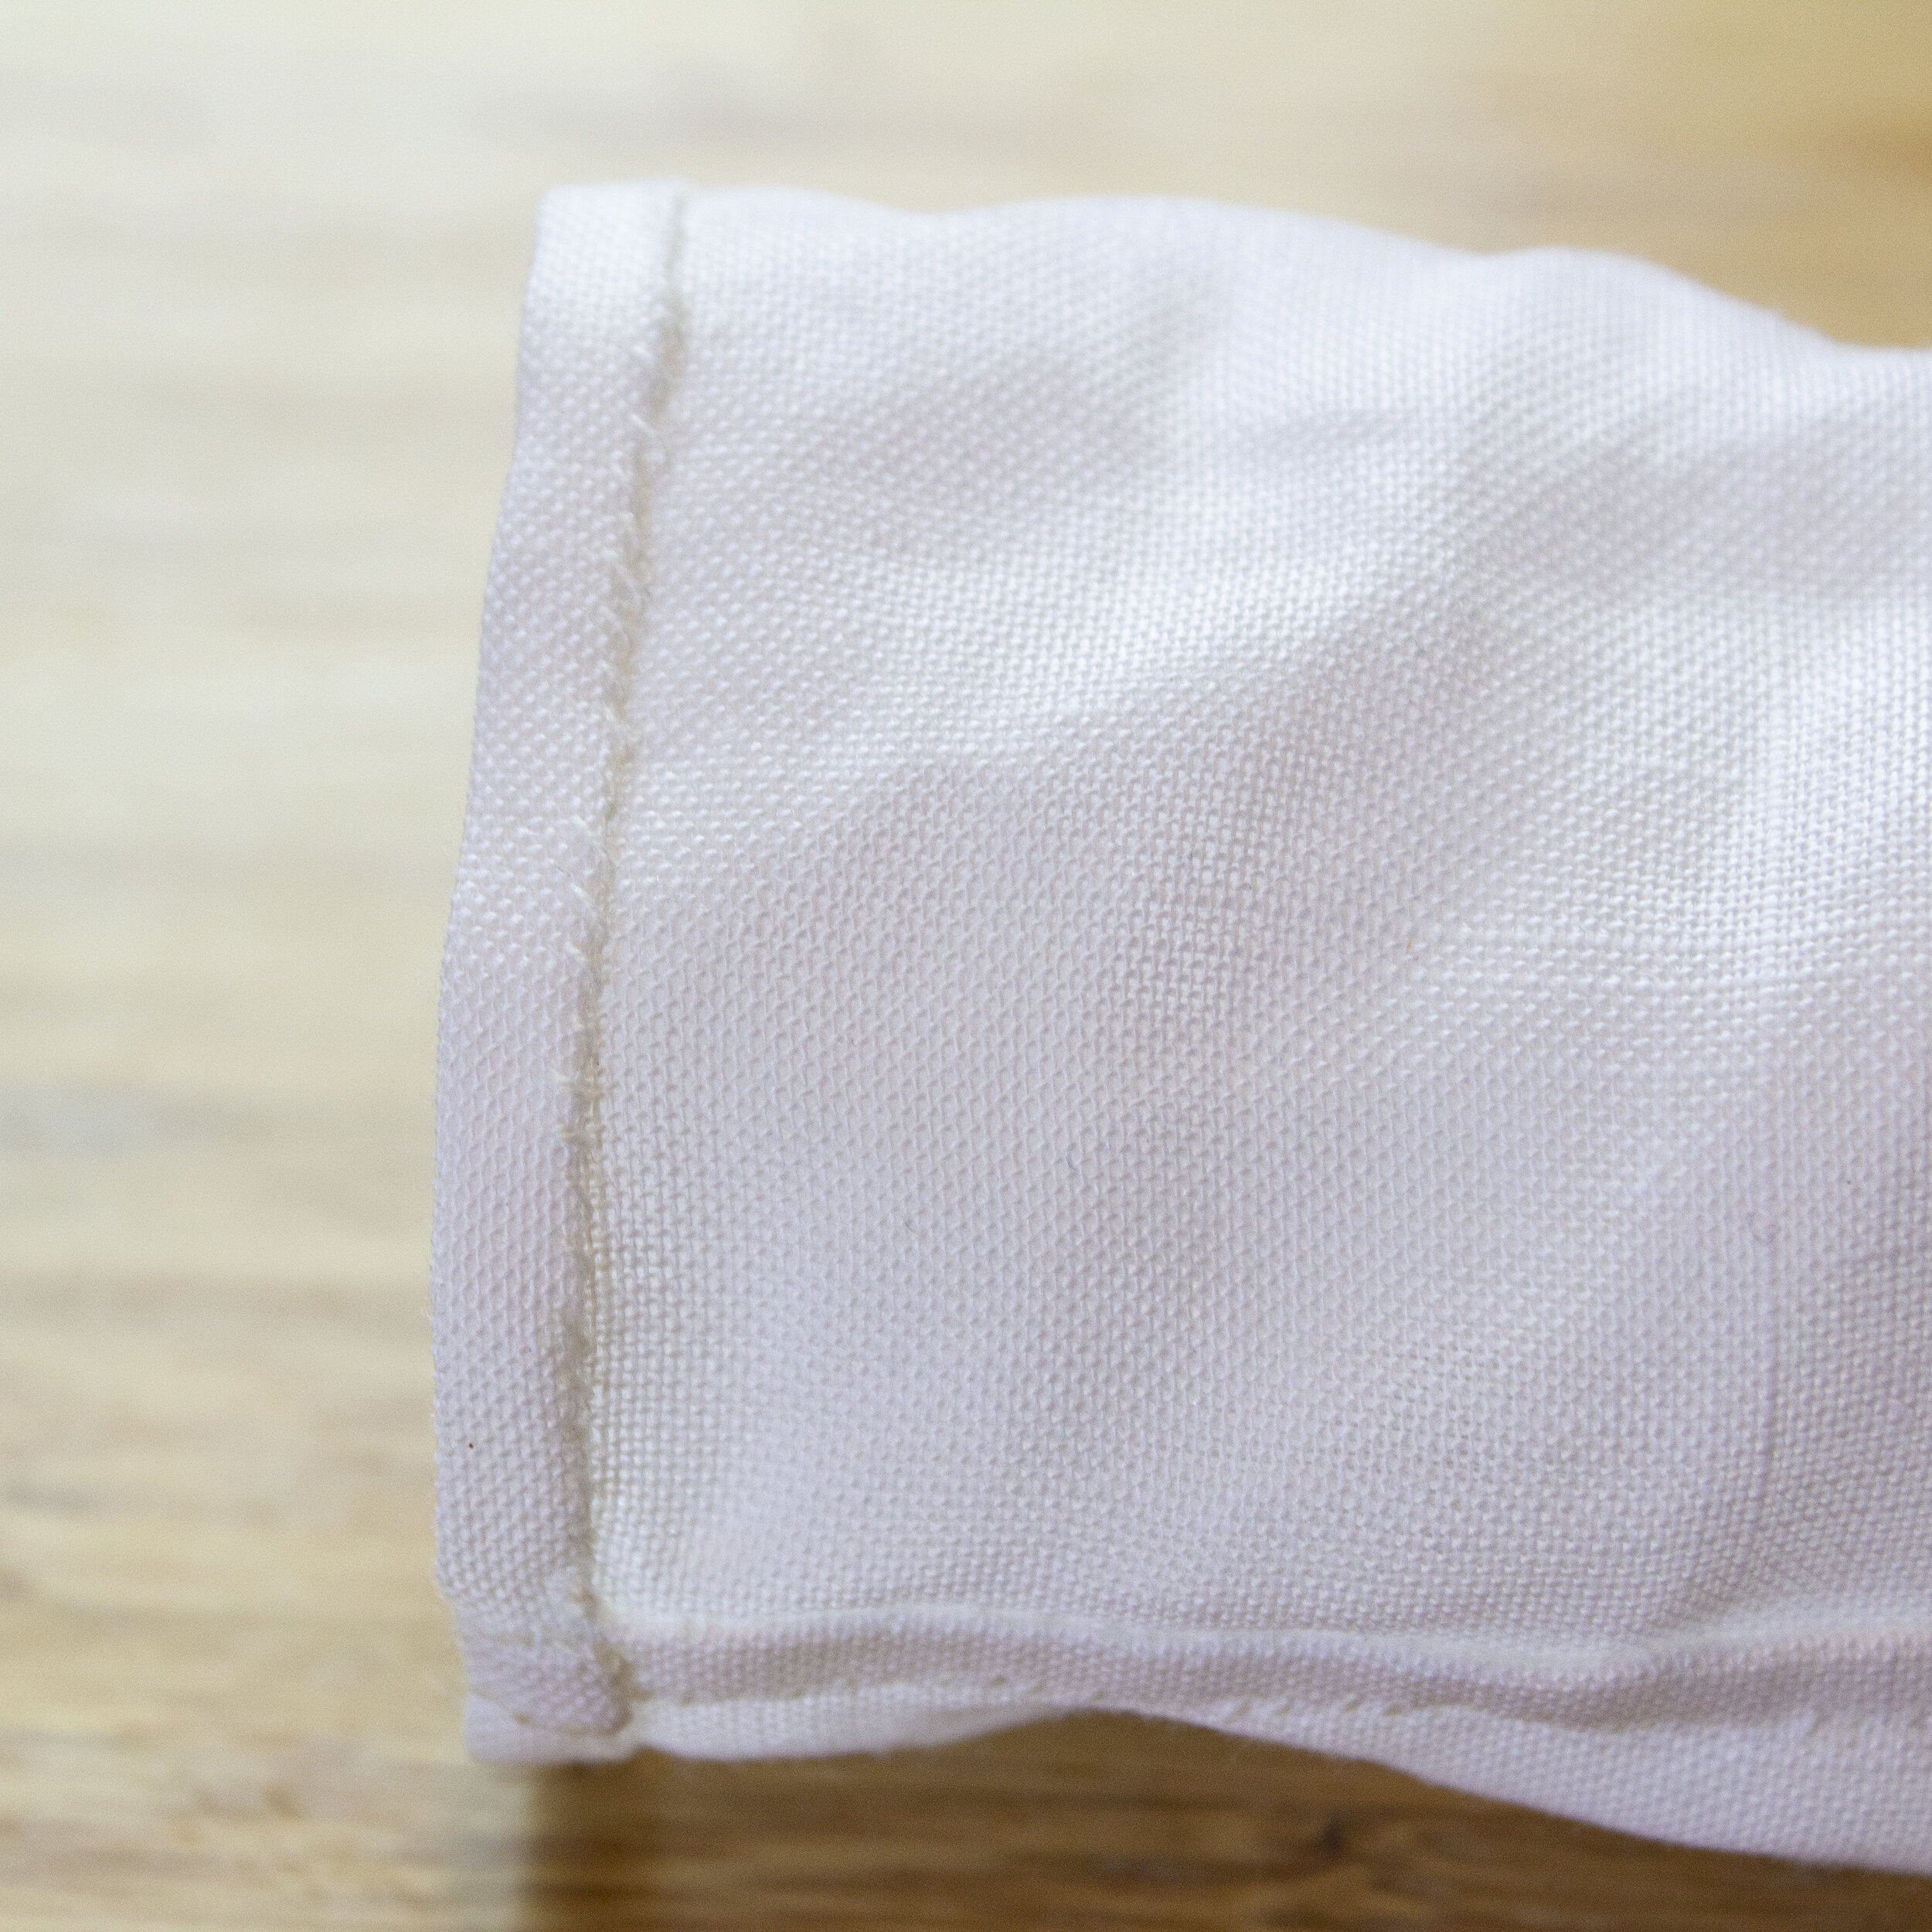
3. Flatten the bag so that the seam is in the middle of one side, and stitch the bottom closed - you may use a simple whip stitch or blanket stitch, as it will be entirely enclosed.

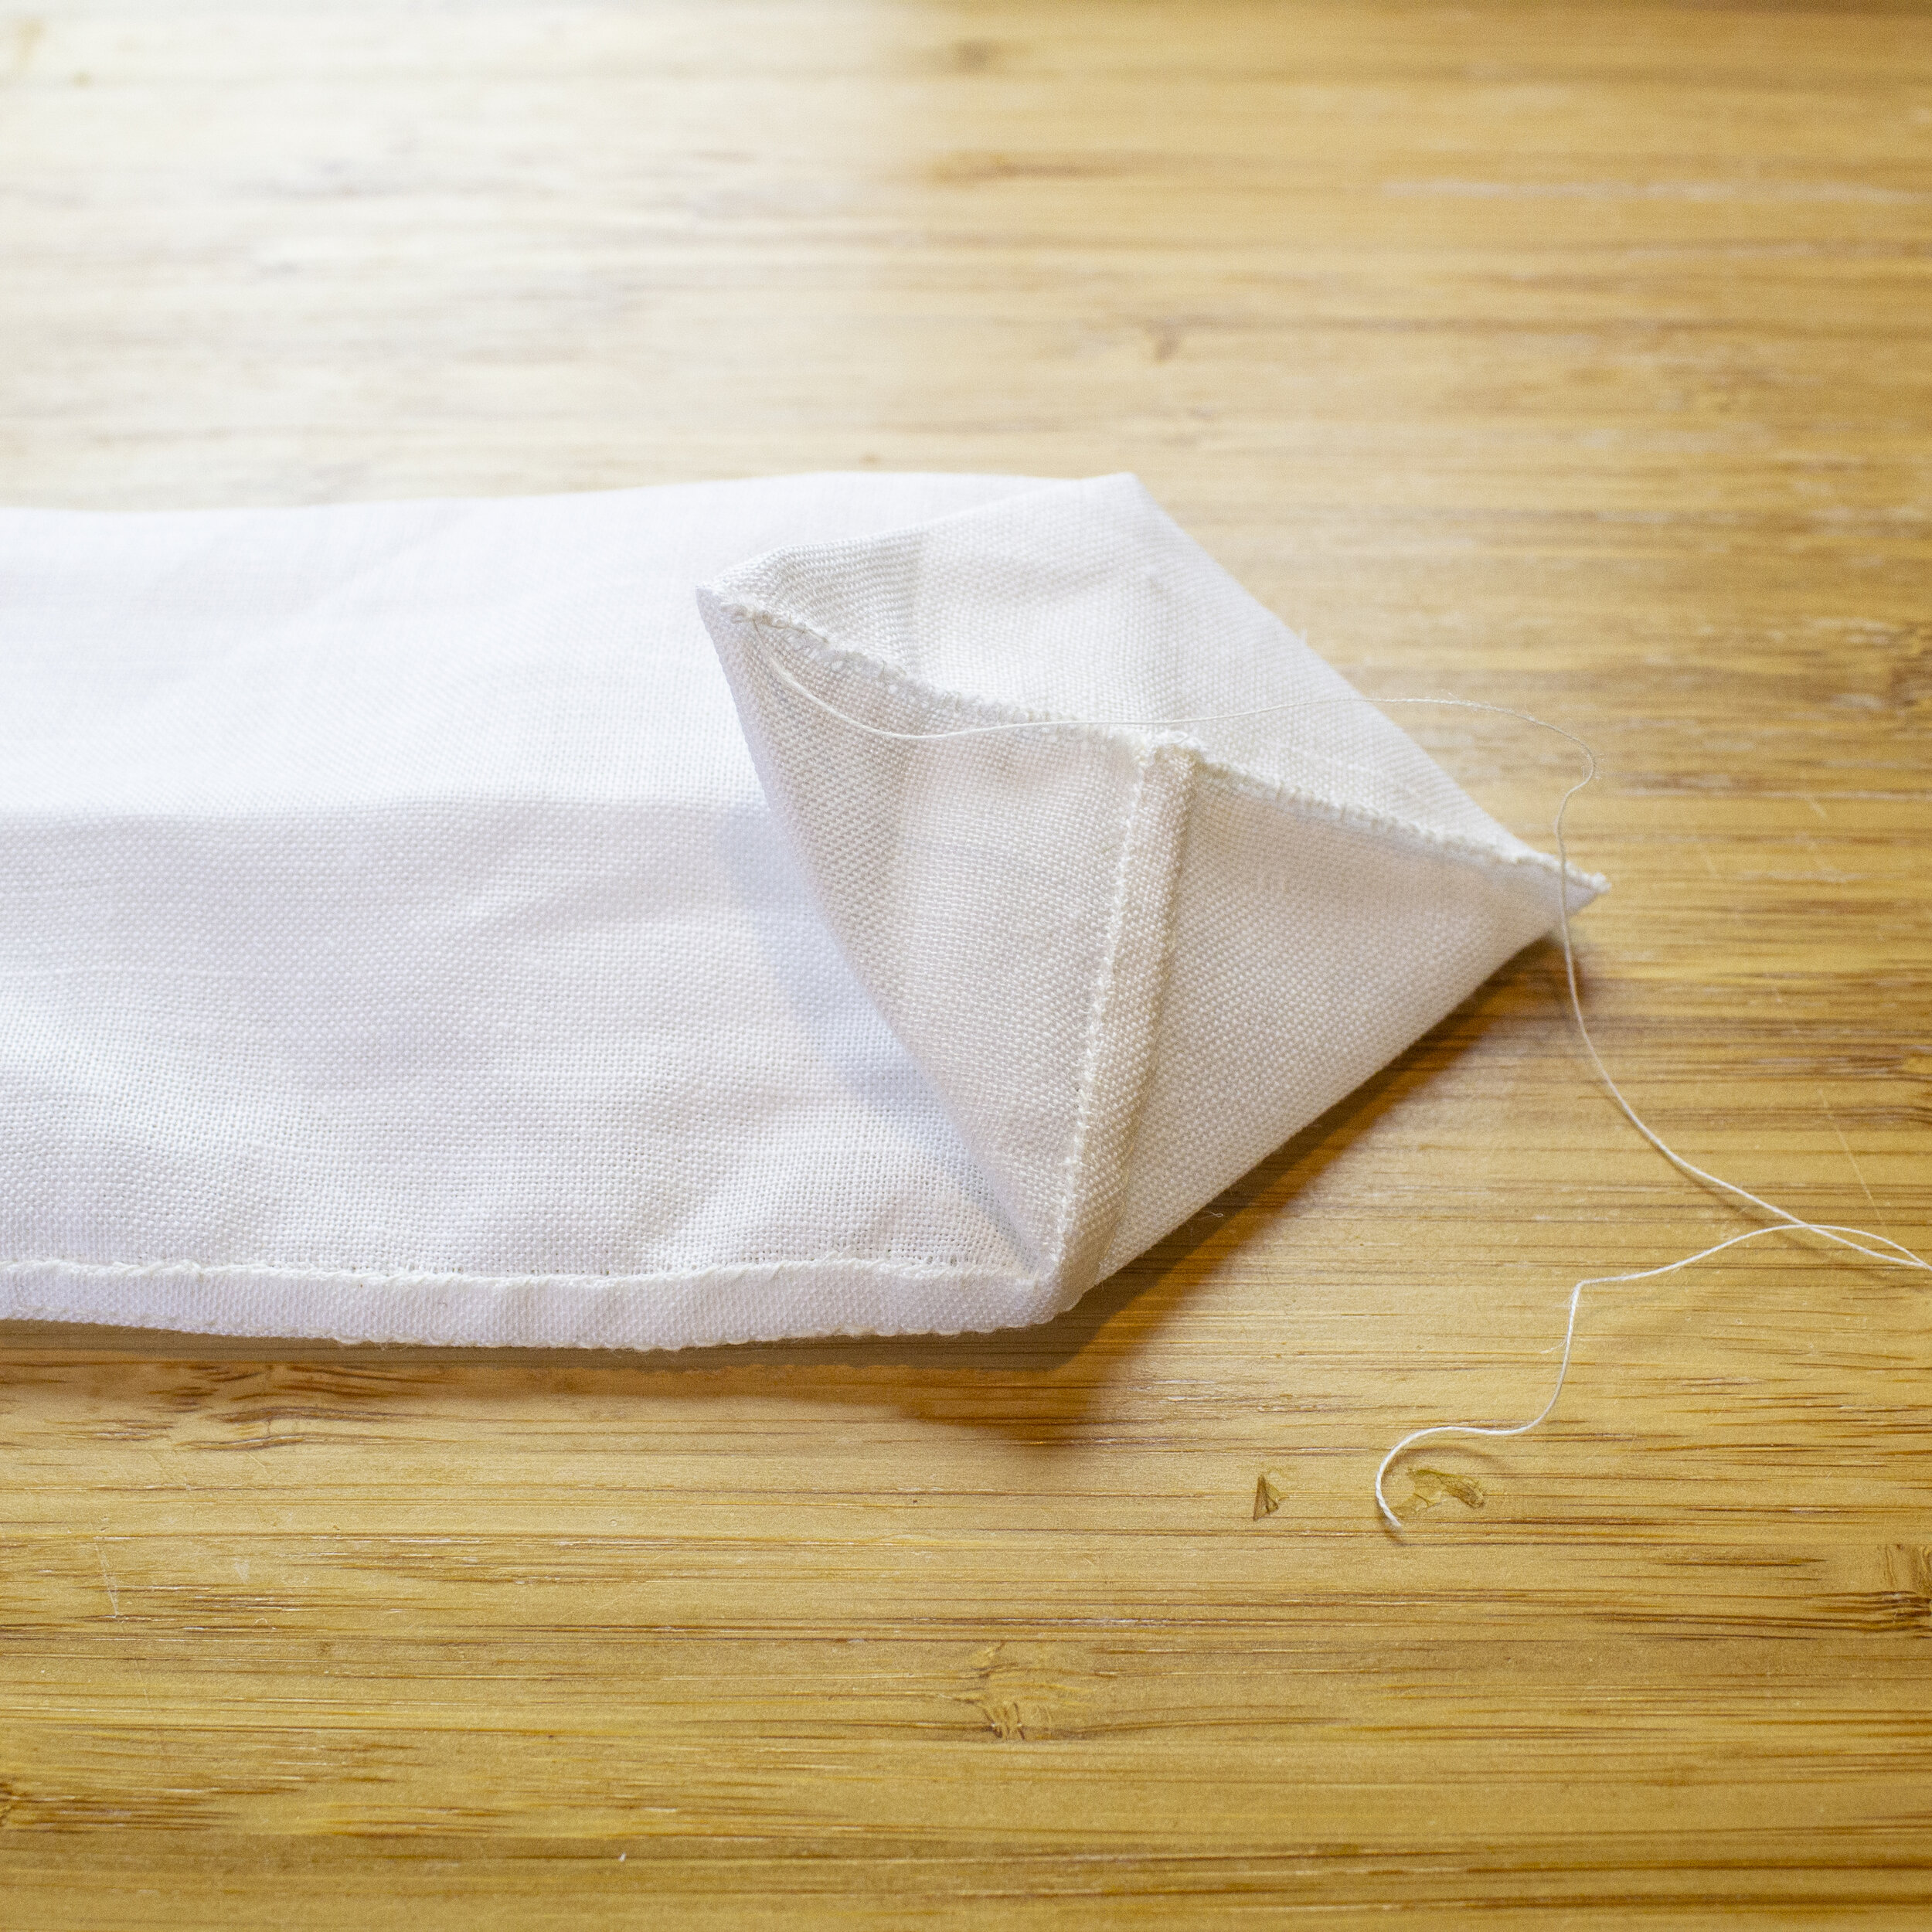
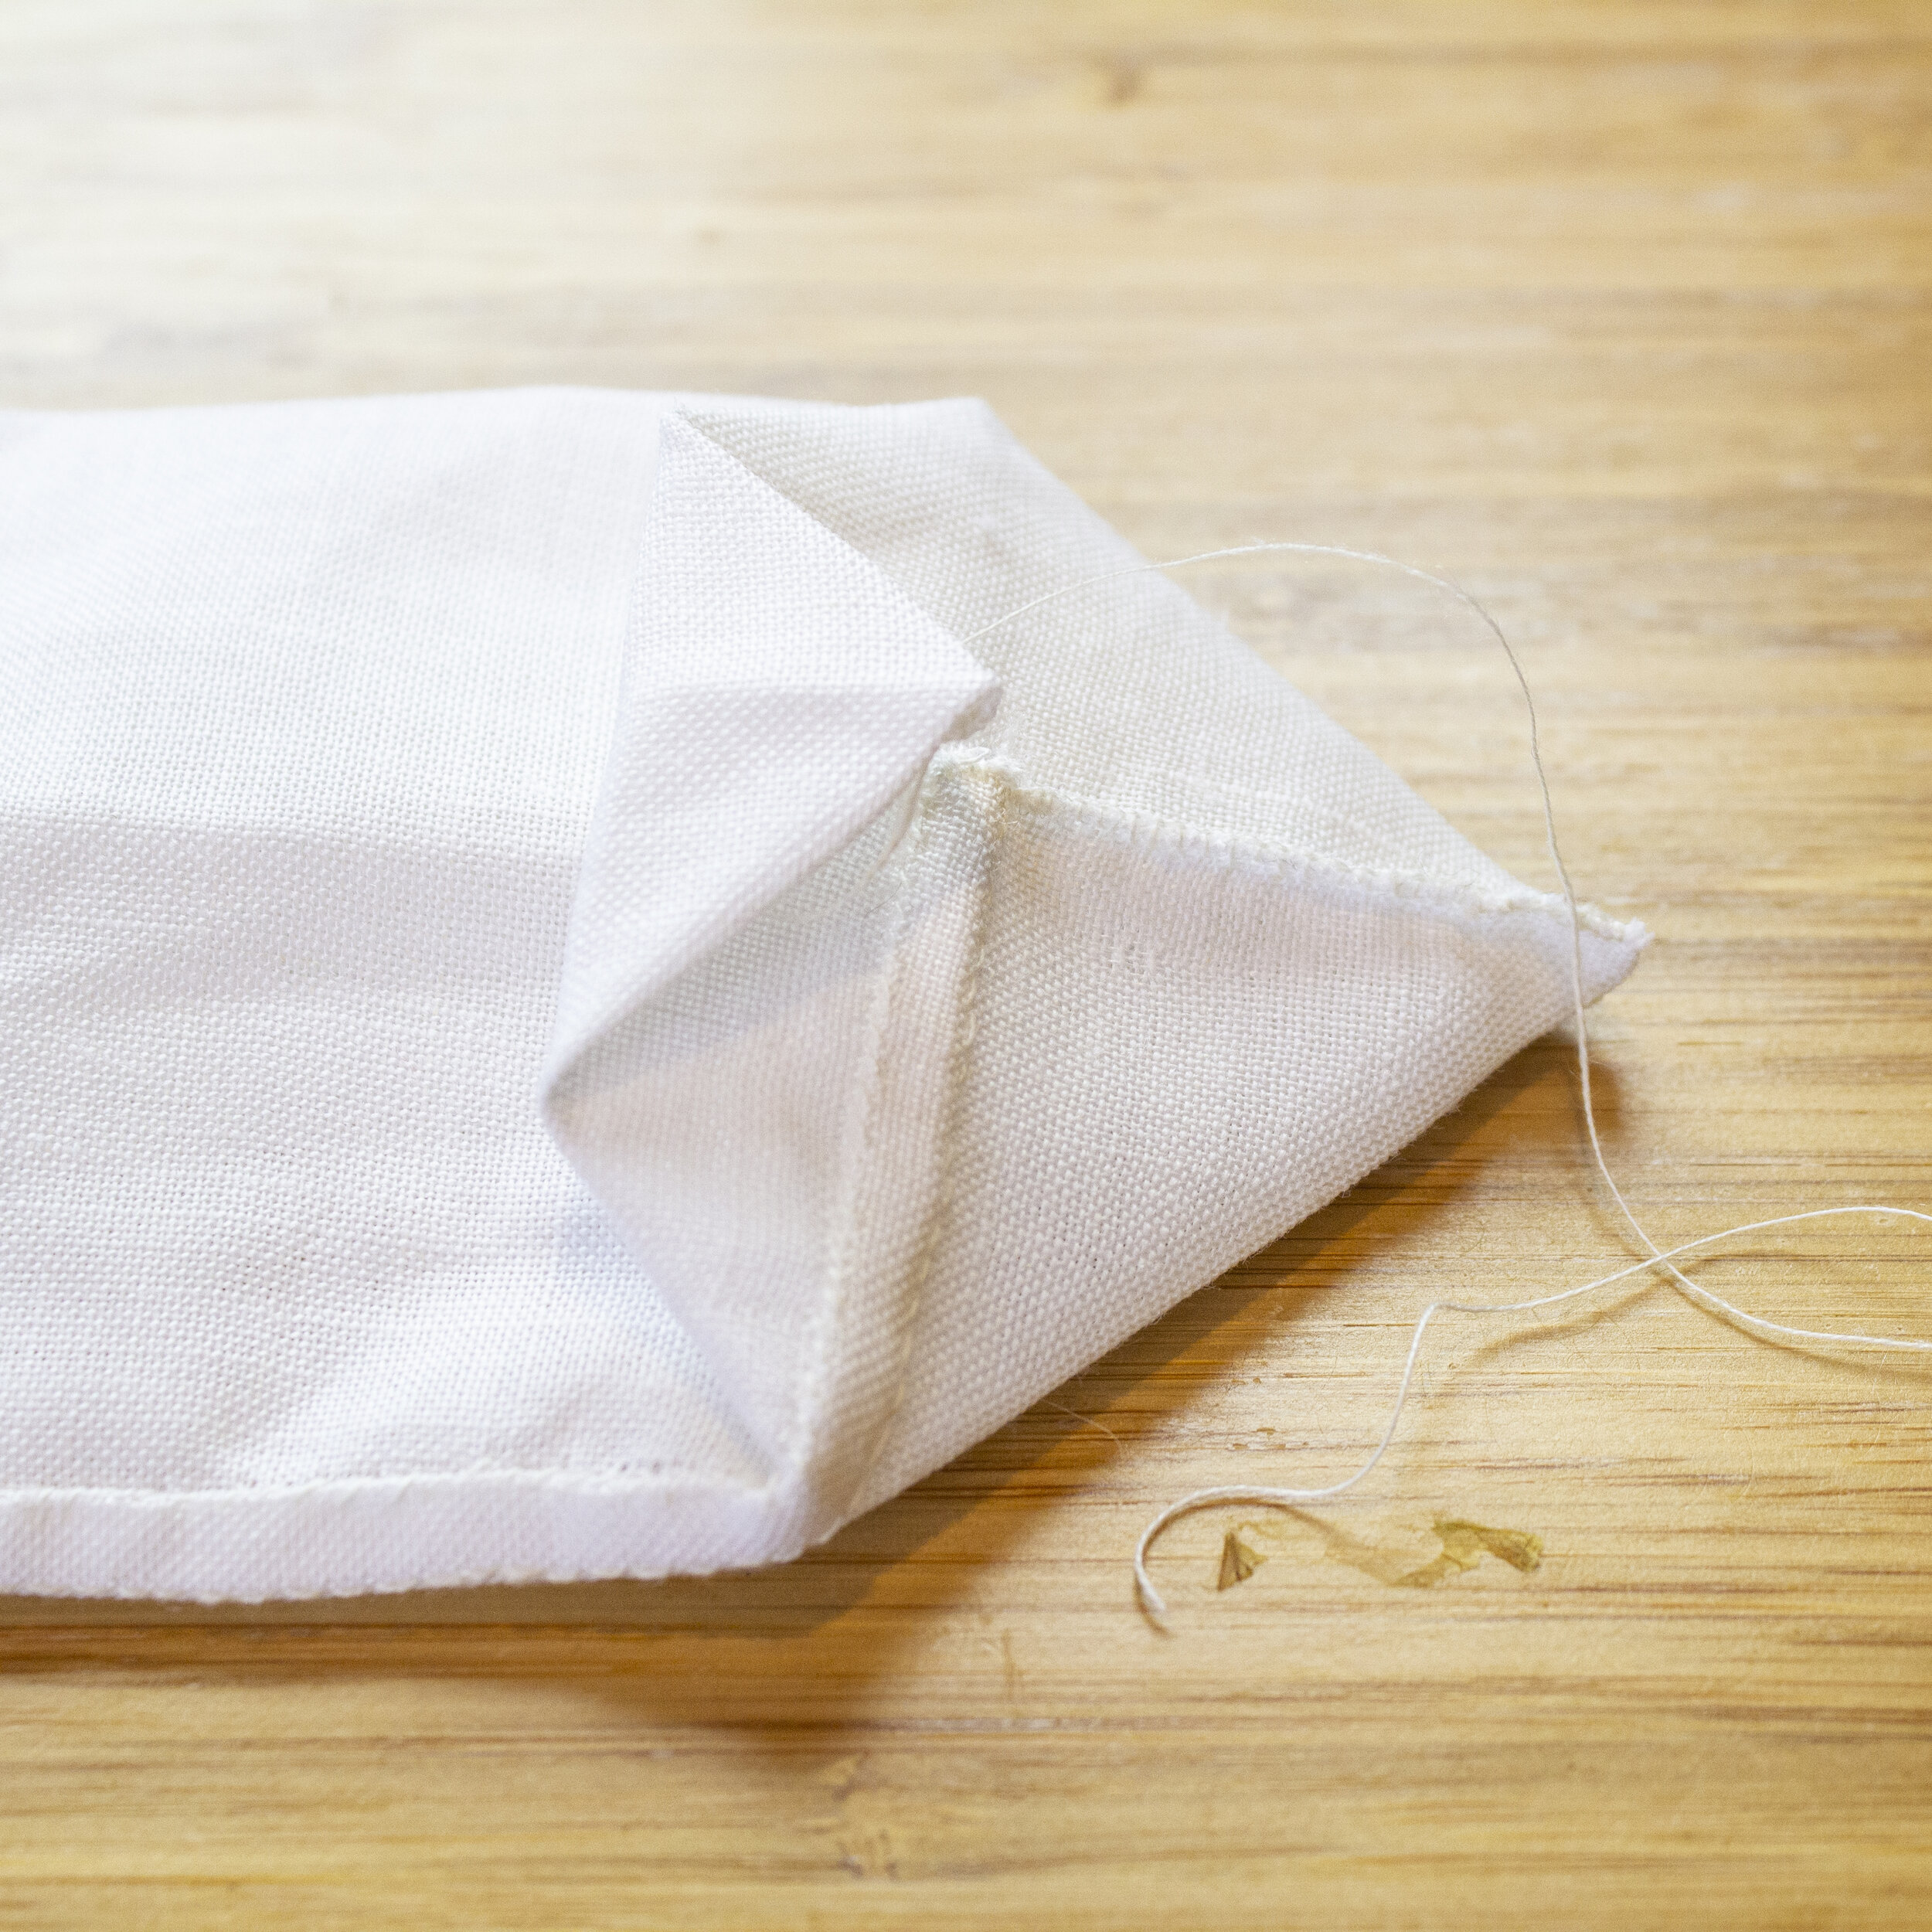

4. Now for a bit of origami… Fold the bag back so that the side seam is on the side again, and the corner is sticking up in the middle. Flatten the top corner back towards the tube, then fold that corner back towards the middle (using the side seam as a guide - this is why we sewed it this way). Fold the other corner towards the middle as well. The bottom should look like an elongated hexagon.
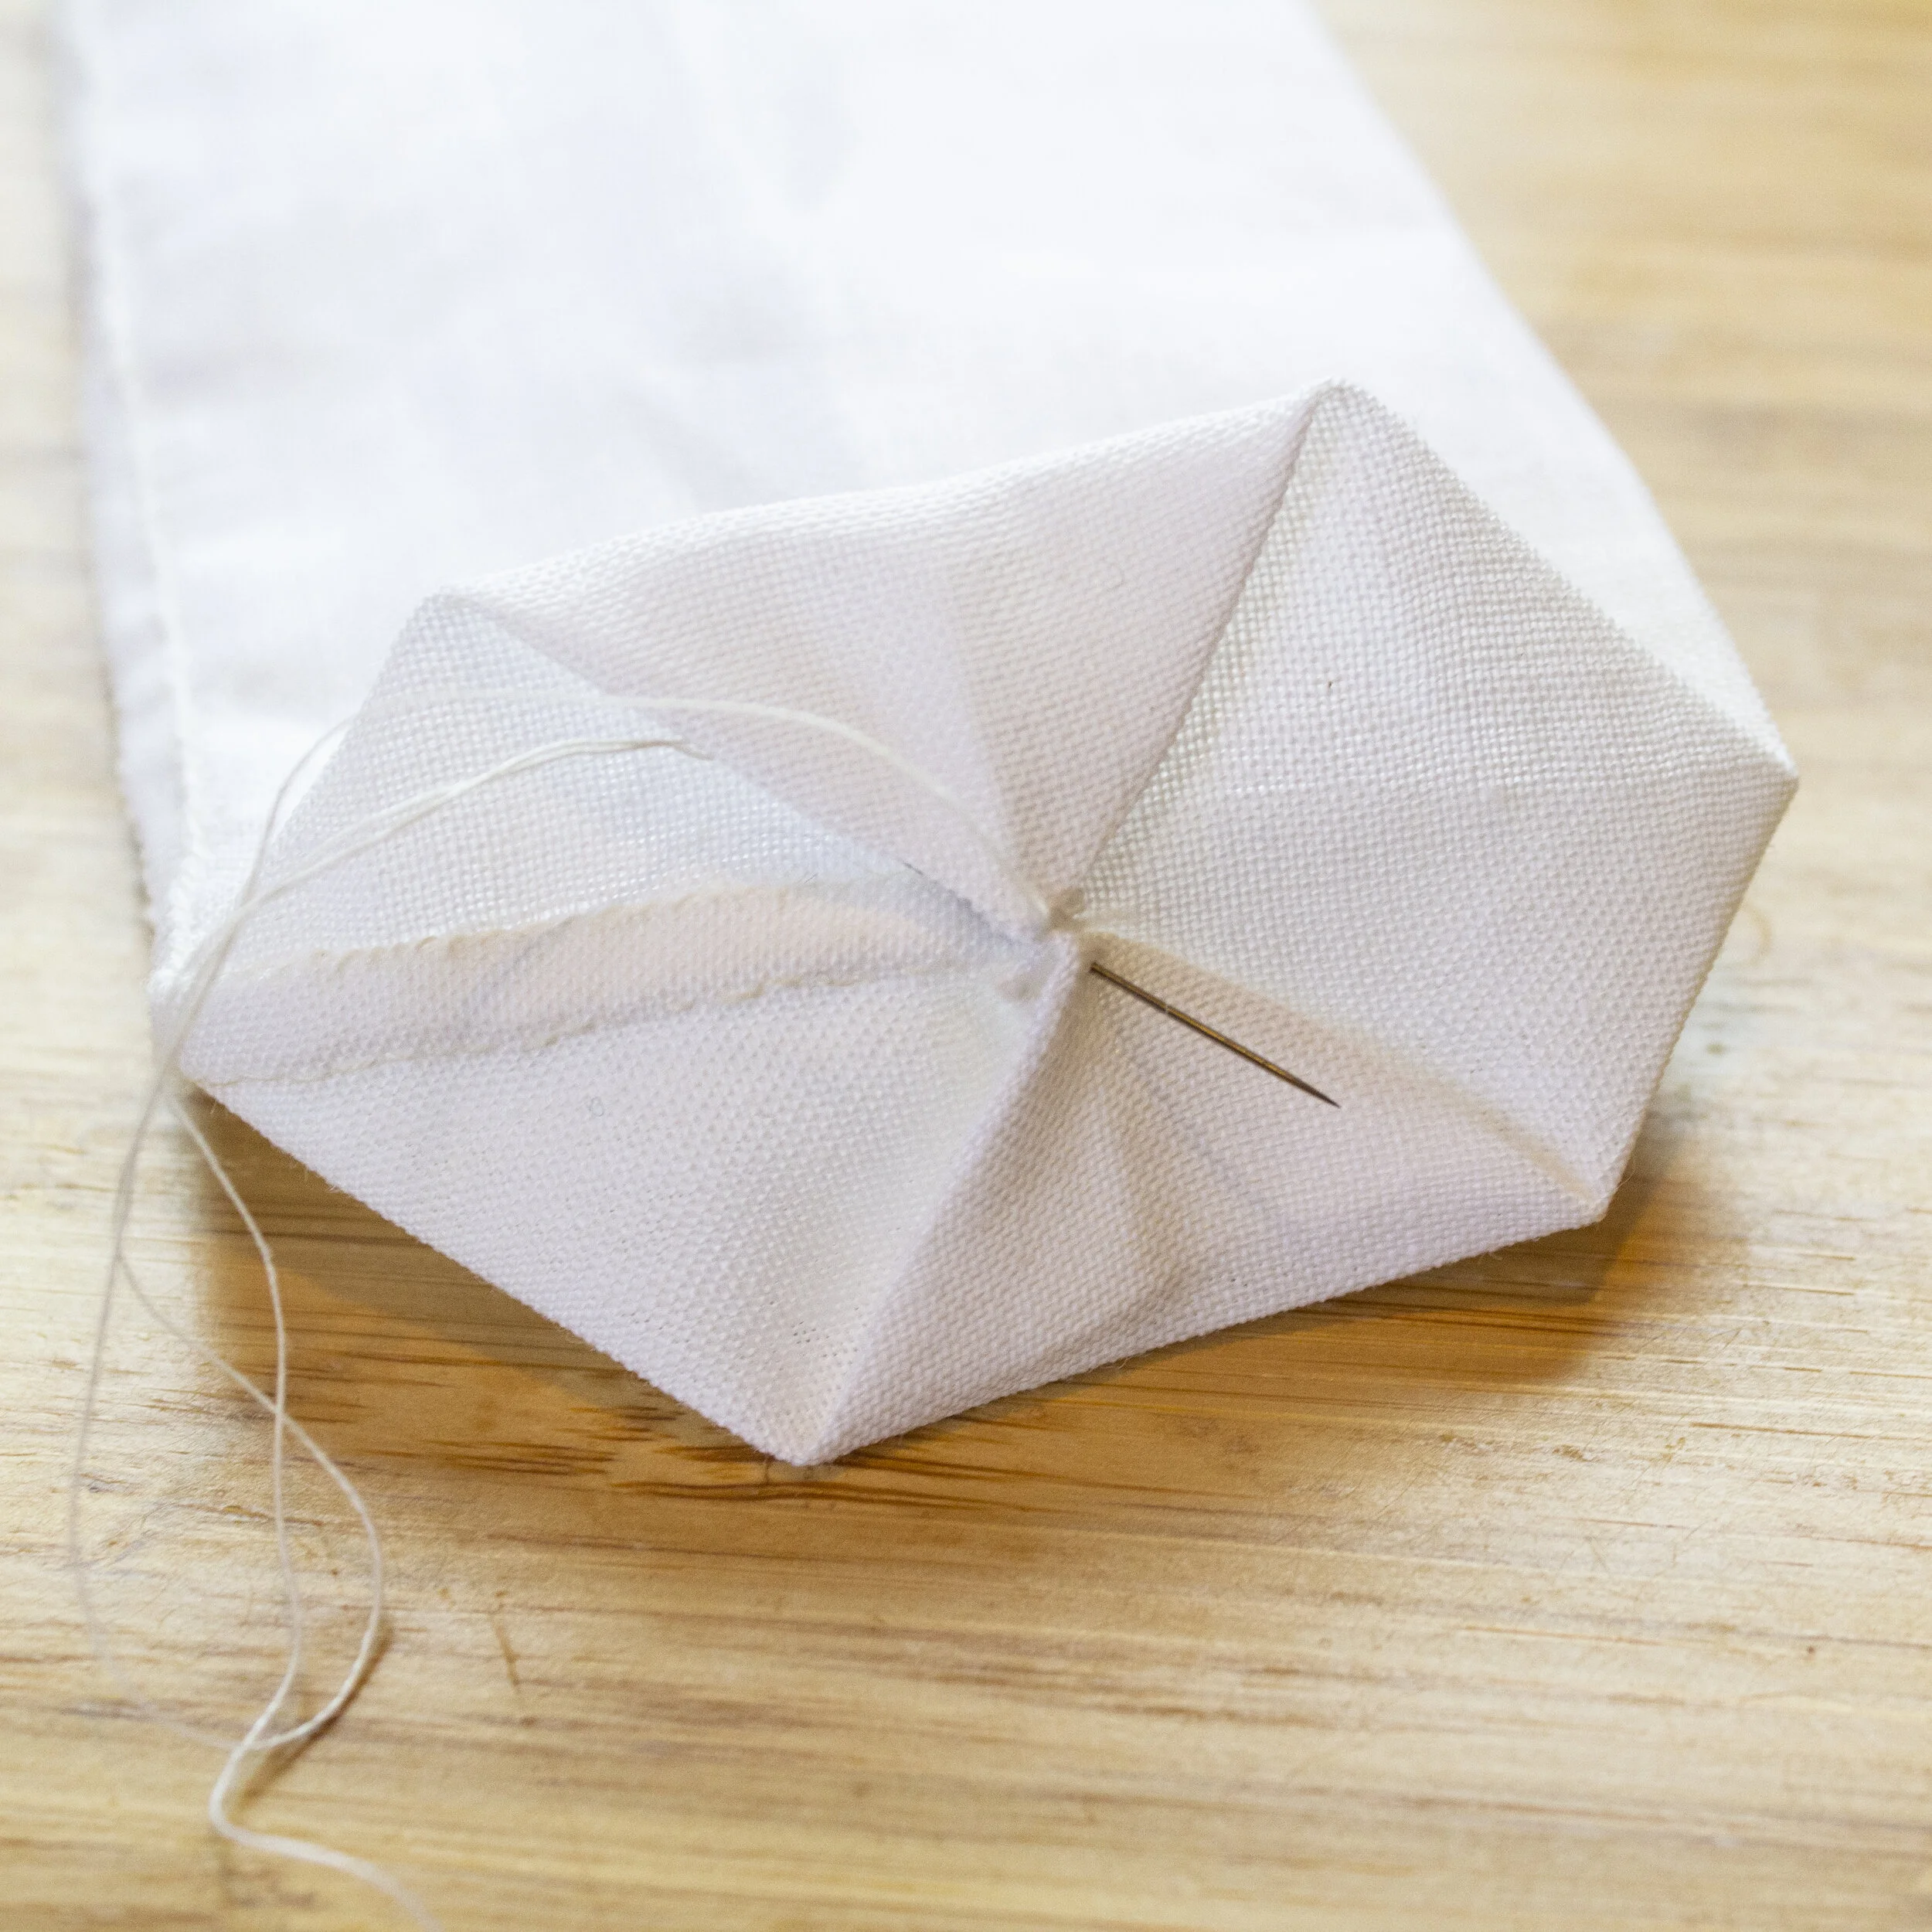
5. Stitch the two corners down to the middle, making sure that you do not stitch it to the other side of the bag.
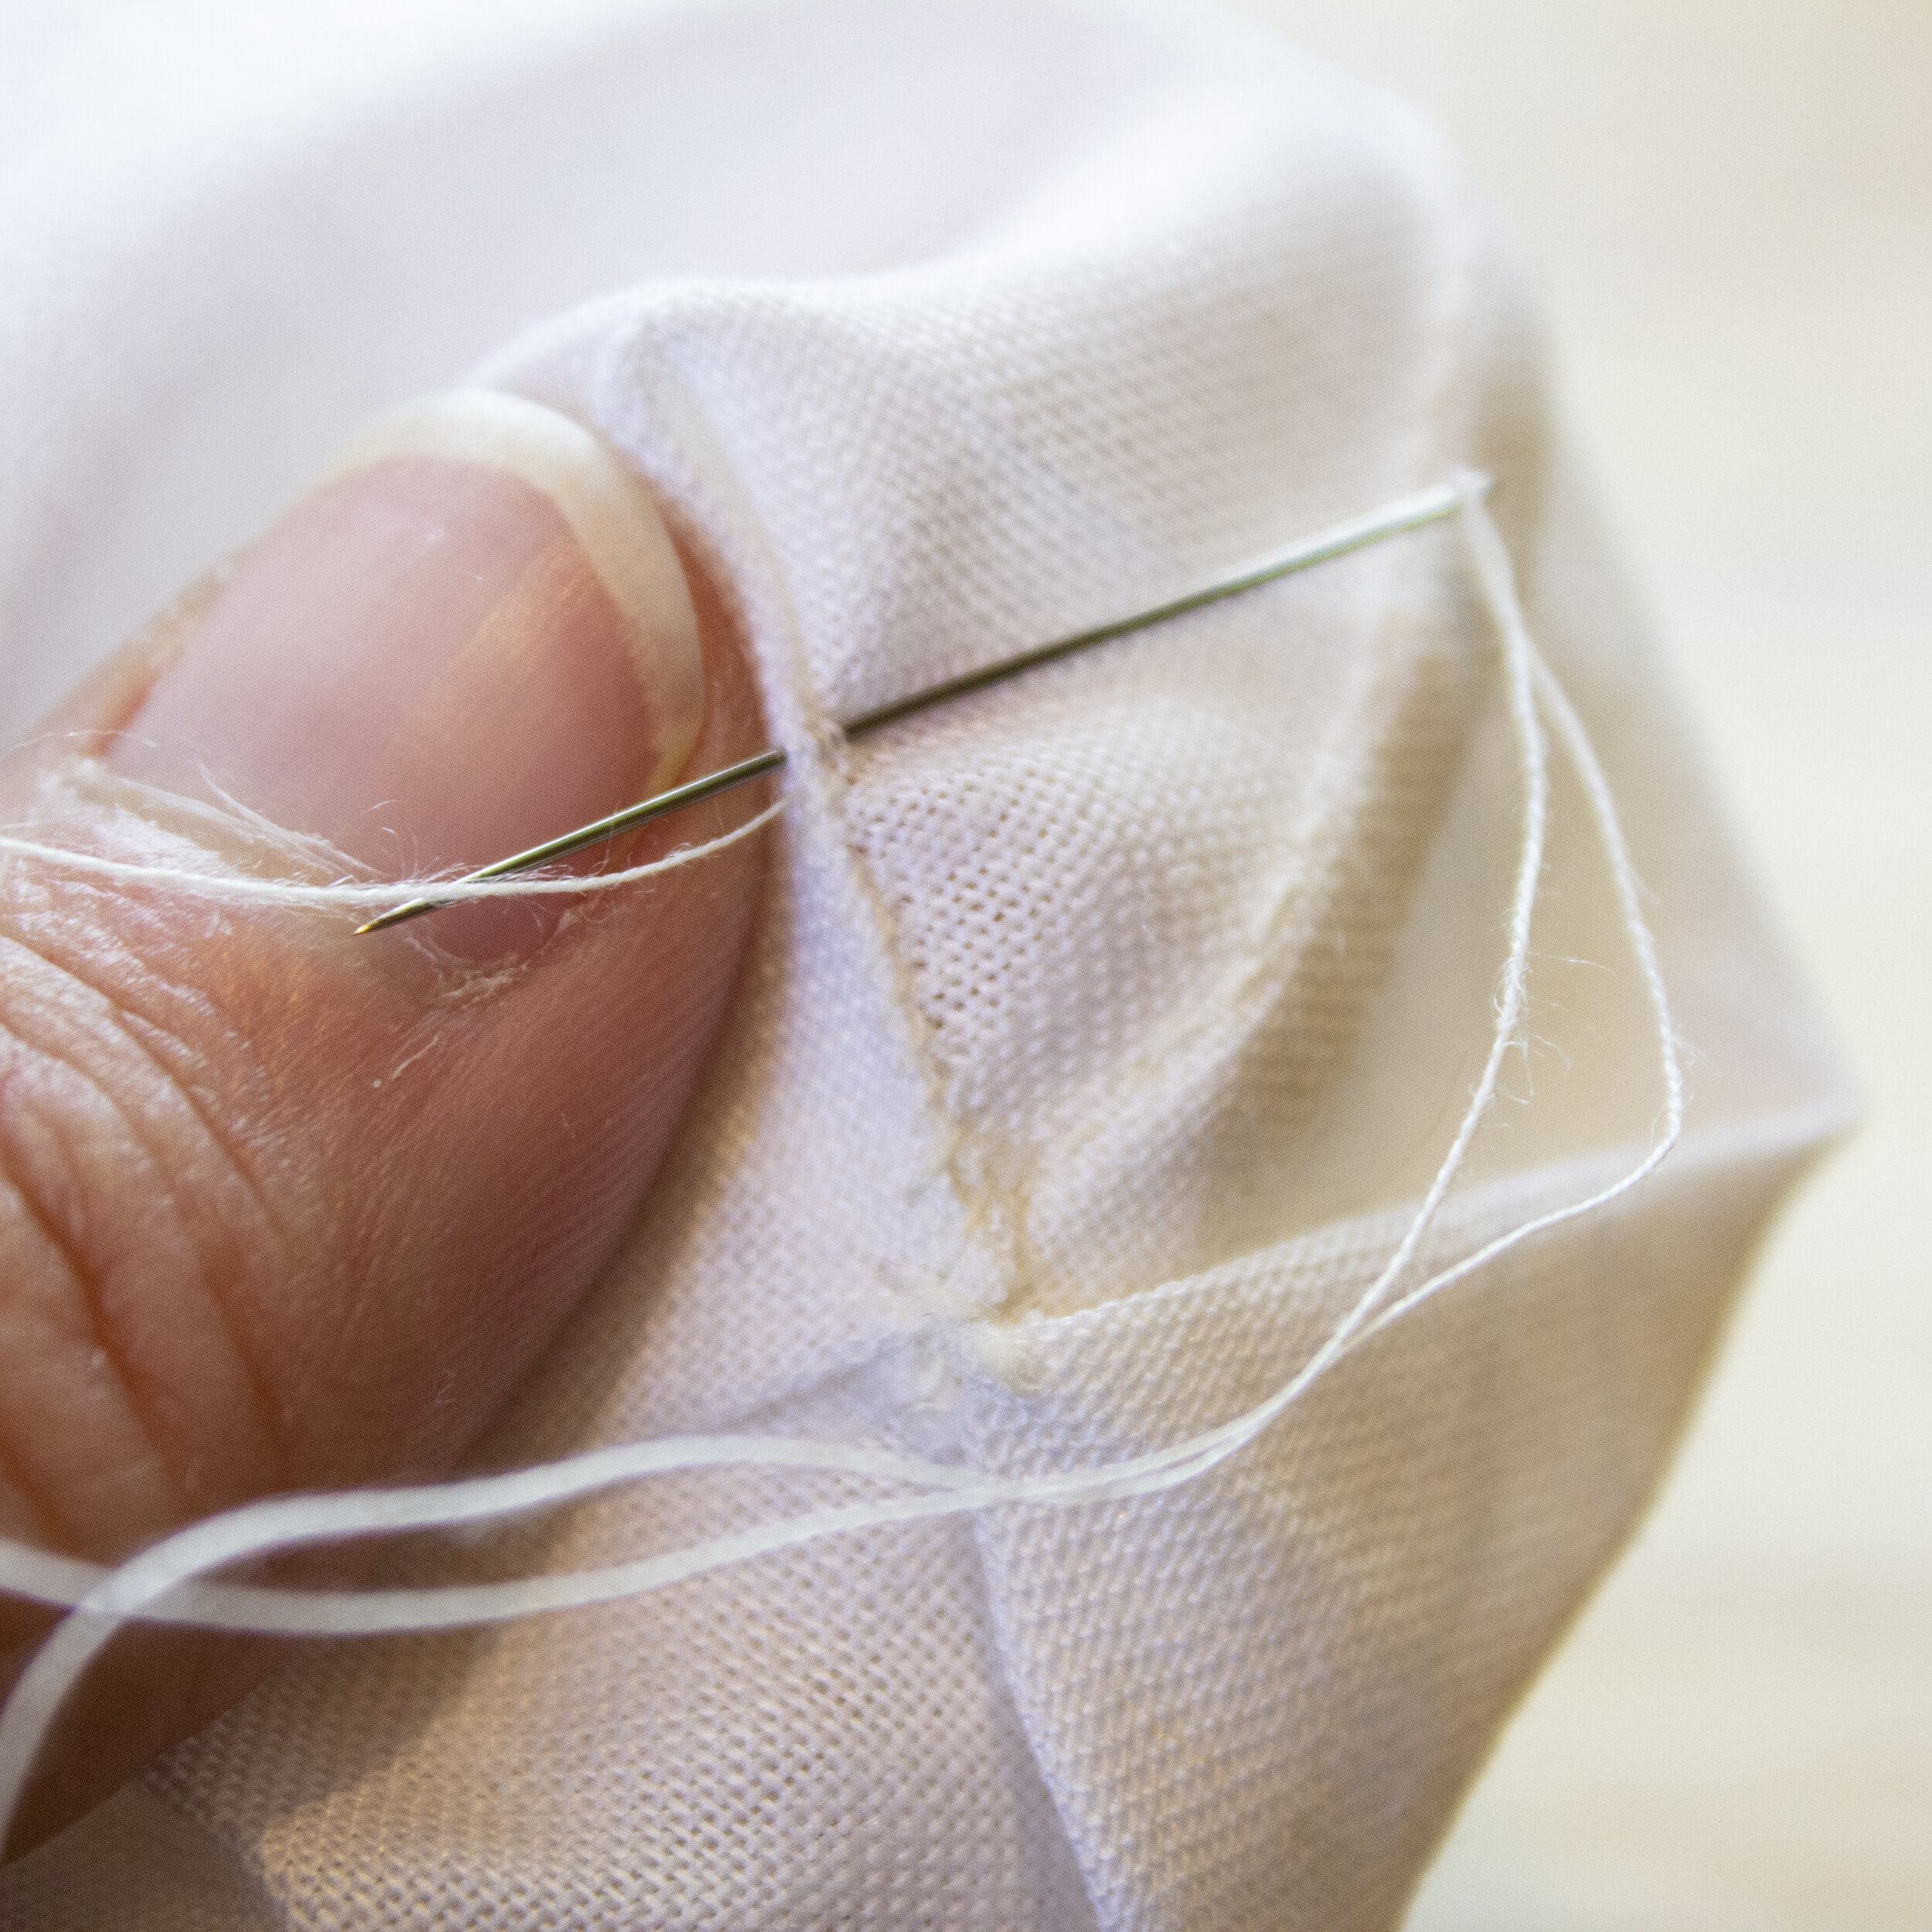
6. Enclose the triangle folds using a fell stitch so there are no open pockets.
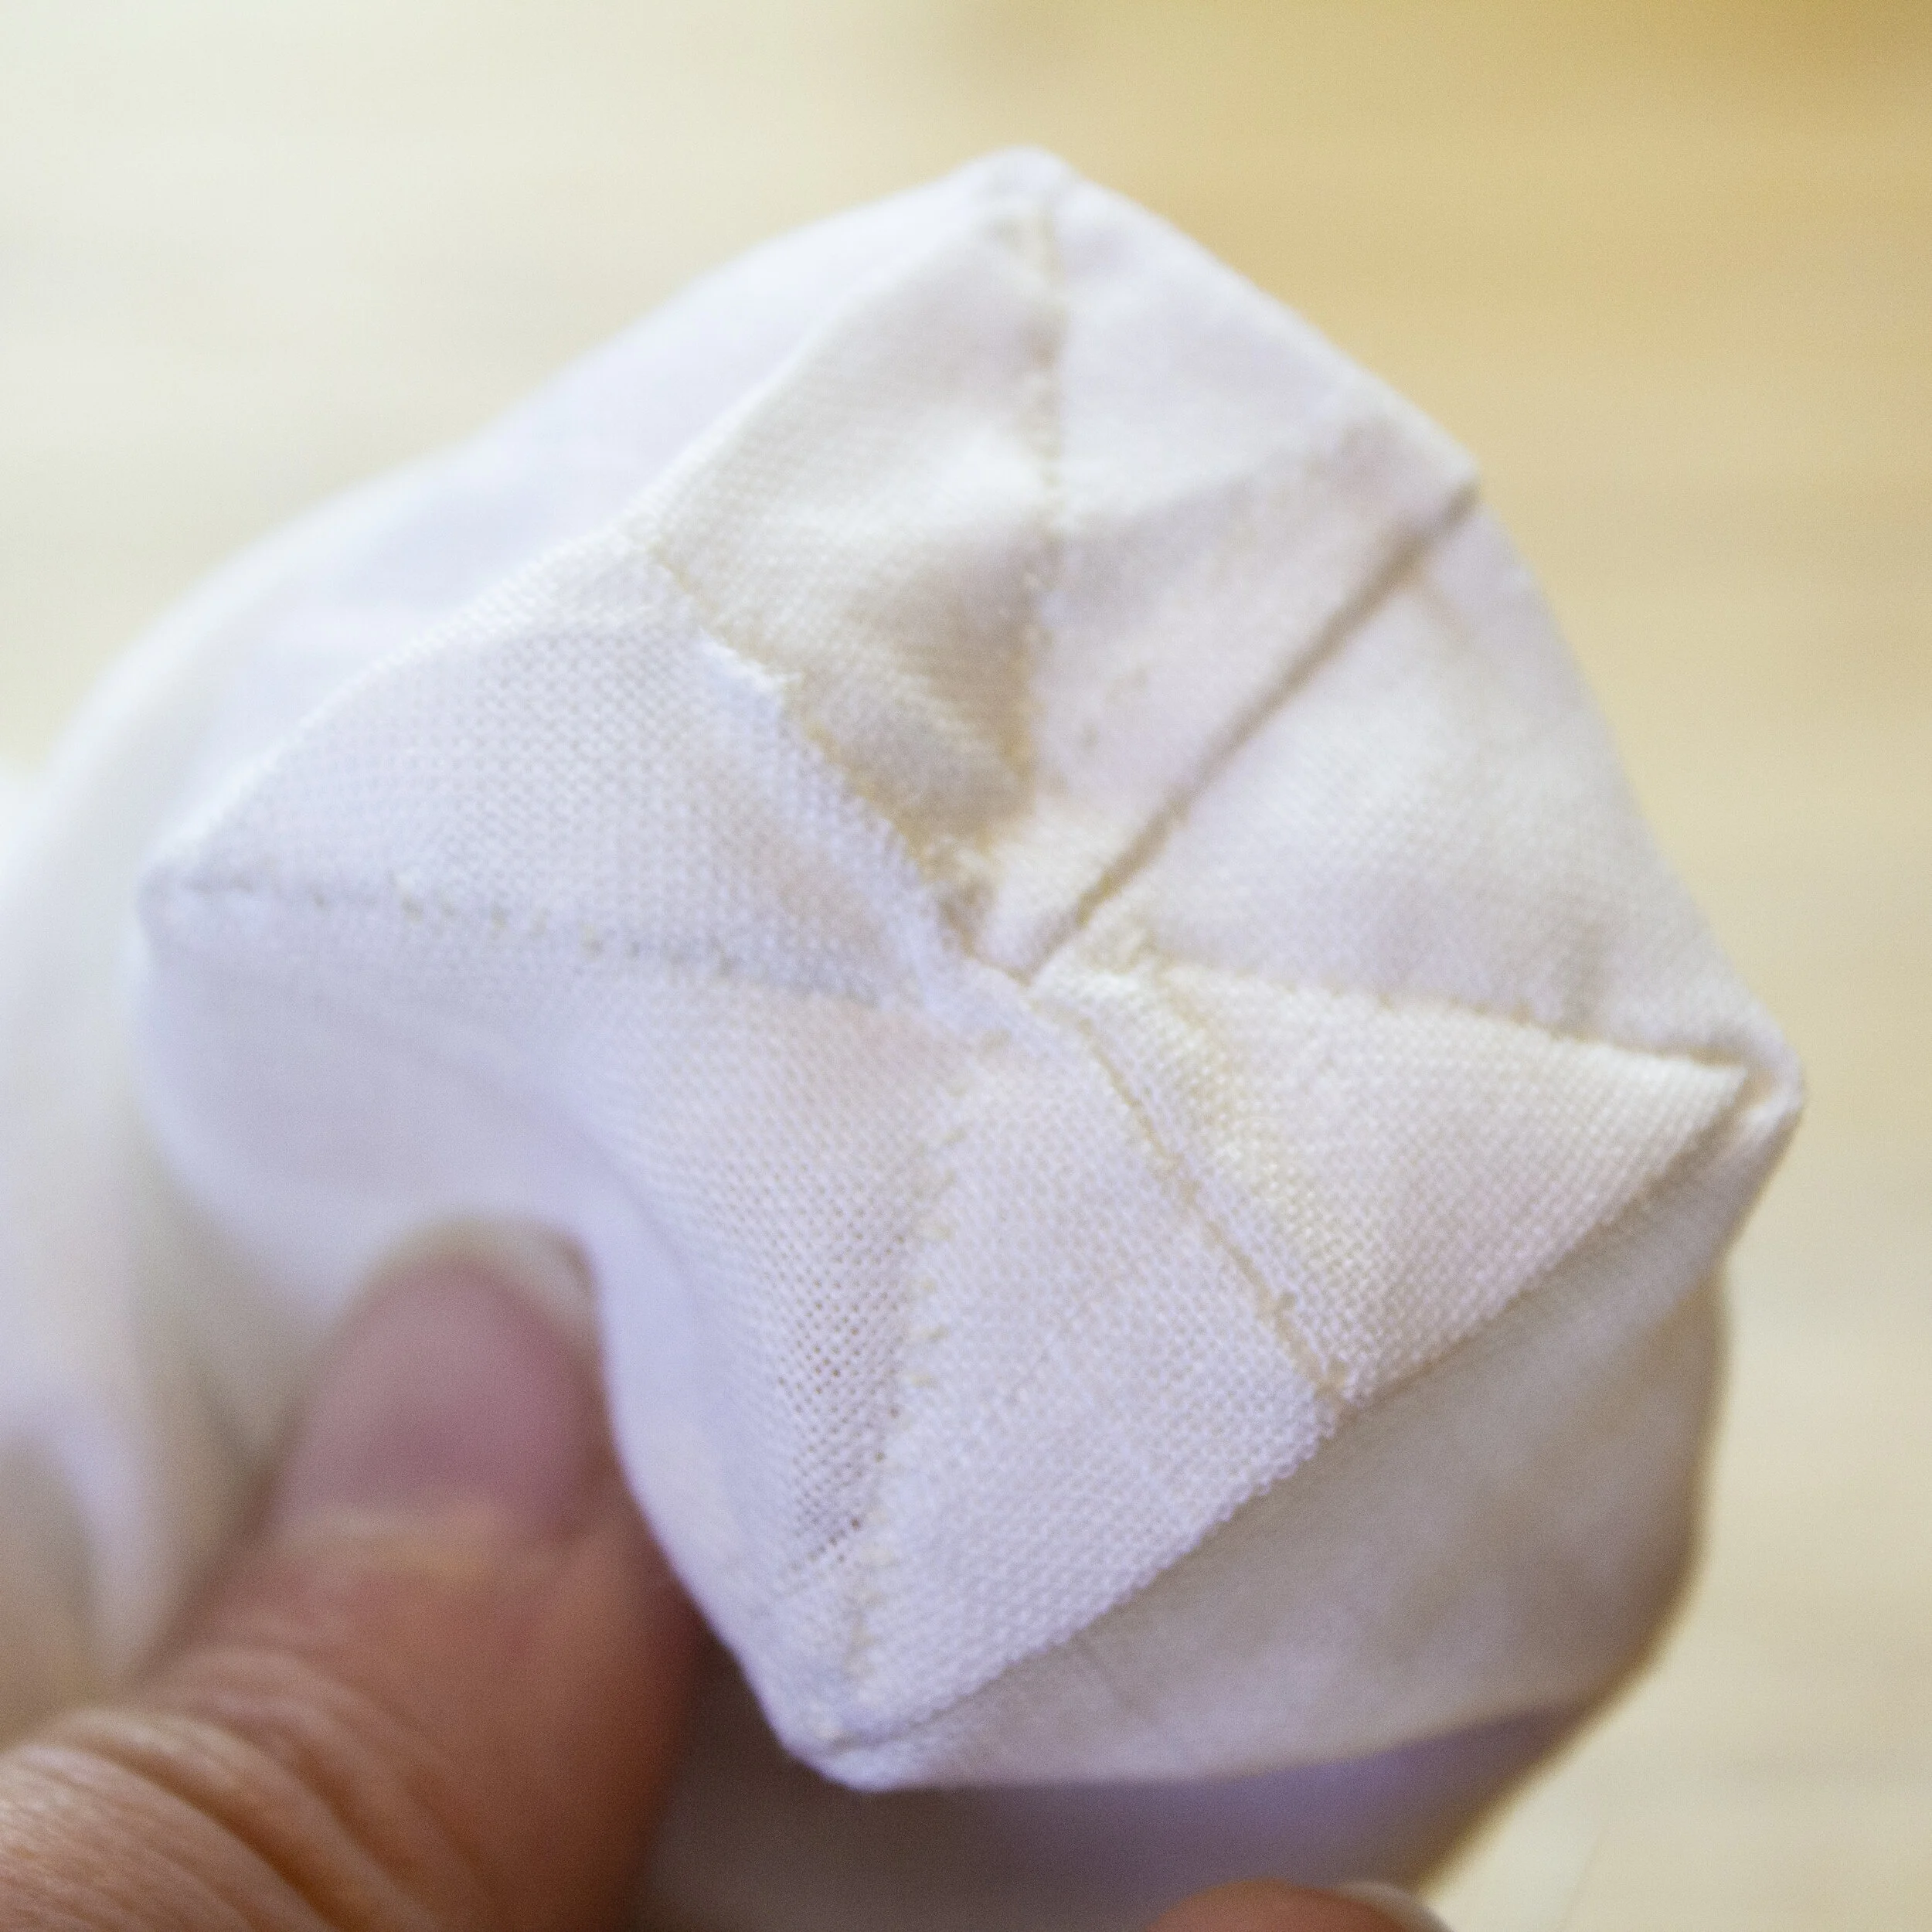
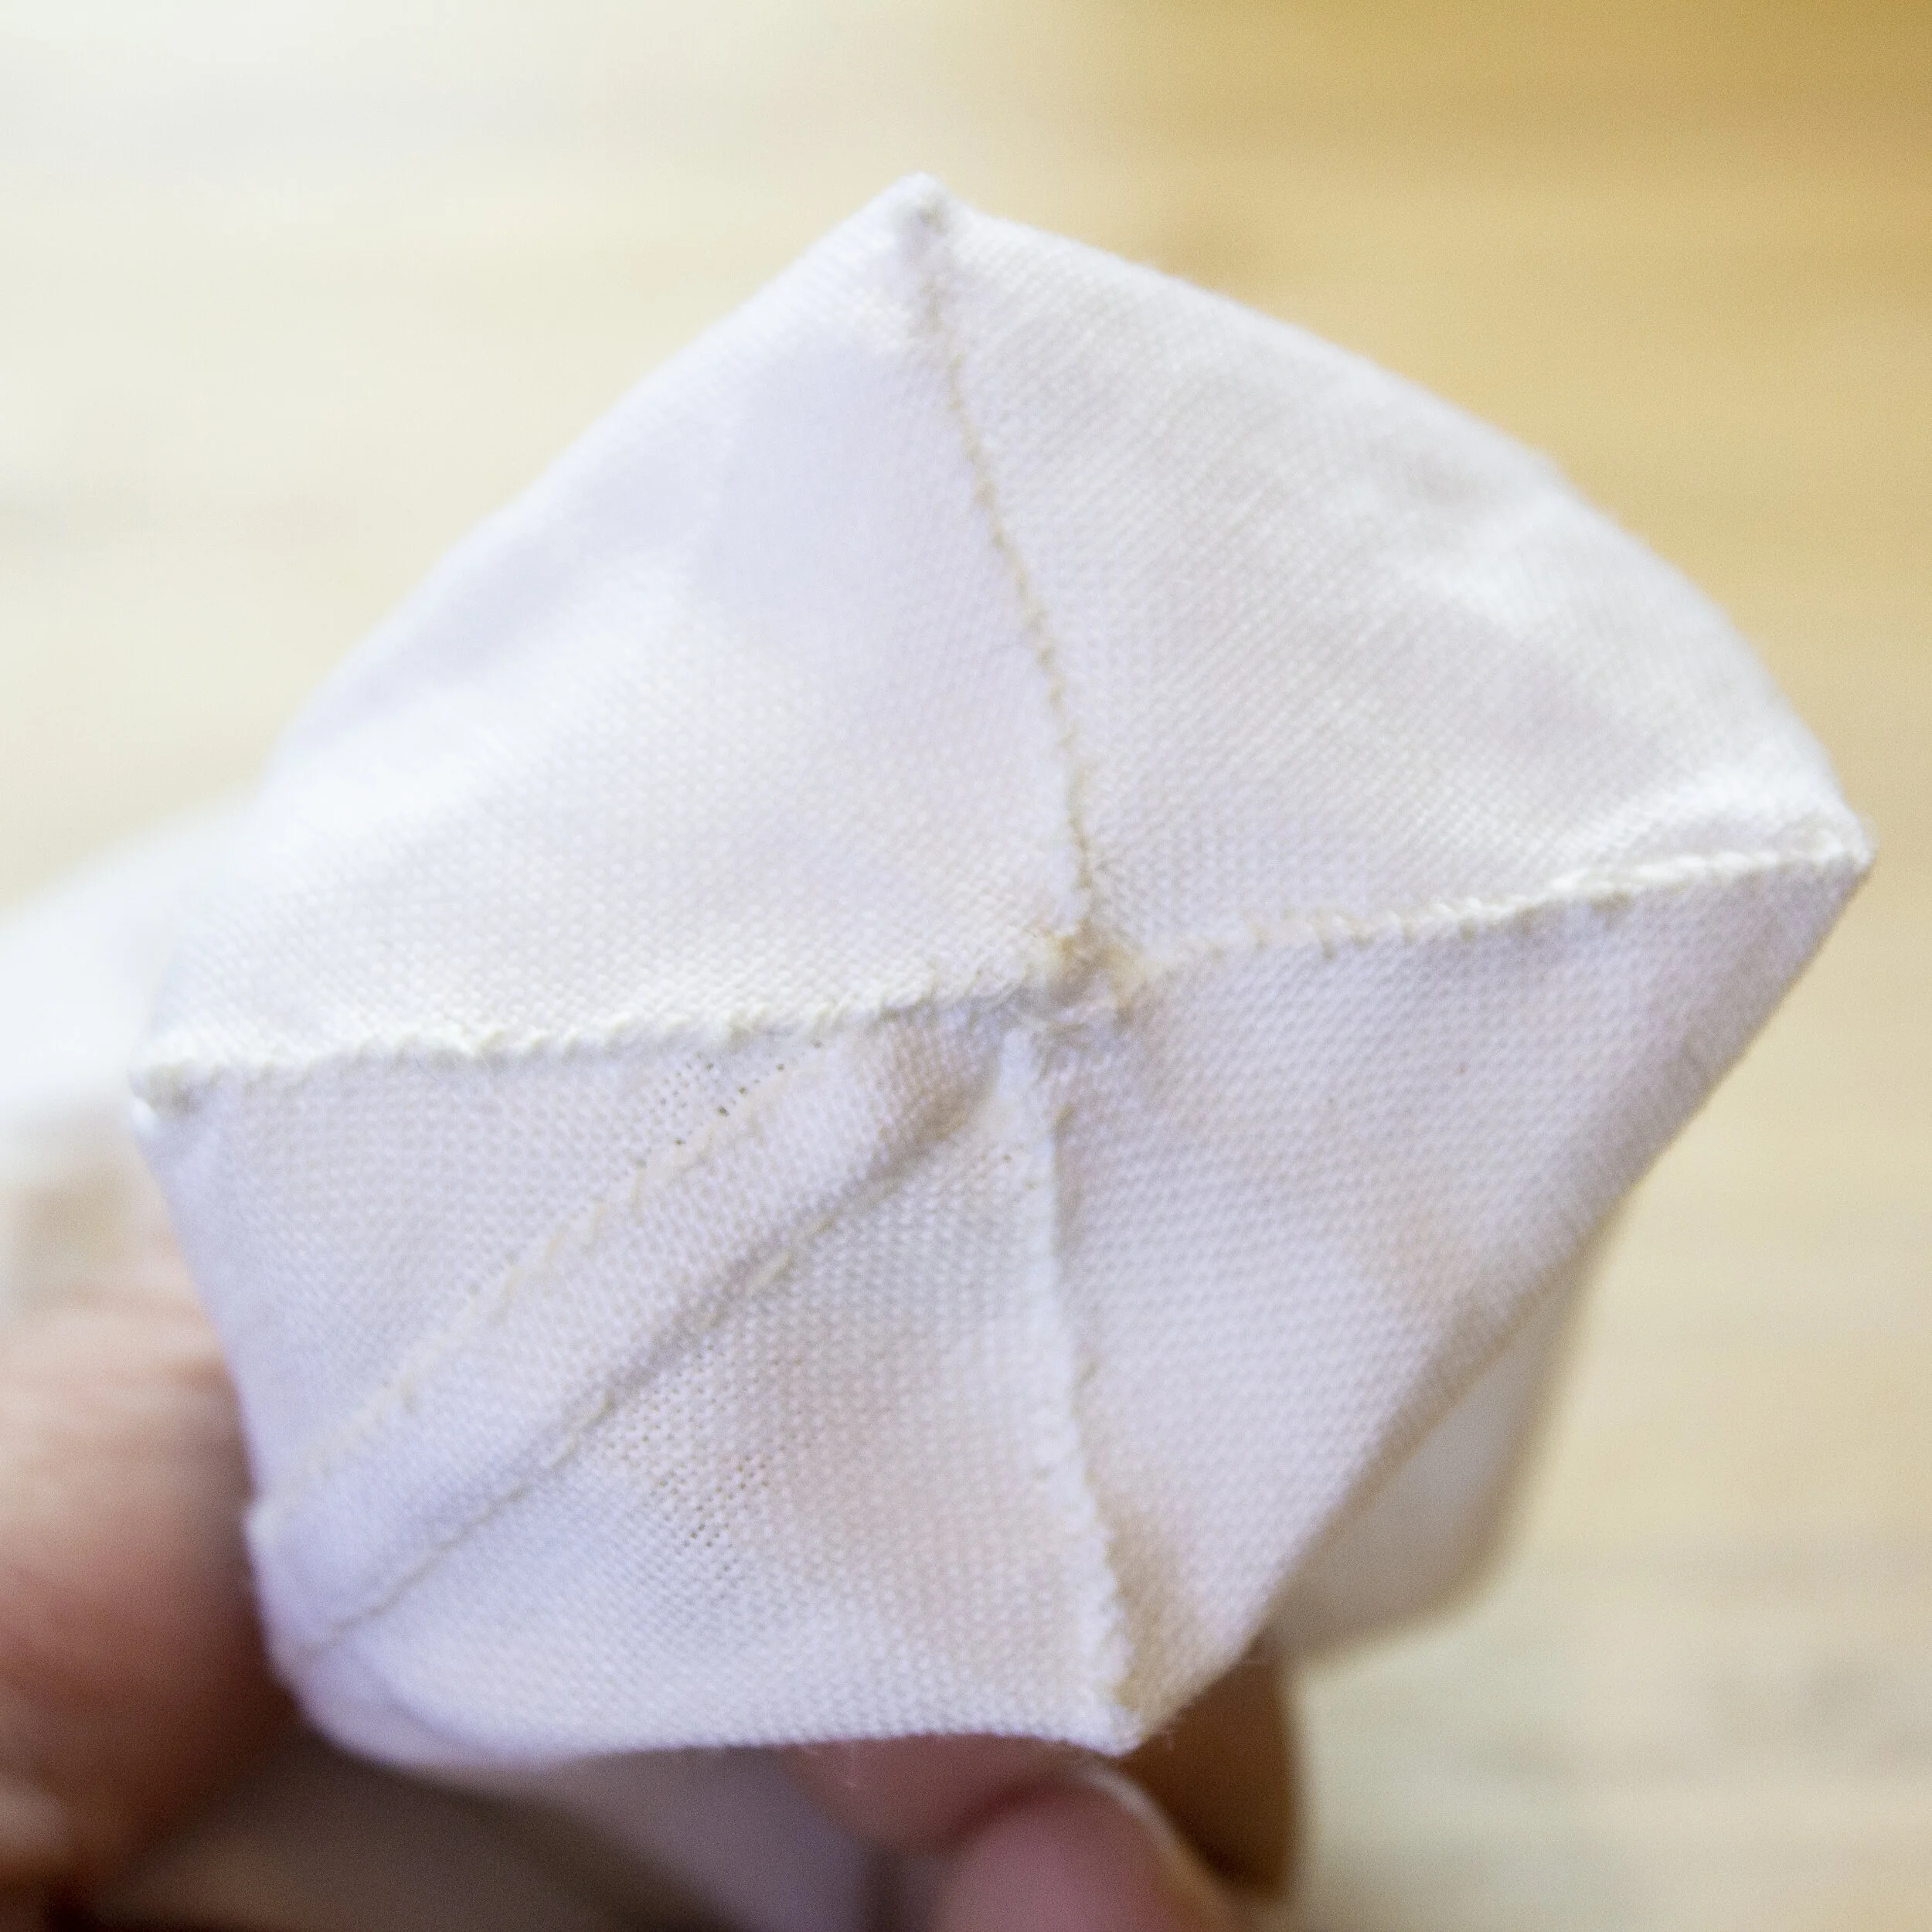
7. Flip the bag inside out, and using the fell stitch again, stitch the folded pockets on the bottom closed.
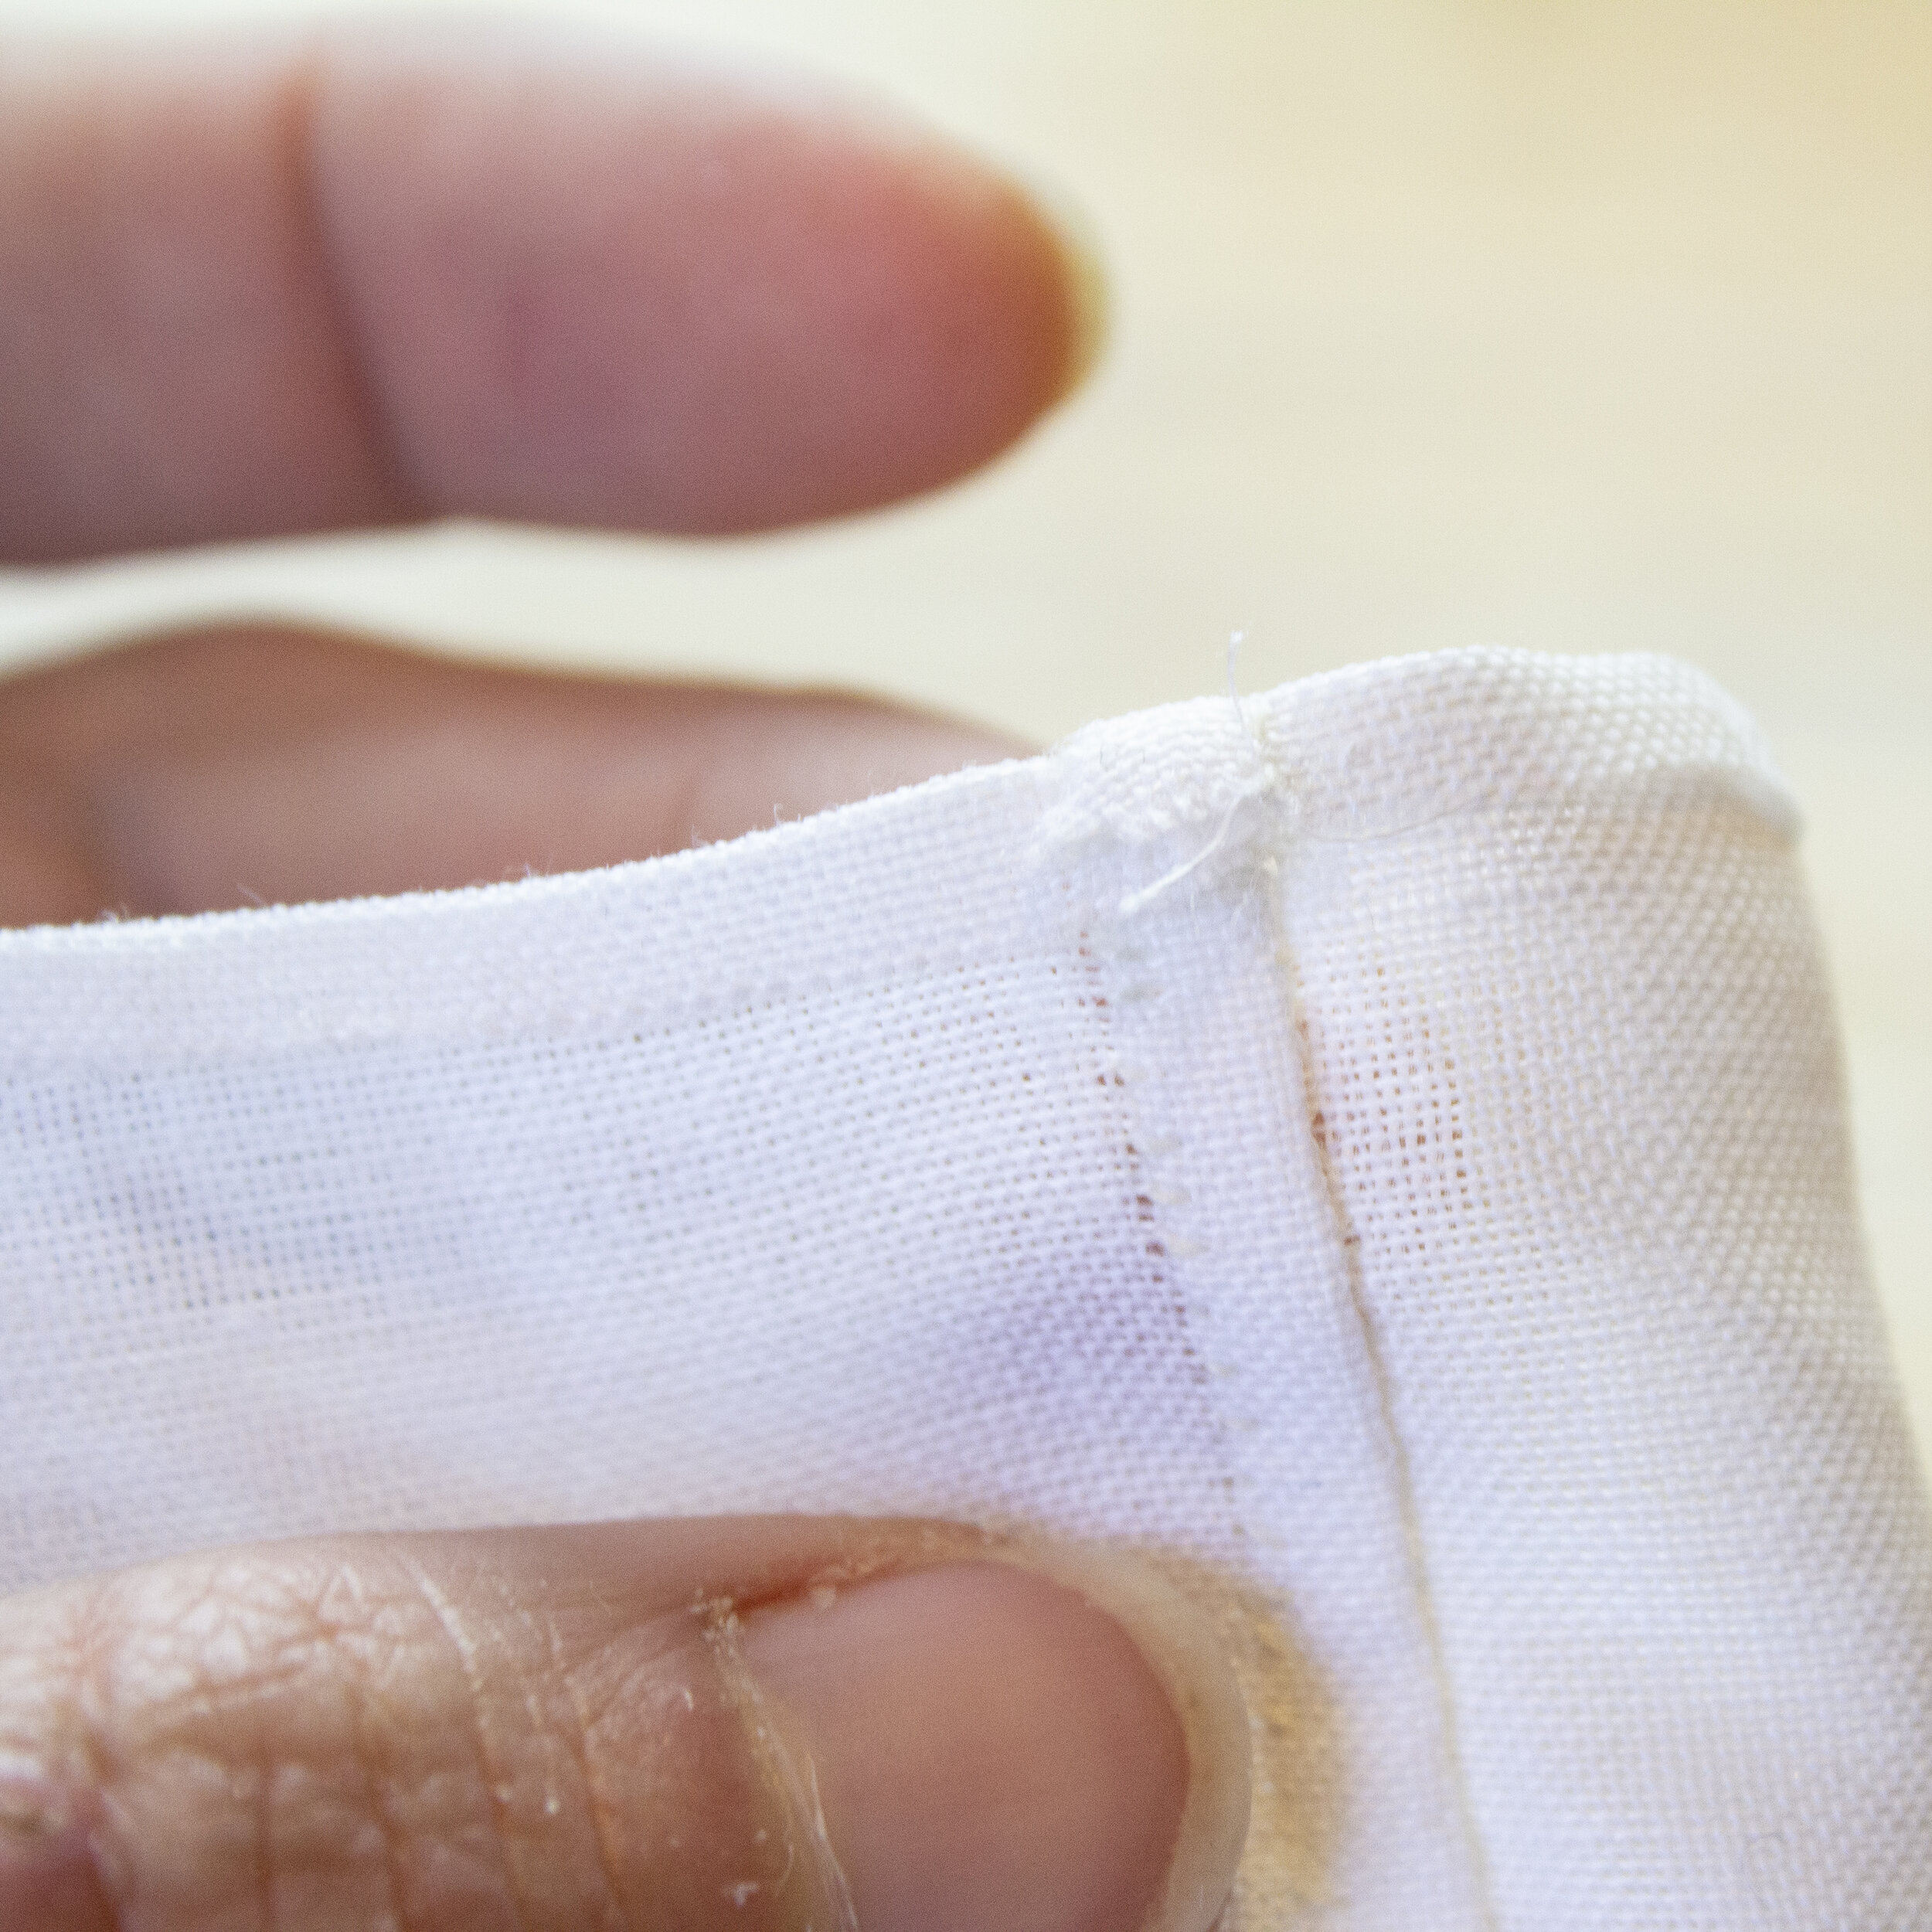
8. With the bag still inside-out, hem the top by folding the raw edge down 1/8th inch, and then fold it down again on top of itself to completely enclose the raw edge. Use the fell stitch to stitch it closed.
And that’s it, your basic tea bag is done! Below are some variations on how to use your new tea bag.
variations
Open Option #1 - String For Attaching To Mug

Take a short length of thick cotton thread (about 6 inches or longer if you plan to add decoration), like one used for Sashiko stitching or shuttle tatting, thread it through an embroidery needle. Knot one end, and pass the thread through the top hemmed edge. The triple layer of the hem will be better reinforced than a single layer of material. Remove the needle and tie a knot at the other end to keep it from fraying. You may attach a bead or button or something else at this end as decoration, since this will not be in the tea. This cord can then be used to tie the bag to the mug handle so it does not accidentally fall into the mug, thus making it easy to retrieve.
Open Option #2 - Loops For Suspending The Bag

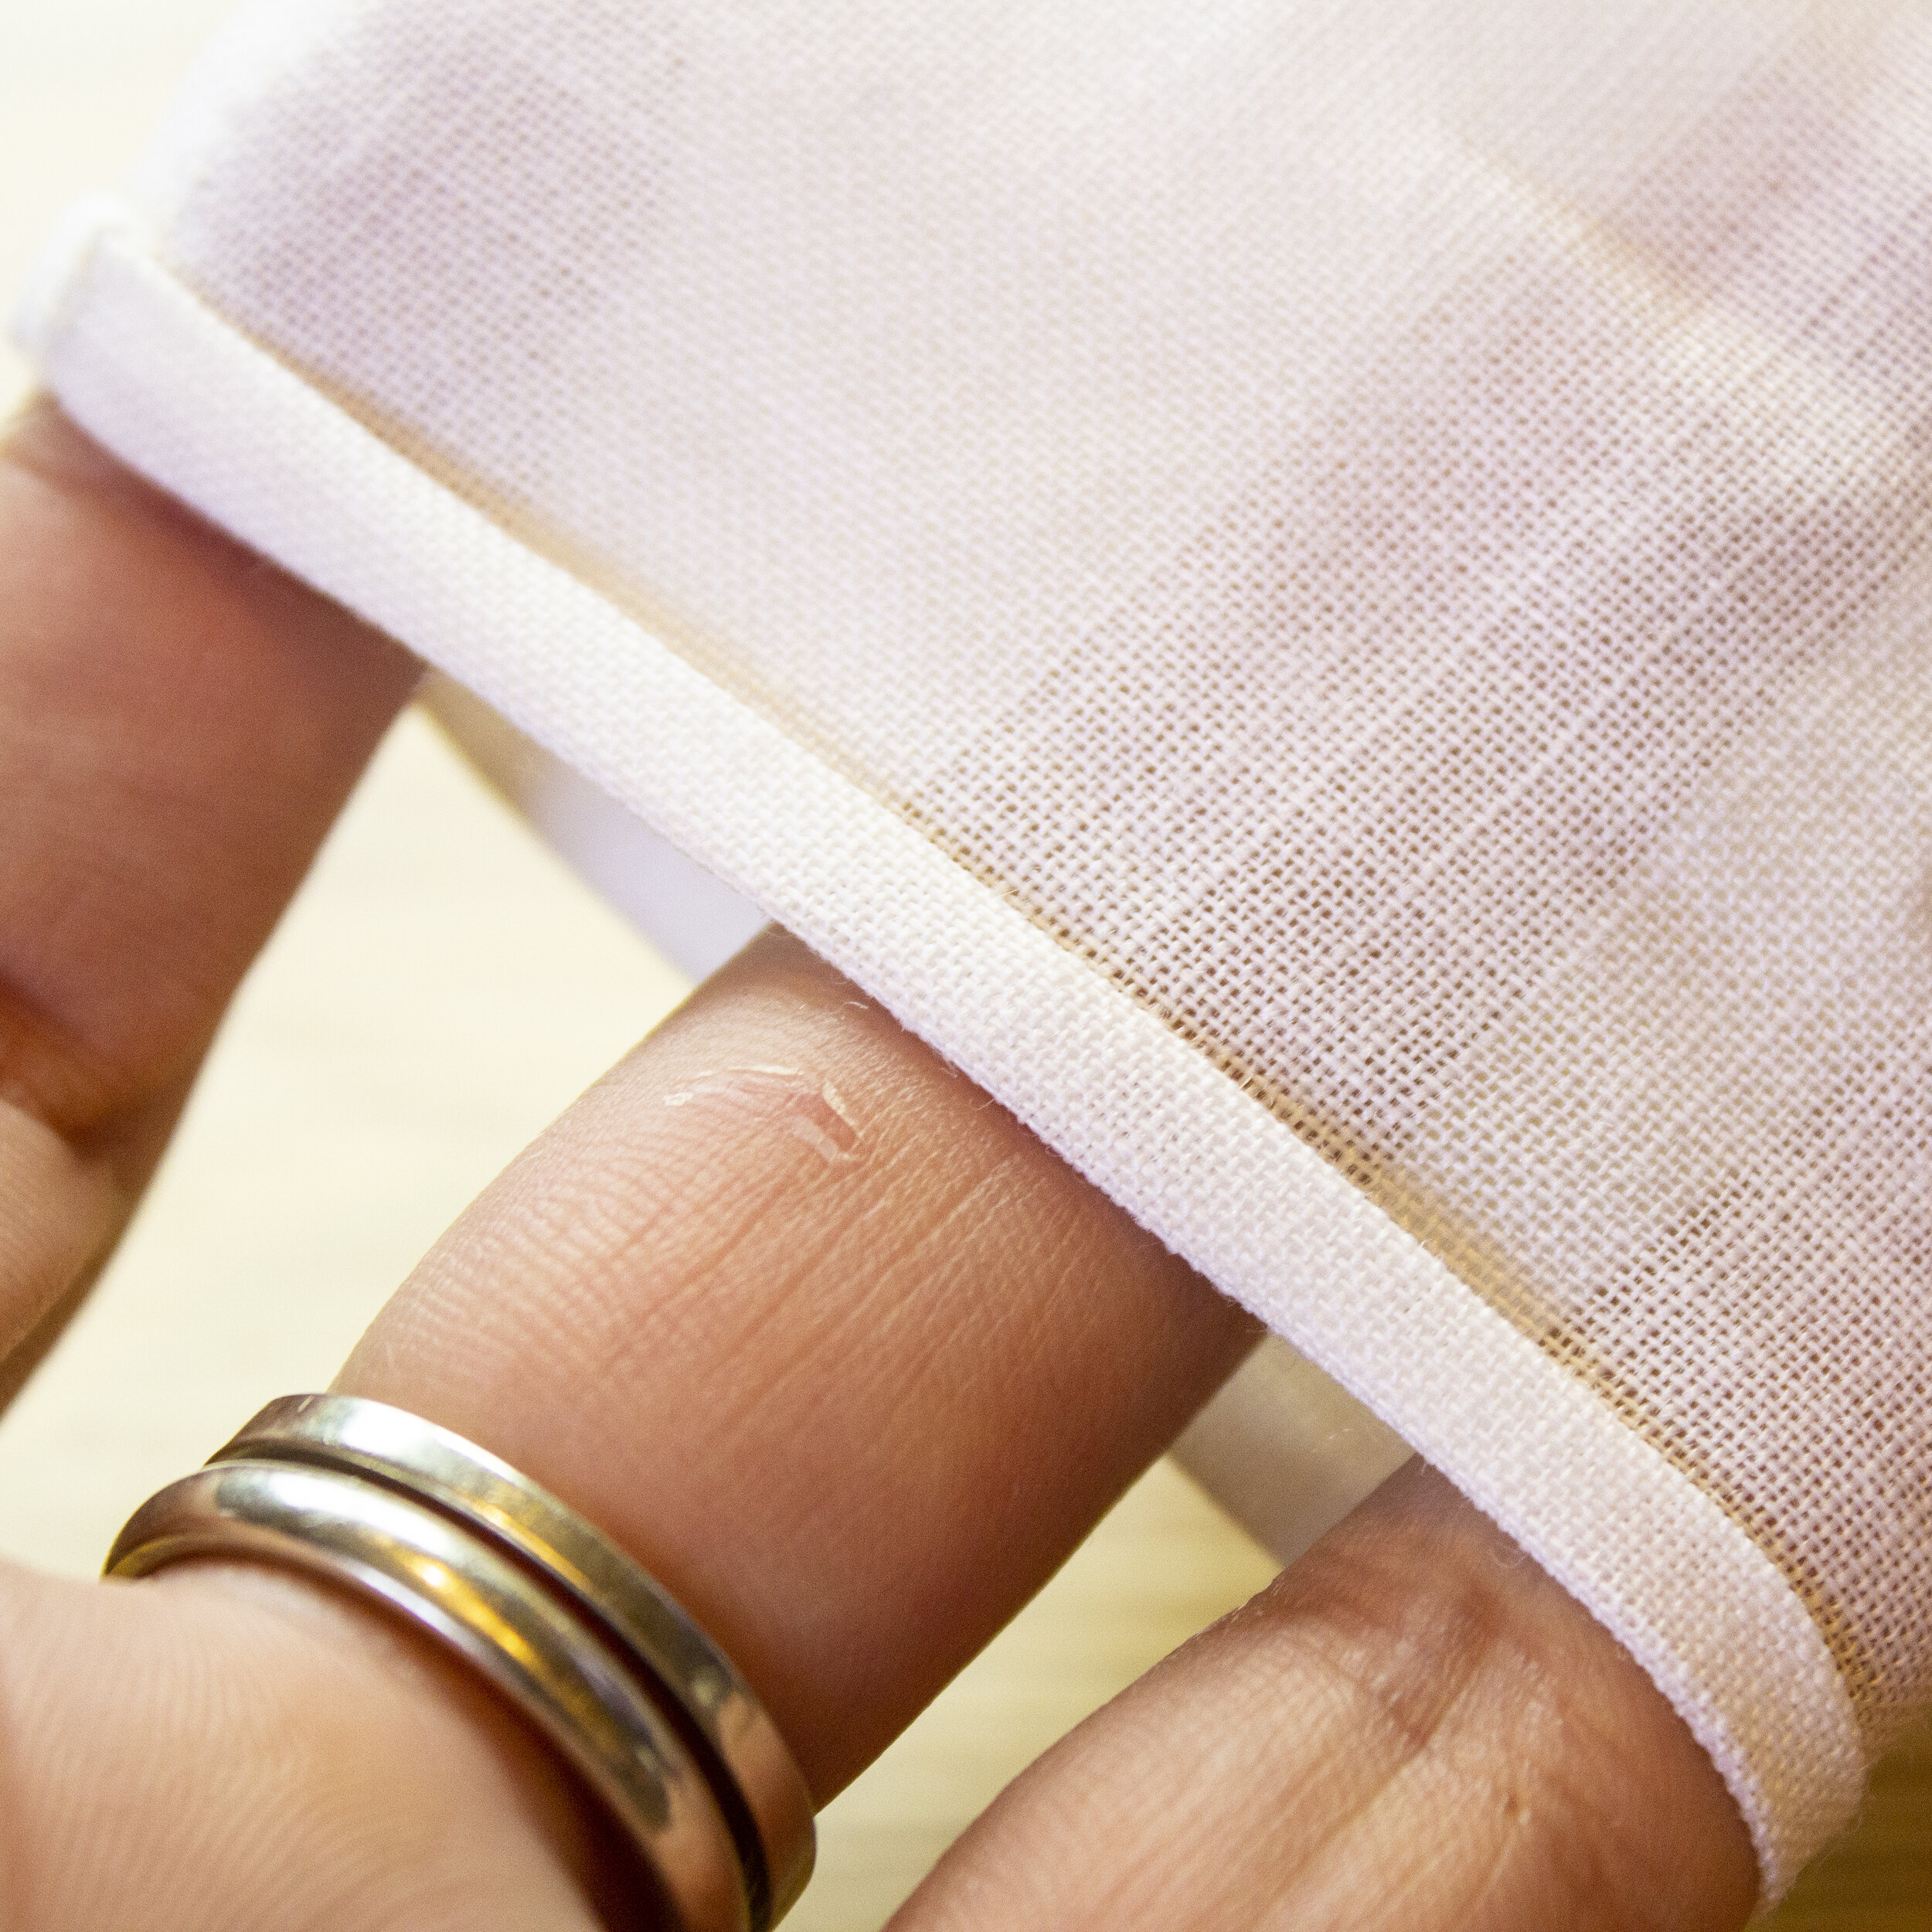
This is my favorite of the two open options. Grab your favorite tea mug and place your tea bag inside, folding the bag down like a cuff on the outside so it is the right height - enough room to suspend the bag without touching the bottom.

Thread some thick cotton string onto an embroidery needle, knotting one end, and pass it through the cuff, about 1/8th inch from the edge. Take the stick you plan on using, whether it is a skewer, pencil, branch, etc. and use it as a guide to make sure your hoops are large enough to allow you to pass the stick through easily but still allow you to suspend the bag within the cup. Bring the thread back in from the outside and knot the other end.
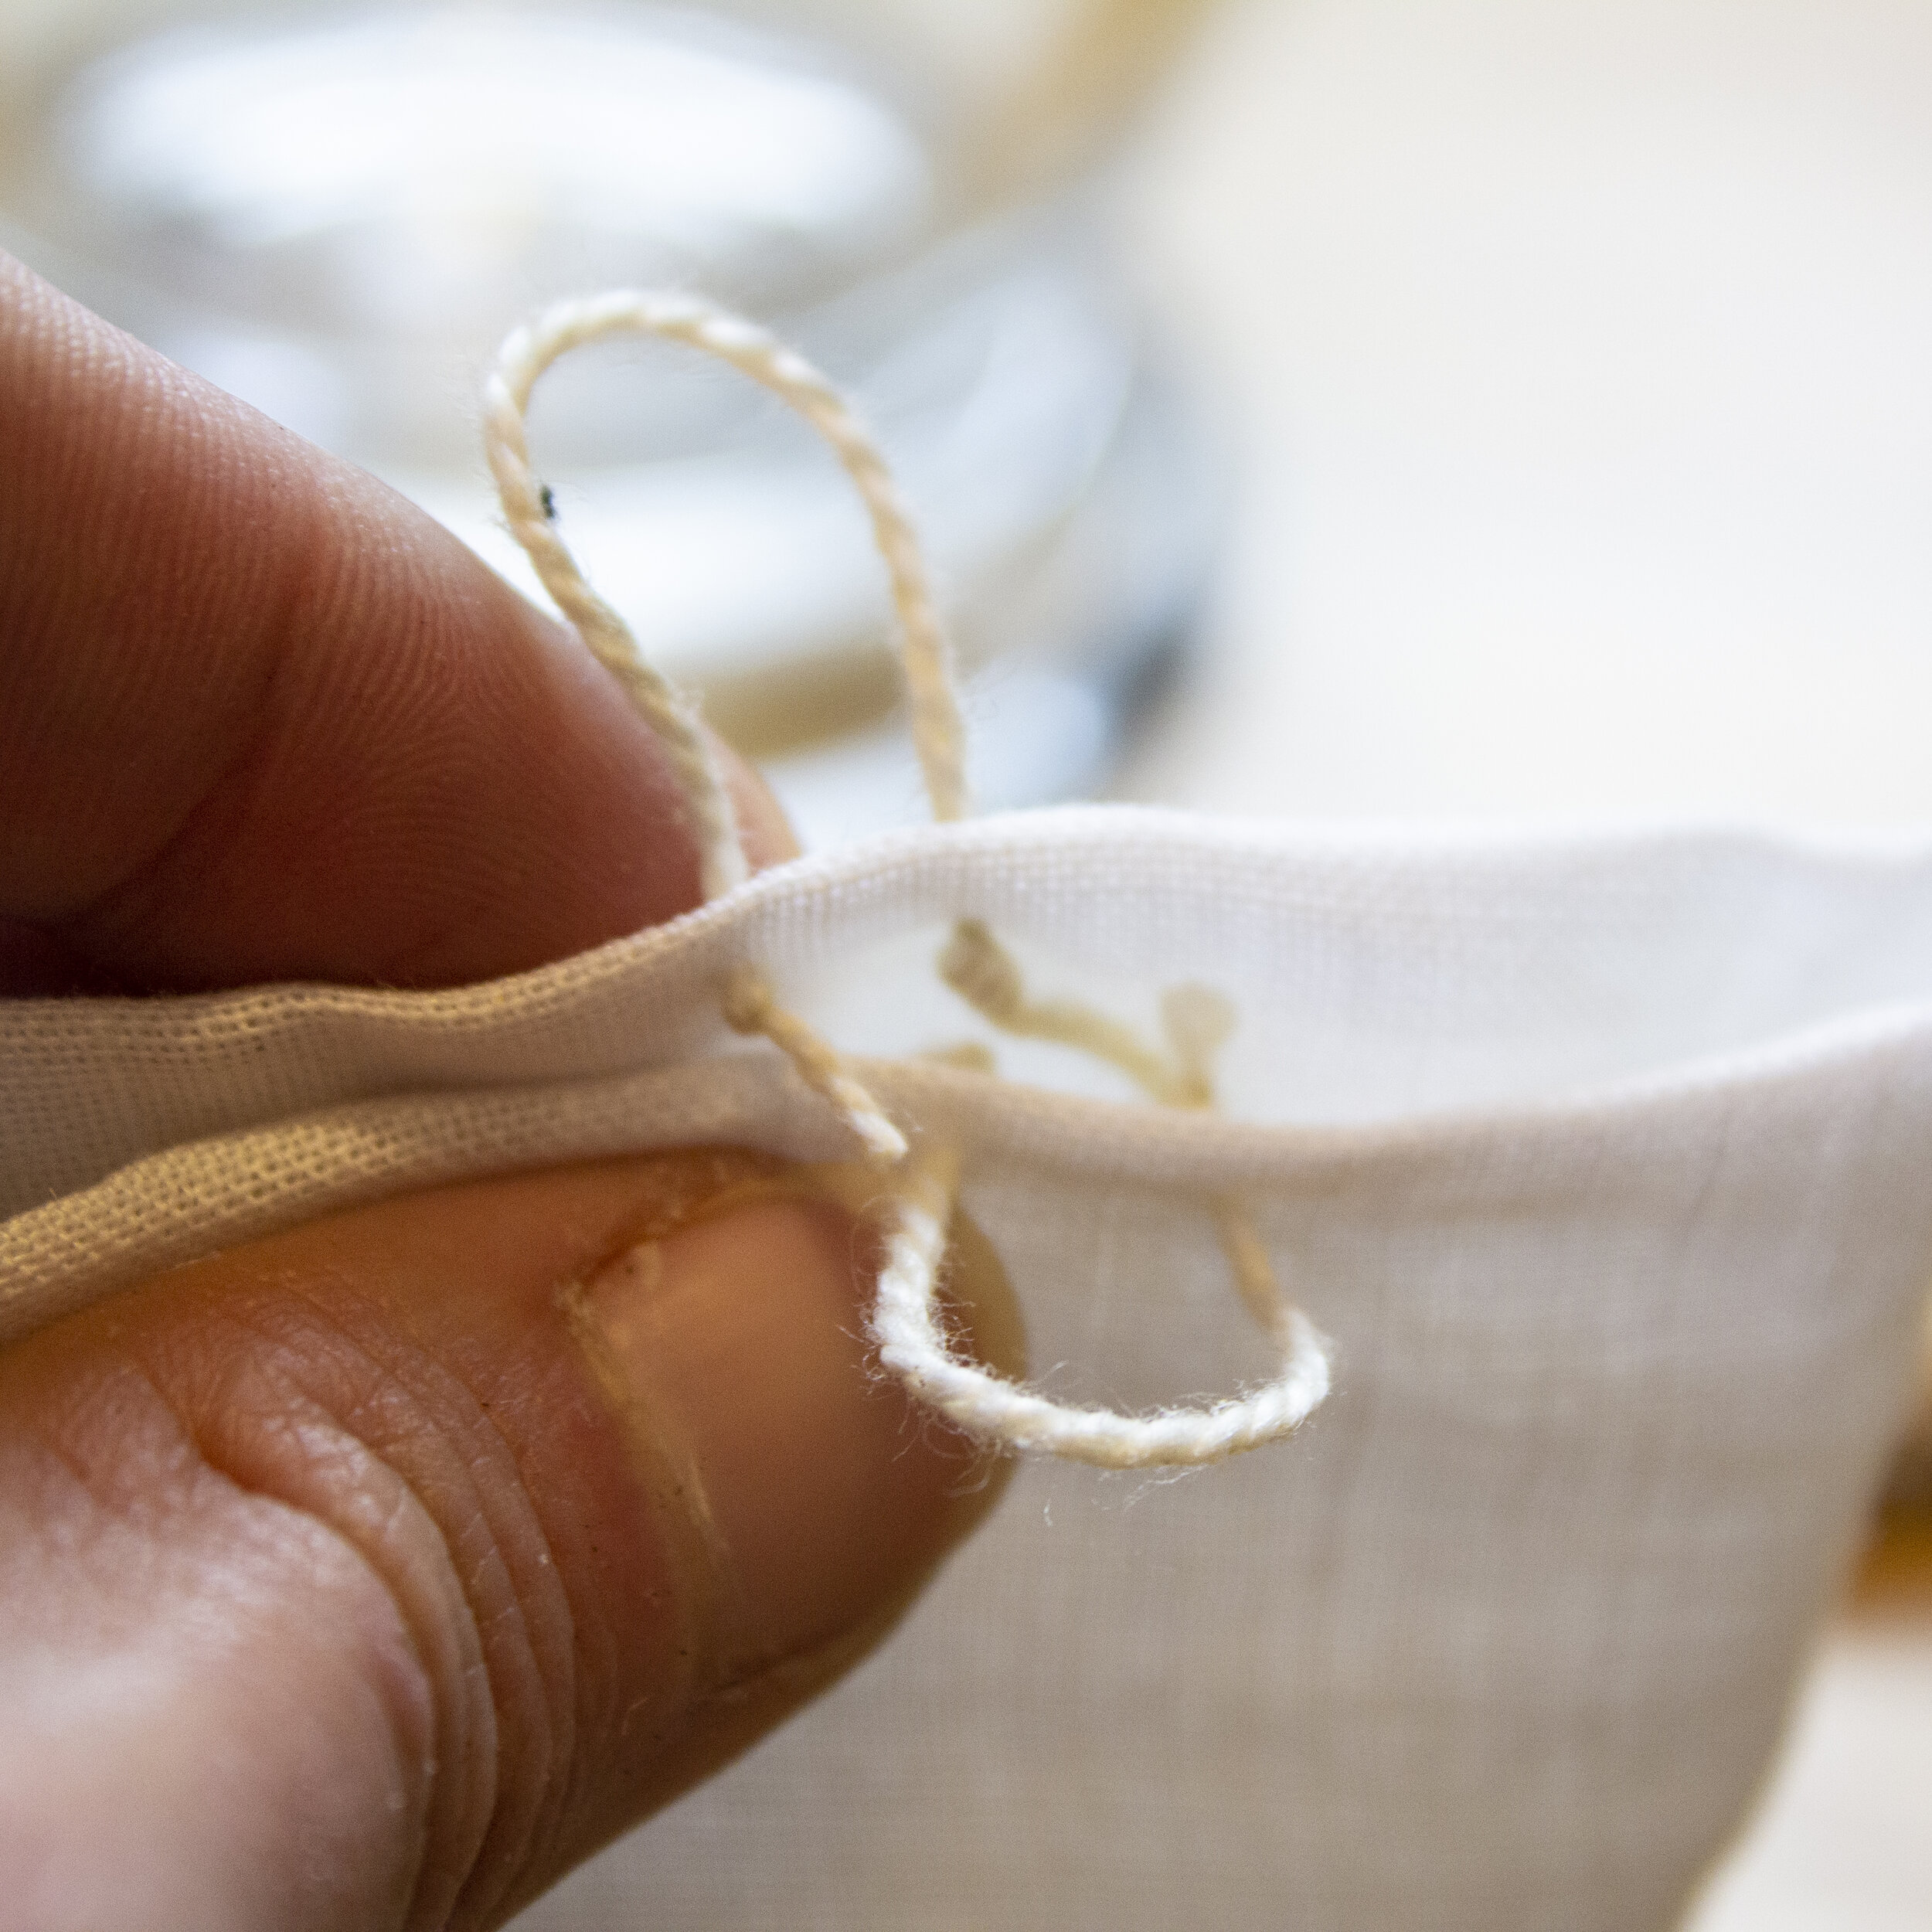
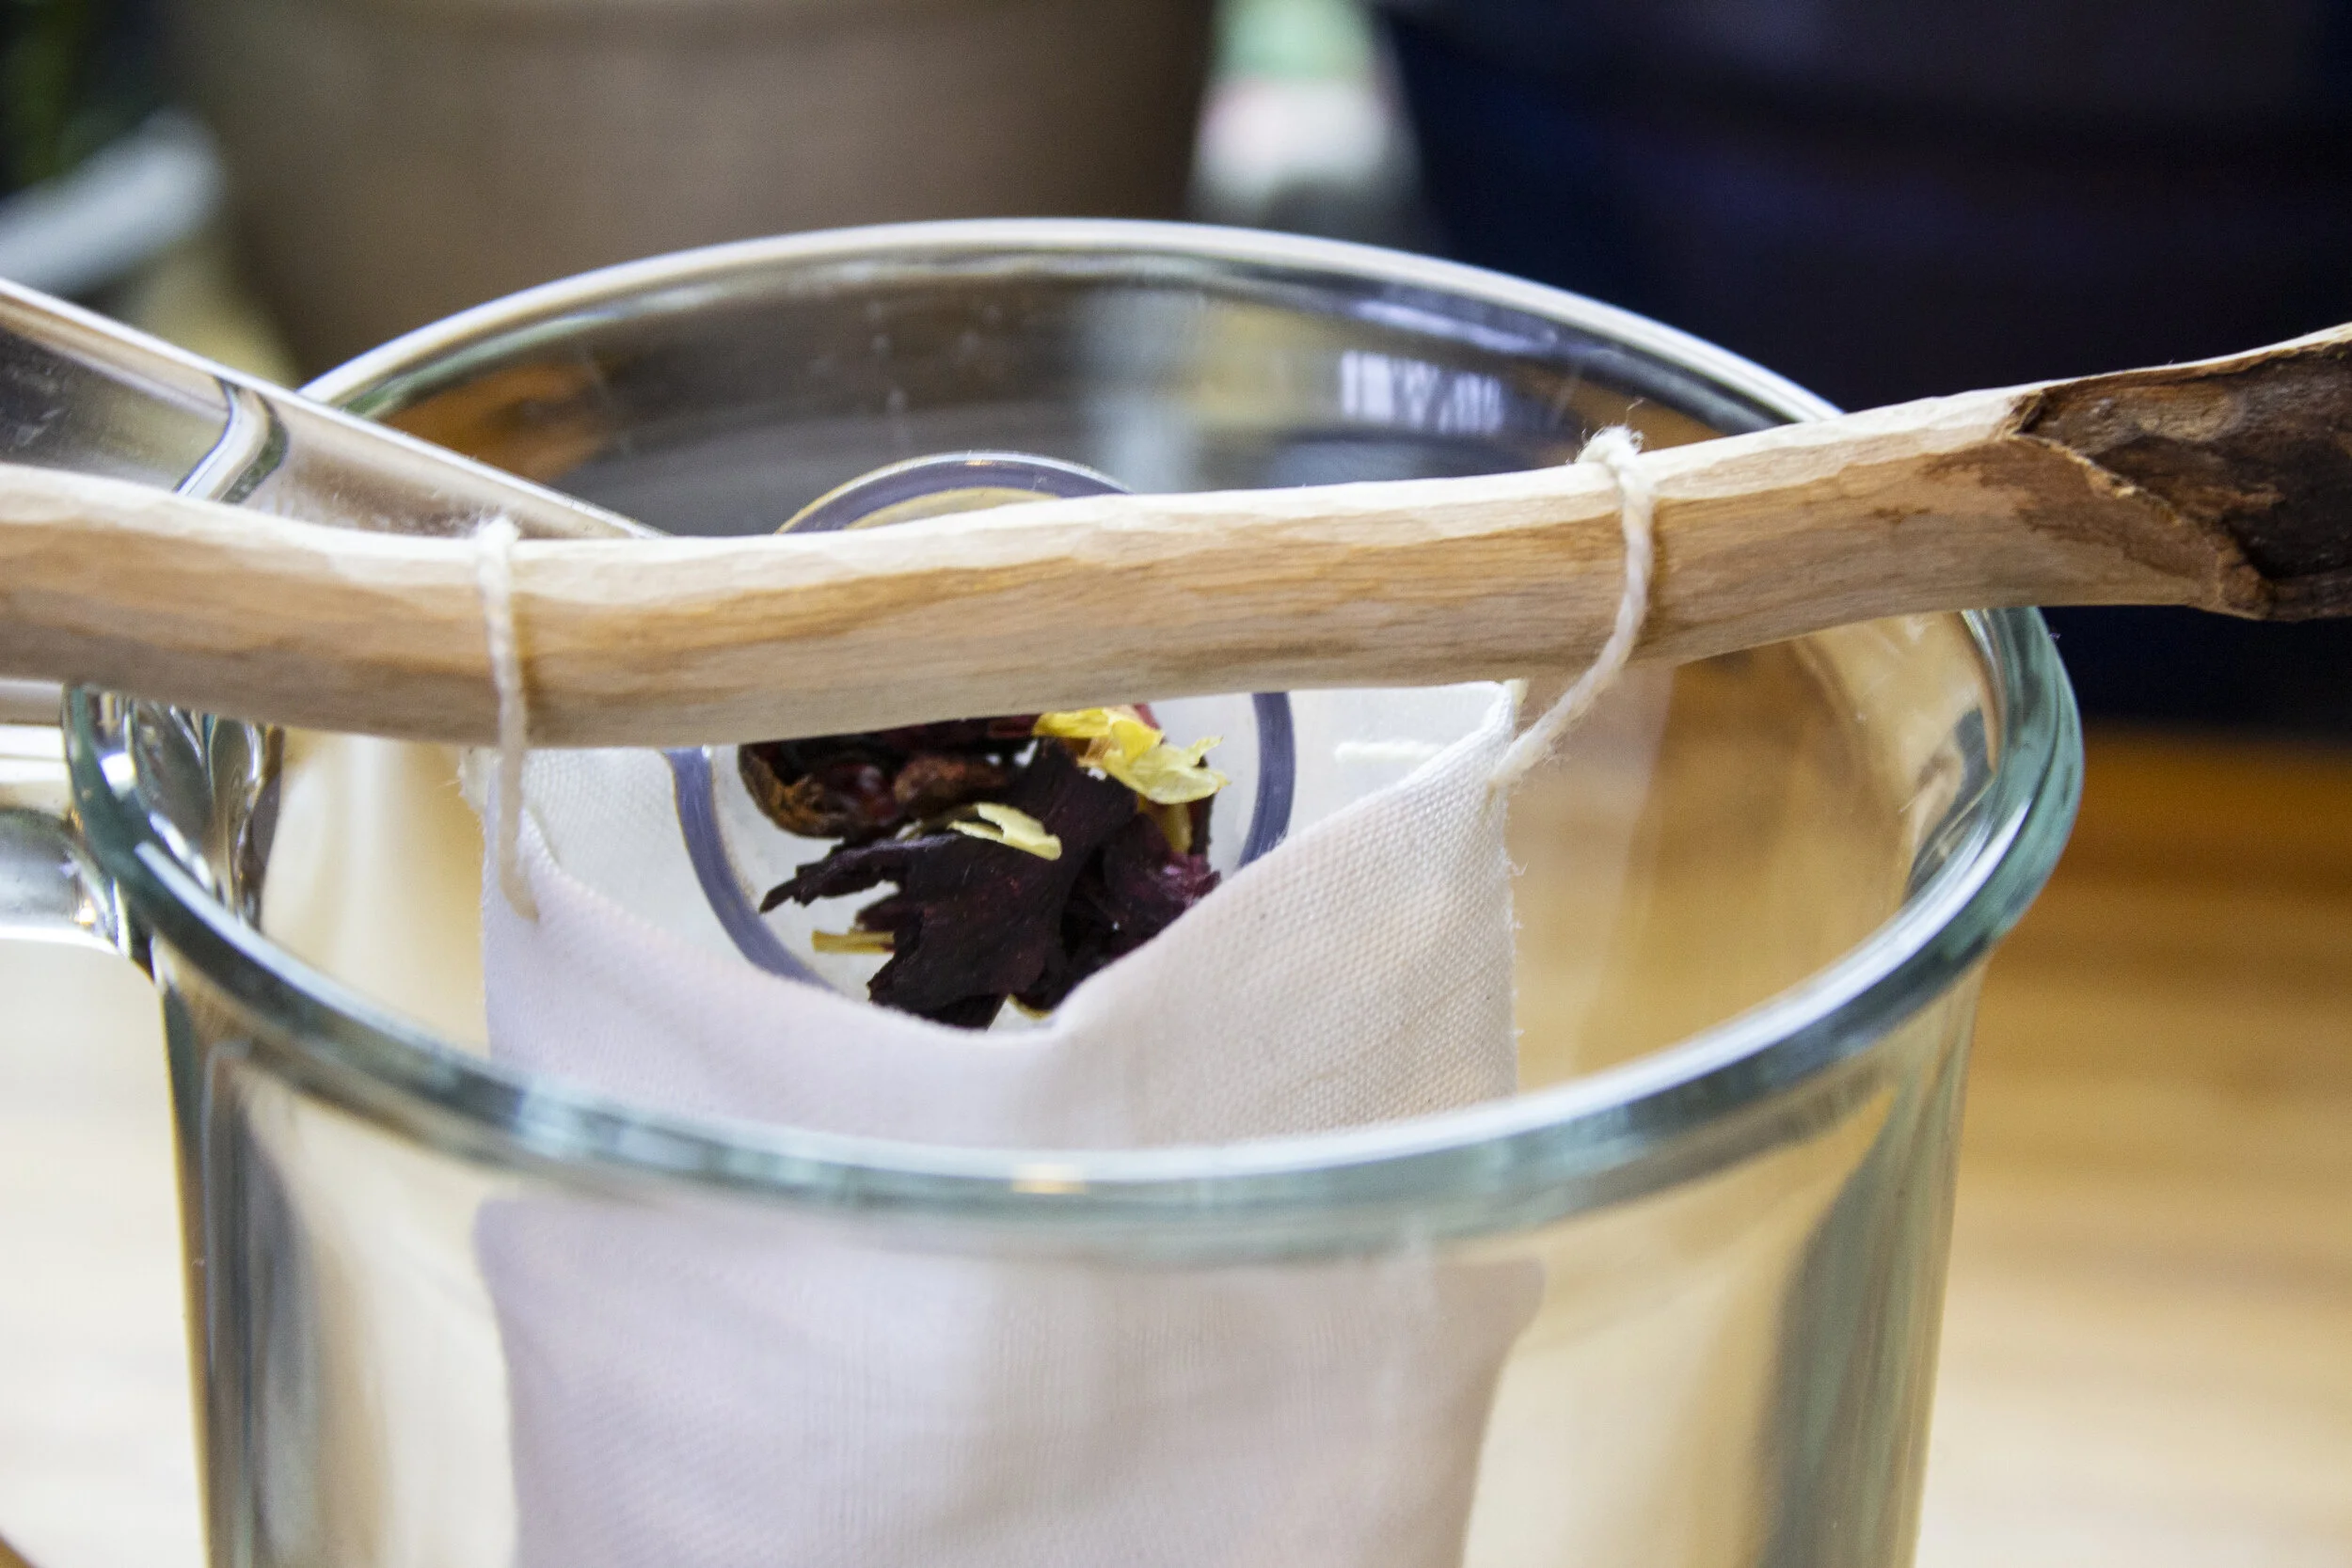
Do the same on the opposite side, making sure the loops are fairly equal in length. Put the stick through the loops and suspend your bag in your mug of choice.
Closed Option #1 - Stitched Closed

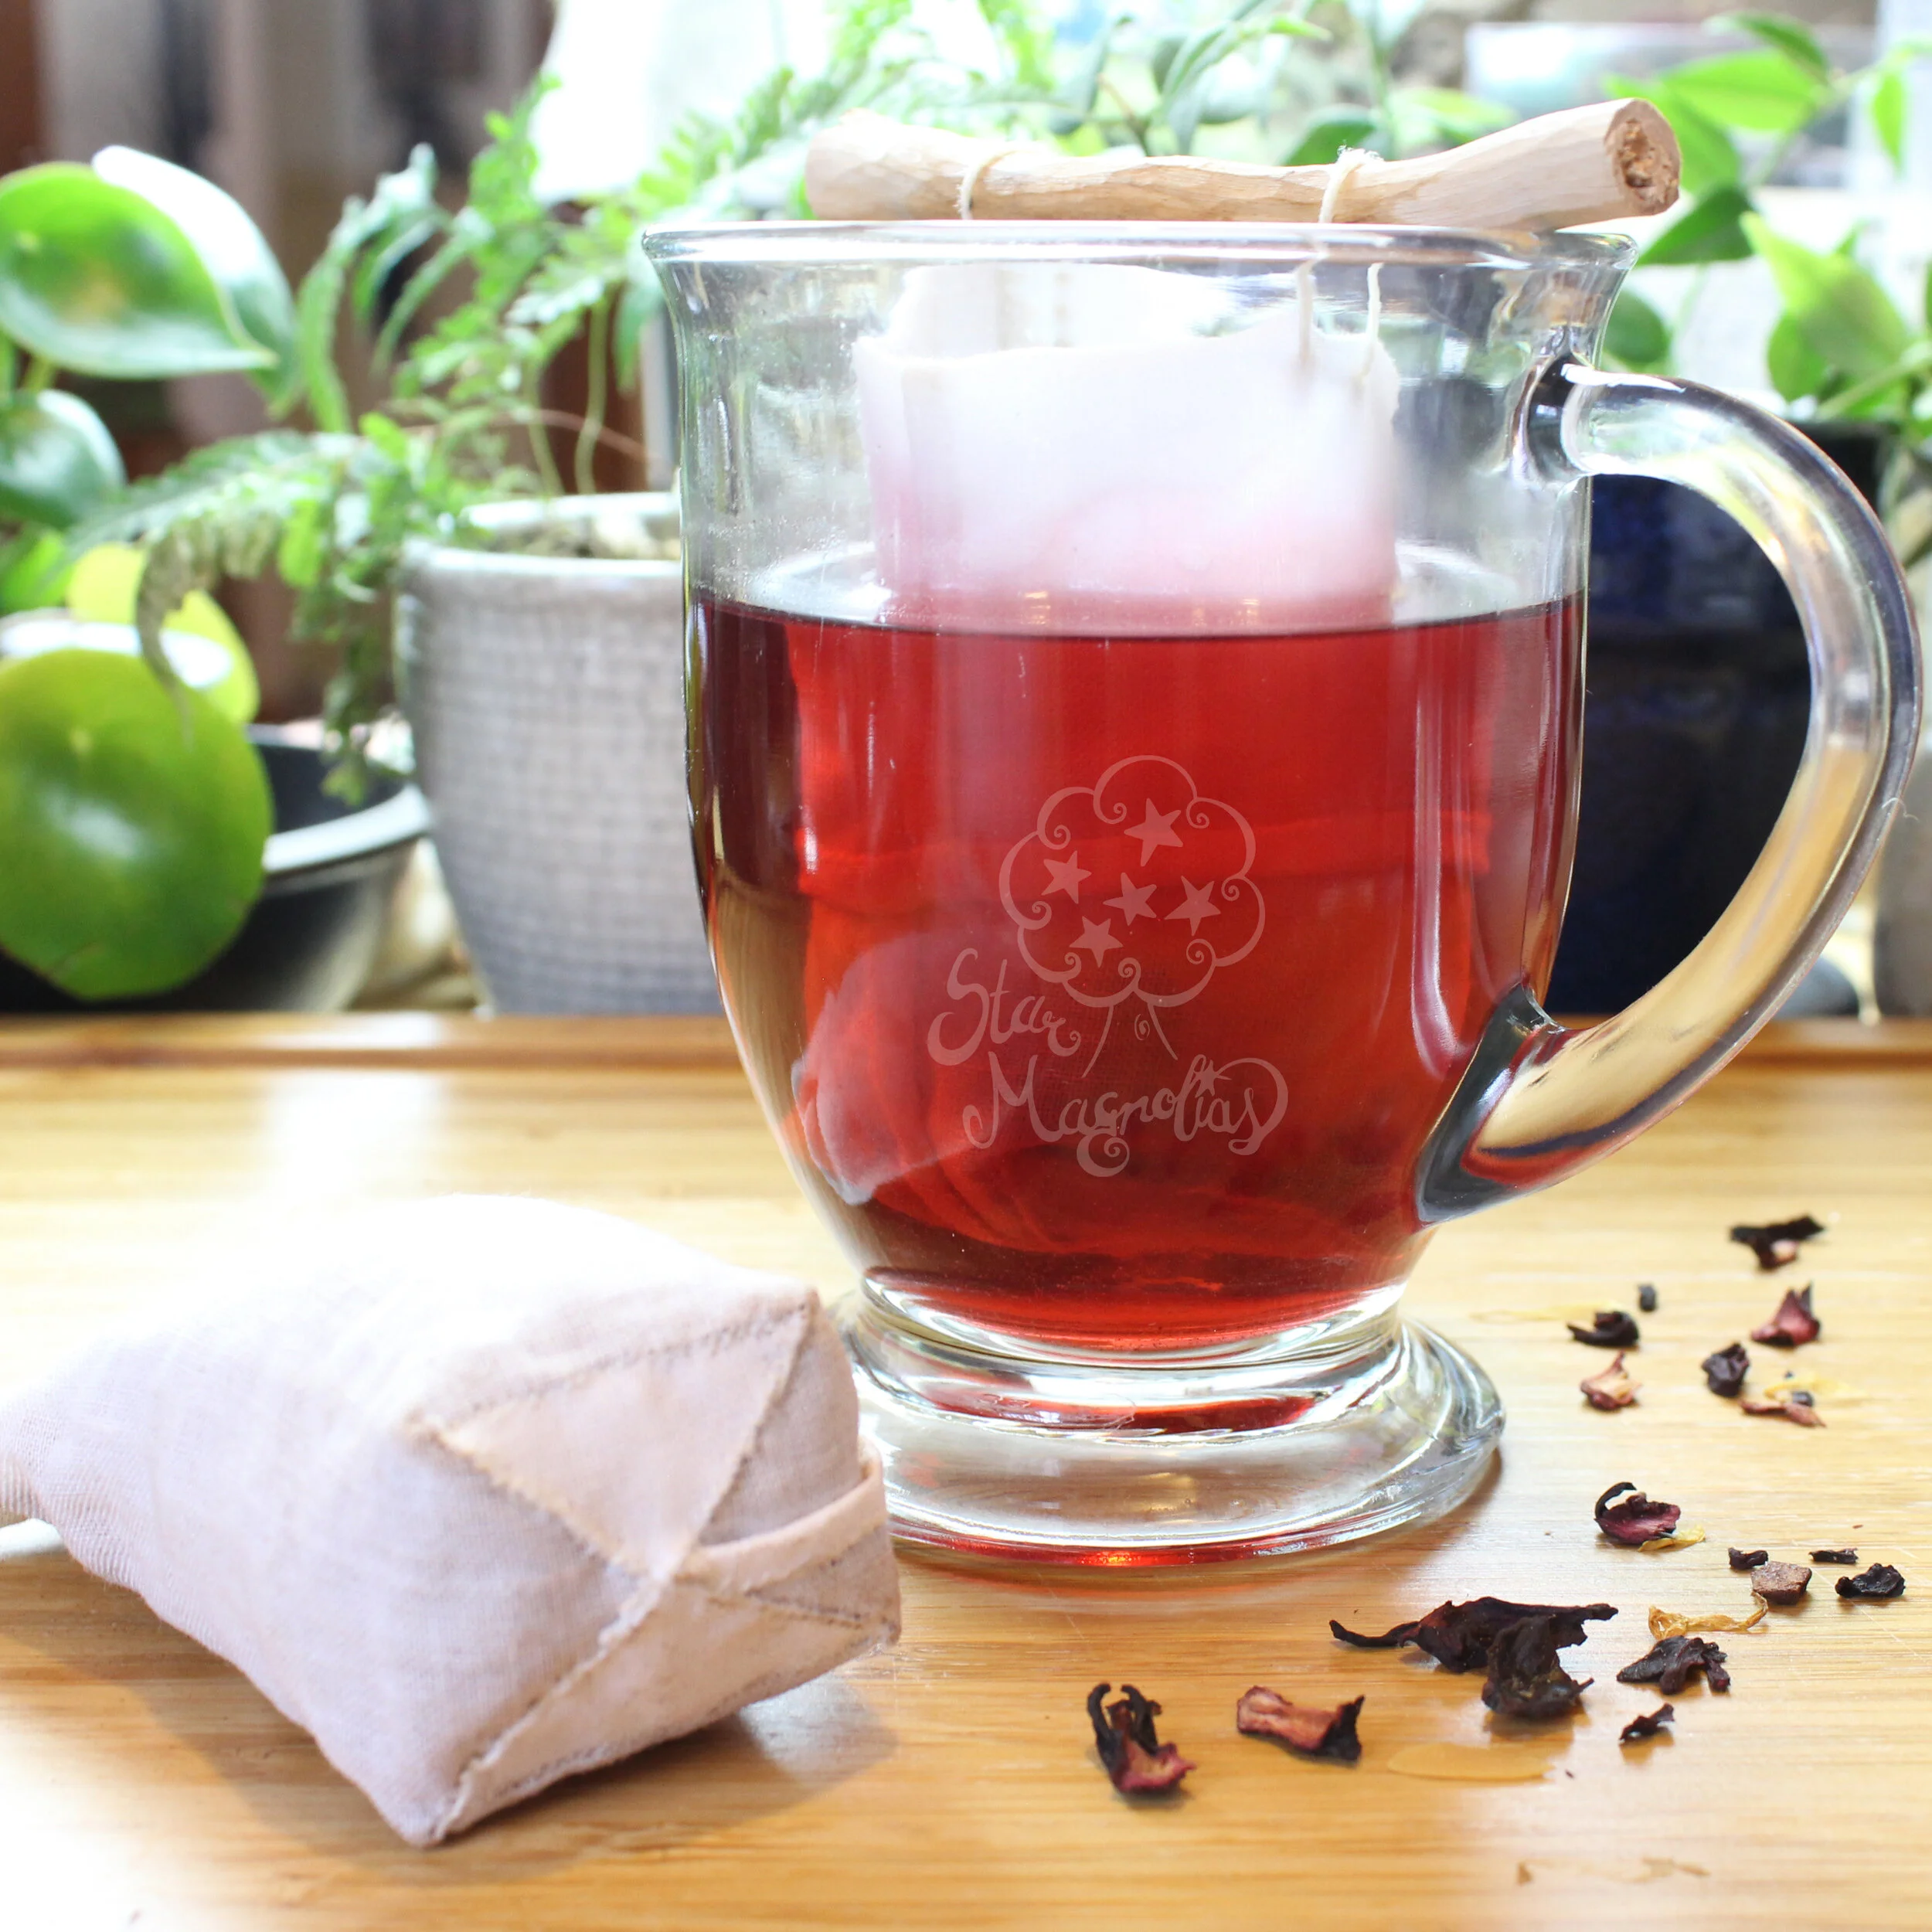
Except for a tiny bit of the tiniest particles, the Chaga is contained.
Fill your bag with tea, fold down the corners, then fold the top down, like you’re closing a chip bag. Loosely stitch the bag closed so the tea is contained, but you can still easily snip the thread when it’s time to dump it out and rinse. Since many teas can be brewed 2-3 times, this tea bag can provide you enough tea for the day and be cleaned out and dried at the end of the day. This is the option I’m using for my chaga tea parcel. It’s also a great way to contain mulling spices or anything else you might make that might require a parcel of contained loose ingredients. If you plan on cooking anything for a long period of time, like chaga or mulled cider, I highly recommend scouring your teabags first. This is done by simmering the bag in water for a period of 2 hours in soda ash. This is a method used by those who dye cellulose materials to prep the fabric for dyeing, and helps you clean the material of the waxes and oils present in the fabric. The few minutes it takes to brew a cup of tea isn’t enough to cause them to leech, but a longer cooking time will.
Closed Option #2 - Wool Button and String

To make the wool button, take a small bit of wool and needle felt a flat circle so that it is fairly well felted. You don’t need to poke any holes in it, as it’s really easy to pass a needle through it, but any stitches will hold it down tightly. Stitch the button in the middle of one side of the bag. Add a thick cotton string to the hem on the opposite side of the button (so if the button is in the front, the tie string will be on the back side hem). To close, fold the two corners down like a chip bag, then fold the top down.

Wrap the string around the button two or three times to keep it closed, then use the remainder of the string like you do on a regular tea bag - you can tie it to the mug handle to keep it from falling in. Add something decorative at the opposite end of the string if you’re feeling fancy. I’m not sure if you’d want to use this closing method for anything with a long brew time - I’d go with stitching it closed. A tiny felt button shouldn’t do much but I know that when I dye wool, if I accidentally cook it for too long it starts to smell, and you probably don’t want that in your tea. A few minutes won’t do anything but a long cook time might.
testing out the tea
So far I’ve made myself two bags, one that is stitched closed with chaga (as you saw above) and another suspended from a stick I found while on a nature walk with the kids last week. I’ve been relaxing lately by learning how to do some basic whittling in my free time while I think about my more involved projects, and had a bit of this stick left over from some other projects I’m working on. Using my outdoor knife, I stripped the bark off the stick and cut the ends down to size, using a precision knife to further refine it just a bit. It’s pretty simple to do with a sharp knife if you love the look of this one.
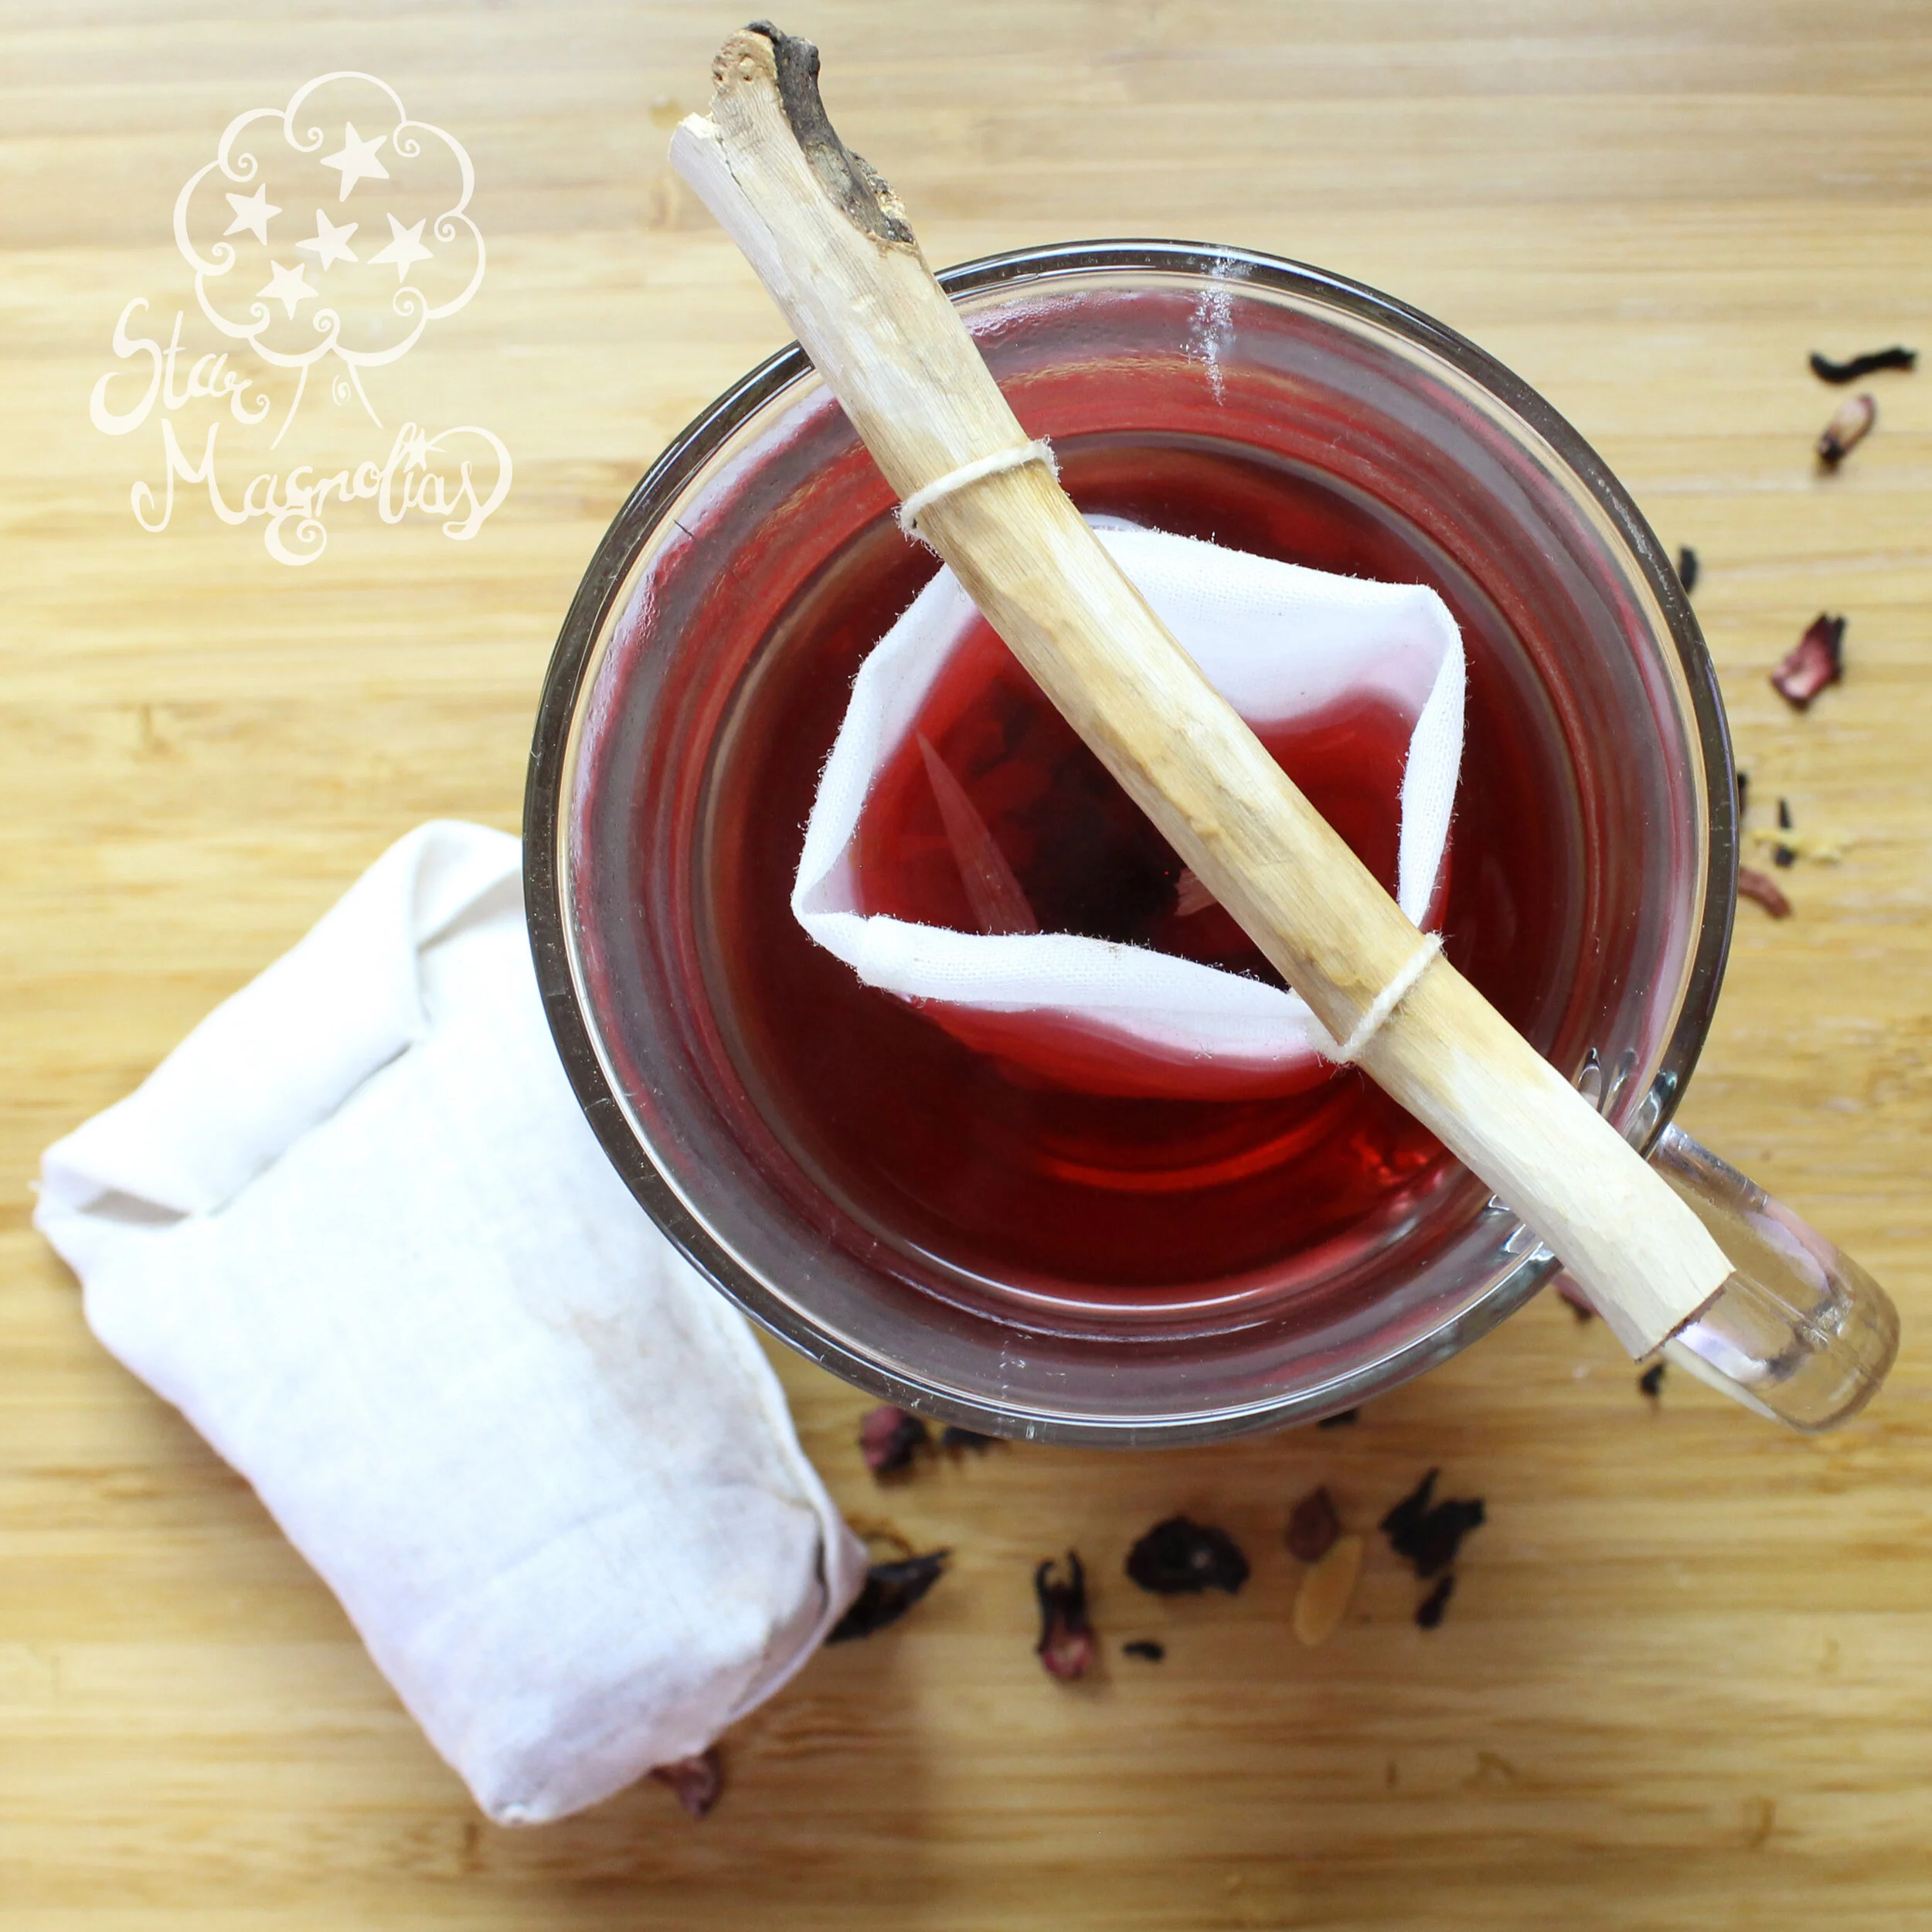
For its virgin brew, I opted for Royal Dessert tisane by Lovare that I picked up at a Slavic grocery store in our area, which is a "blend of hibiscus tea with fruits, berries, flower petals, spices, and cherry aroma." The kids and I love the Lovare teas and tisanes, which are naturally sweet due to the dried fruit and do not require any additional sweetener, although we do like to add just a hint of sugar or honey to it anyway, because why not?
A note on teas: for some reason fruit teas (tisanes) have not caught on here in the states much? Regular teas and a tiny selection of herbal tisanes, sure, but you really don’t see much in the way of fruit ones. You’re missing out! If you can make your way to an import store, check out the tea selection, or order some online. You might not be able to read it - neither can I (my can is entirely in Russian… I had to google it), but thankfully there are pictures all over it that give you an idea of what’s in it. Royal Dessert has images of apples, cherries, strawberries, currants, flowers, as well as hummingbirds and butterflies, but I’m certain there are no animals in this product. My kids’ favorite from Lovare is called Citrus Paradise. I believe there are 12 different flavors to choose from; so far we’ve only sampled these two. Lowell also makes a Forest tea which I’m pretty sure has bilberries in it, and is absolutely delicious with muffins. Also, I do mean a tiny selection of herbal tisanes - herbalism is far more popular and common in Europe, and for that reason you have a much larger selection of herbal tisanes that are used as the first line of defense/treatment in a European home in an import store than a typical grocer in the States.
I hope you enjoyed this tutorial! If you decided to make your own, feel free to share, tag me on IG (@starmagnolias), and link back to the post if you can. I really love seeing what others make with my tutorials!

