

Janome FM725 Felting Machine
FTC Disclosure: Please note that some of the links in this post are affiliate or referral links (full disclosure here), and if you make a purchase or sign up for a service within a certain timeframe after clicking on one of those links, I may earn a small commission paid by the retailer at no extra cost to you. I wouldn't recommend anything that I don’t or wouldn't use myself. Thank you for your support!
This post was last edited/updated in March 2021.
As far as I can tell, any such felting machines (which are also sometimes called embellishers) are no longer available on the online market. That includes both this one or the Simplicity. I cannot find anything definitive stating that they are discontinued - even on Janome's page on them, but good luck finding one in stock online. Maybe this is now a dealer-only item? If you really want one, you could try calling up your local Janome dealer and find out if they still carry them.
I've made a note to give Janome a call to find out if the model is officially retired and update here if it is. That being said, if you are interested in having a felting machine, and you have an extra sewing machine that you're willing to sacrifice, there is a conversion kit available for $50. According to the description, the only caveat is you can't switch back to sewing once you convert. Don't do this on a machine you currently use and need.
This post is not about the large, several-thousand-dollar felting machines (like these) that make a very large, flat textile. I have heard mention of these by some in the felting community, but they're a wee bit out of my budget, so I can't tell you anything about them other than the fact that they're slightly more portable home versions of the big commercial ones that make commercial felt (they're big so not really that portable). It's also not about the wet felting roller machines. The ones I'm talking about look more like sewing machines, and when they were on the market, were priced about the same as the average sewing machine.
I am leaving the post up because you may still be able to find these used. Chances are that some will have invested in this expecting certain results and not liking those, so they’ll resell them. I personally like using mine. There’s an artist I shared about some time ago, Vicki who uses hers to fuse fabrics together. Here’s the video where she shows using her Janome FM725:
And here’s another video showing someone else using their felting machine (looks like the Janome as well) to attach alpaca yarn to their art quilt.
As to why they’re no longer available, if I had to guess, something as niche as a product like this (especially in a time when needle felting hadn’t really exploded yet the way it has now), it’s a combination of new-tech-too-soon and not enough marketing showing the capabilities of this machine except a random video here and there in the deepest pockets of the interwebs. The high ticket price, the physical space it takes up - people generally don’t have the expendable income for something that, as far as they can tell, is really only good for one thing.
Maybe now that needle felting is a booming industry, with more and more people learning about and picking up this craft, they'll re-release it. After all, you can still get the accessories for it, like the changeable needle unit (which I do have), and their replacement needles (I don't recommend unless in an absolute pinch - I provide another source below). So, about those needles... I think that's the other reason why these didn't sell as well as they could have, but I'll address that in a minute.
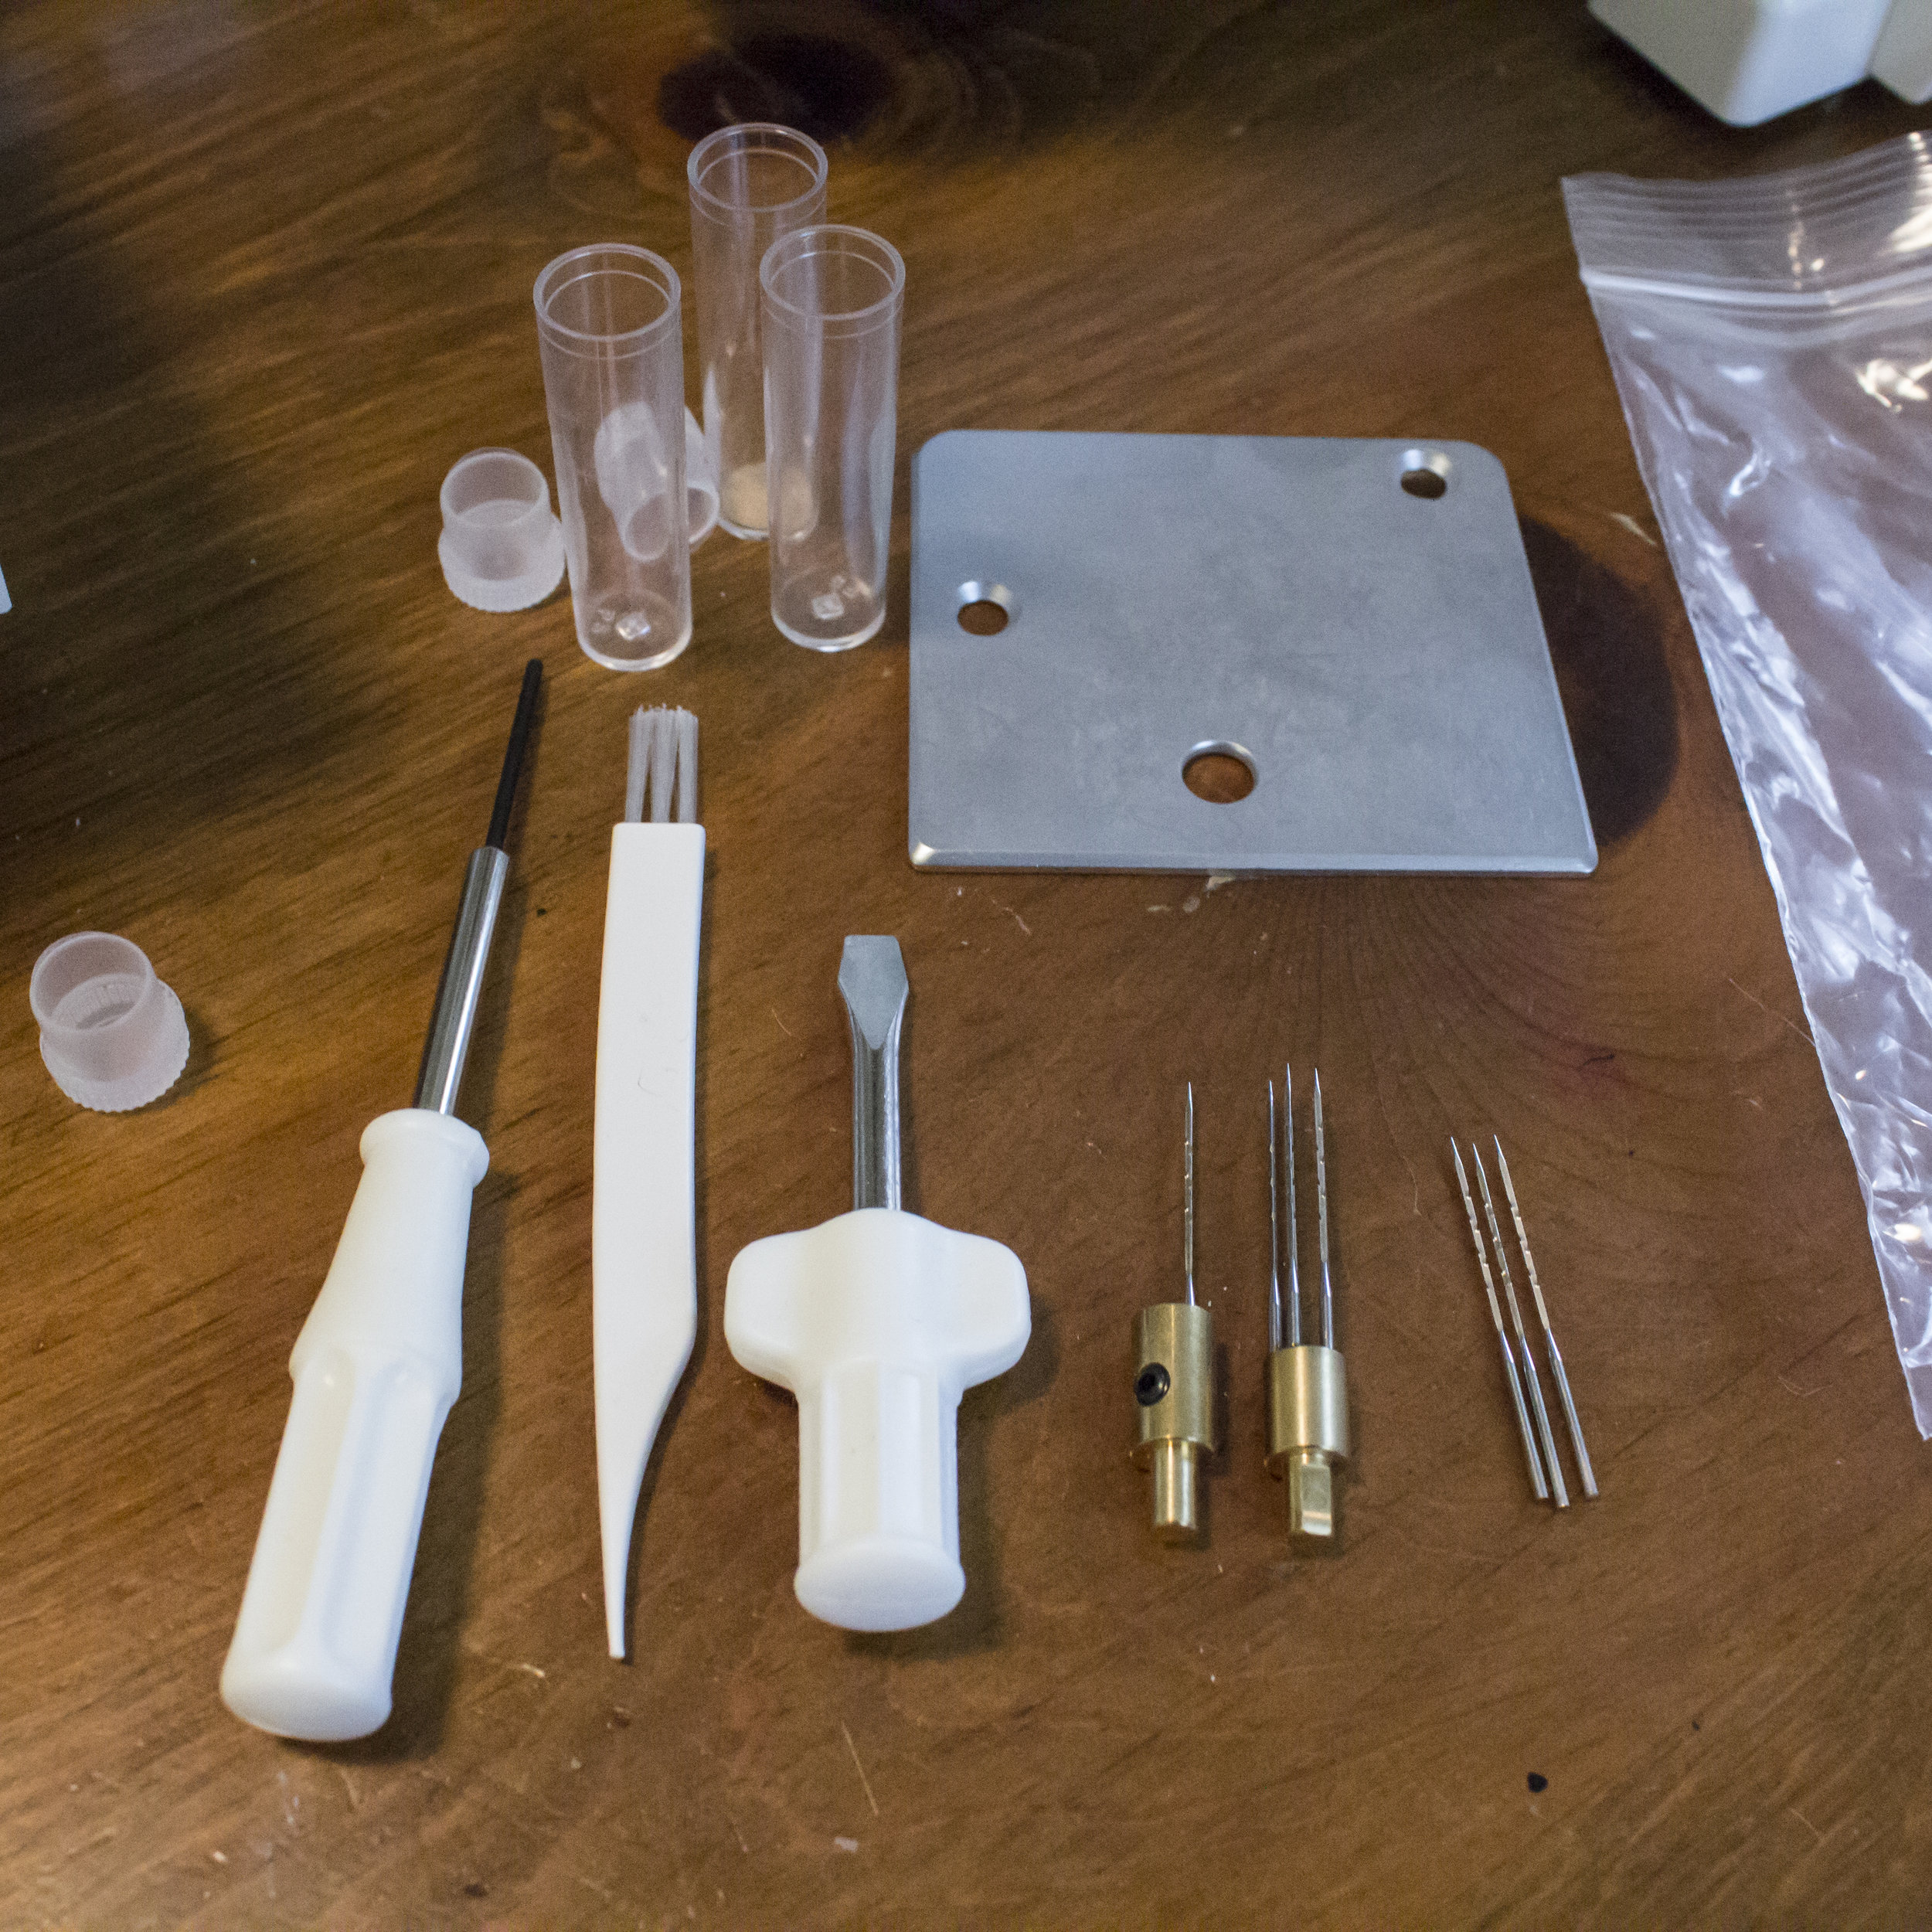
From the left: hex key, lint brush/pick, screwdriver, interchangeable single needle unit, fixed 5-needle unit, and three extra needles. All needles appear to be 38g triangle. The open hole plate is at the top, as well as the containers for the needles. Not pictured: instruction book, presser foot, instruction DVD
What's in the box?
The machine arrived safely packed in styrofoam, with the presser foot/power cord (the two are combined into one plug) and the instruction book which contains a DVD. I highly recommend watching the DVD that comes with it prior to using the machine, as they go over a few things that they do not mention in the instruction book. The instruction book mainly goes over the individual parts and how to change them out. The DVD tells you how to use it. I did do a search to see if I can find the actual DVD online, but I'm not seeing it, so do not toss it out until after you've watched it. Janome (which is apparently pronounced jah-know-mee - am I the only one who didn’t know this? I thought it was jah-gnome) did put a video up, but it’s inconsistent with a few things on the DVD - common sense would indicate that typically a video in an updatable format online would be the correct one to follow, versus one that was prerecorded and shipped with a product, but you’ll see in a moment how wrong that is this time. (still, good to review anyway)
The JAH-KNOW-MEE comes pre-installed with a fixed 5-needle punch and the 5-needle hole plate. The accessories are tucked away inside the extension table, which include the open hole plate, an additional fixed 5 needle punch, an interchangeable single needle punch, three extra needles, a screw driver, hex wrench, and lint brush. At quick glance, it appears as though all the needles shipped with the unit are either a 36g or 38g triangle.
The guard tilts up and down, and the presser foot is height adjustable. Oh look, I only have two left on this one because learning-curve.
The felting machine also comes with a clear presser foot and an eye/finger guard. I love that both are clear so you can see what you're doing. The presser foot is height adjustable, OR you can just leave it up if you just want to quickly work on something quick but not worry about adjusting the height every time. Not keeping it down will not prevent you from using the machine (unlike my sewing machine which yells at me if I leave the foot up). The eye/finger guard doesn't really prevent your fingers from coming close to the needle (oh you don’t know what I’m capable of…), the presser foot does that. I have luckily not power-stabbed my fingers yet. In the event one of your needles snap, it gives an extra layer of protection from them flying out like shrapnel and getting lodged somewhere in you (or your eyes). So far any needles that snapped on me remained in the project, but better safe than sorry! Maybe some safety googles would’ve been a good idea too? no?
Accessories Not Included
If you do want to get any accessories, I personally do not recommend getting any more fixed needle punches - as you can see, they are incredibly costly for something that isn't replacable. I do recommend getting the changeable needle unit (which I do have). There is absolutely no way to get the broken needles out of the fixed one to replace them - this is really the only way to make this a worthwhile purchase. When it comes to the needles, and maybe why they didn't sell quite as well as they thought, their replacement needles are overpriced, which if those were the only ones available, would not make this a worthwhile investment. Thankfully, Bethany Arts on Etsy realized the problem and came to the rescue!
I checked with Groz-Beckert in spring of 2020 to see if they have something that would work, but the measurement was slightly longer than the ones that come with the machine, and I can only buy bulk directly from the manufacturer. They don’t break boxes and didn’t have a test needle available to ship me, so I’d need to buy the entire box - which at this time I don’t feel the need to do (especially with the Etsy link above). Also, they’re only available in a 40 gauge - which may be a good idea for wool painting with merino or silk fabrics, but would likely be more prone to breaking. If something changes, I may take a chance on a box in hopes that they’re what I need.
The gauge is definitely an important factor, and possibly why many people felt a bit put off by the machine. This leaves big holes. The holes do eventually close up but this is not a “finishing” machine out of the box. For an absolute perfect machine, I’d like one that allows you to adjust the depth at which it punctures the material. For finishing, you don’t need it to stab all the way through. That way, you could do a first round that felts the wool down onto the material, and then subsequent rounds, raise the puncture depth higher so you’re just using the very tip of the needle as you would felting by hand to smooth out a piece. This would also reduce the size of the holes to some degree.
None of the tools I have are capable of cutting through the needles I use - they’re far too soft. This is where you can help me, if you know someone who knows about machining & steelworking, I would really appreciate if you’d be willing to have them try cutting a needle for you.
If you do figure out how to cut the needles, I would not recommend using cheap needles for this - using a high powered machine already increases chances of breakage, and the last thing you want is to increase your chances of shrapnel with a brittle needle.
Using the Felting Machine
As I mentioned earlier, the machine comes pre-installed with a 5 needle unit and the 5-hole plate. This is more than sufficient for felting fine materials/thicknesses. If whatever you're felting is not too dense, like some roving on a thin cotton flannel or piece of felt, that's great. However, if you plan on felting on anything dense, such as denim, or really densely felted thick piece of wool, make sure you switch to the open hole plate. This is where the Janome's youtube video is misleading and differs from the DVD they send with the unit. They say that the five hole plate will protect from unnecessary needle breakage when felting thick pieces. WRONG! wrong-wrong-wrong-wrong-wrong The needles will deflect some while felting dense material, hit the plate, and snap. I am speaking from experience here. You can't tell in the pictures, but there are tiny scratches in the plate where the needle deflected, hit the plate and snapped. The DVD tells you to switch to the open plate when felting thick material to prevent needle breakage. Makes you wonder if they were lacking in replacement needle sales after producing the initial DVD but prior to the youtube video... I would even venture to say that if you are felting something really thick/dense, it might even make more sense to switch to the single needle and go slow.
Make sure your needles, if broken, are snapped as close to the taper as possible so you don't tear up your work.
Another tip here that they do not mention in any of their material is that, should one of the needles on the fixed unit break, stop and make sure it's snapped as close to the taper as possible. I noticed the one 2-star review on amazon's product page complained of breaking too many needles while felting denim (likely used the 5-hole plate instead of open hole) and that it tore up her work. My guess is the reason it tore up her work is that it snapped lower, and she continued felting with a half broken needle. Ever try stabbing a project with a broken needle? Same thing applies here. So definitely stop, foot off the pedal or just turn it off first, reach in and snap it as high up as you can. If you need a bit of extra help, use a set of pliers, grabbing the needle where the taper starts. You won't be able to snap higher than that, but it's more than sufficient because the taper does not punch through the work.
While this can certainly speed-felt, I do recommend going slower and being careful, especially when felting thick materials or over a dense material like a canvas or linen. The two ways you’re most likely to break needles is because of it deflecting through the material (as mentioned above) or accidentally moving it while the needles are down in the material. Take your time, and pick up speed as you start feeling more confident.

Make sure that, from time to time, you pull the extension table off and open the little door under the bed. That's your lint catcher. If you're like me and will hoard any scraps you can, this isn't salvageable because it's literally powdered wool at this point. You can dump it in the trash or compost it. The extension table does not have to be on the machine in order to felt. This does open up the possibilities, especially if you want to embellish a cuff or something else with a small opening.
I needle felted this trivet using the felting machine and handpiecing Icelandic fleece locks together.
You don't have to felt ON another material. Embellishing is definitely one of the machine's strengths, as is laminating multiple fabrics together (as you saw from the videos I posted above), but you can also just stick loose, wool roving on its own under the needles to make a flat piece of felt. I've done this with my scraps, piecing together a colorful piece of felt. I did this with uncarded locks in order to piece together a wool trivet as a gift for my mother. I've done this with some of the alpaca fleece I washed and did not card because had tiny knots/nepps in it, so once I had a decent pile of it I just felted it all together. Speaking of which, this does a great job at felting fine fibers like alpaca. Yes, it does leave holes, but I think that can be solved by the choice of needle gauge. This DEFINITELY makes life easier because I no longer need to felt a flat piece on foam and then attempt to peel it off. No peeling involved, just a nice, thin piece of felt. The possibilities are endless if you need to create thin shapes, like ears, or felting clothes for one of your sculptures, or maybe a new background for a felt journal page! That will definitely knock it out quicker than wet felting, and there is no waiting time for it to dry.
This piece was started by hand, but considering it’s 4ft long and has a lot of open spaces, I became overwhelmed by the sheer size of it. The felting machine came in very handy to complete this piece.
As someone who really is not a fan at all of wet felting, but loves to make wool painted pieces, this machine comes in very handy for either completing large works (like the one above, on a linen backing) or to quickly knock out a background felt in the way I want it to look (even using uncarded locks, like the icelandic wool trivet) to add to with needle felting by hand. And, as you saw from other videos, this does have other applications when it comes to fiber and textile art. If you can manage to get your hands on one, you might find it’s a little more versatile than you initially imagined it to be.

